
Do you want to create a tour & travel booking website easily?
Do you want to offer exciting travel packages and let people book their transport and stay through your website?
You can do all this without much effort, with the help of the MakeYourWP Readymade Tour Booking Website Template.
MakeYourWP is a platform that helps you build any kind of website you want, with the help of pre-built website templates. This means the website you want is already built for you.
All you have to do is to purchase that website and add your own content to it. So you don’t have to build an entire website from scratch.
So let’s begin!
In this blog, we will look into the following topics in detail.
But if you want to start creating a website right away, click here to jump to the step-by-step procedure on how to create a Tour and Travel booking website.
So first, let’s see how having a tours & travel website is beneficial for your business.
There are thousands of tour and travel booking websites online and everyone is talking about places to stay, food to eat, things to do, etc.
So, how can you stand out from the crowd and establish your brand as an expert?
The perfect way to do this is by niching down or choosing a particular topic in travel.
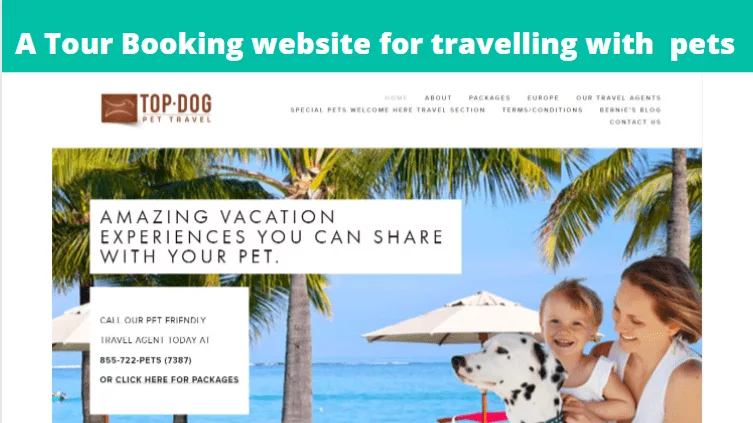
For example, if you create a website with the topic “Tour and Travel” then there are a lot of similar websites for that same topic. but a niched topic like “Traveling with Pets” focuses on a targeted audience. This audience is more likely to take action and see your brand as an expert.
Wide topic – Tour and travel booking
Niched topic – Traveling with pets, traveling in tropical islands, backpacking & camping, solo travelers, etc.
So first, find out your niche when it comes to the type of tour booking website you want to build.
This will help you to stand out from your competitors and help you succeed since you are the expert in that field.
Networking is the next step to building this website. Having the right set of information regarding a locality/area, communicating with Hotel Travel services, and putting together an attractive package is highly important.
Gather all the information you need and build the website you want.
Once you’ve selected a niche for your website and decided the kind of website you want to create, we can start designing our site in MakeYourWP.
Like we said earlier, MakeYourWP is a platform that offers readymade website templates.
MakeYourWP makes the process of setting up and managing your Tour and Travel booking website very easy.
You can quickly launch your website with a pre-designed Travel booking website template with just a single click.
Then, upload your images, destinations, and Tour Packages, and your website will be up and running in a few hours.
Additionally, you need not worry about managing your website technically as it is all taken care of for you.
Right from your site’s speed, security, and backups, everything is managed by MakeYourWP’s team so you can focus on your business.
Now that we know the purpose of using MYWP, let’s look at the features you get by building this website.
Now that they know everything about MakeYourWP and why they should create the website with it,
Next, let’s start creating our tour & travel booking site with MakeYourWP.
You can easily create a Tour and Travel booking website in just 5 parts, and here they are.
1. Launch your Tour and Travel booking website
2. Add/Update information on your website
3. How to edit the contents of your site
4. Get a unique domain for your Tour and Travel booking website
This is where you get your new website live on the internet. So to launch your website, just click here, and it’ll take you to the MakeYourWp website.

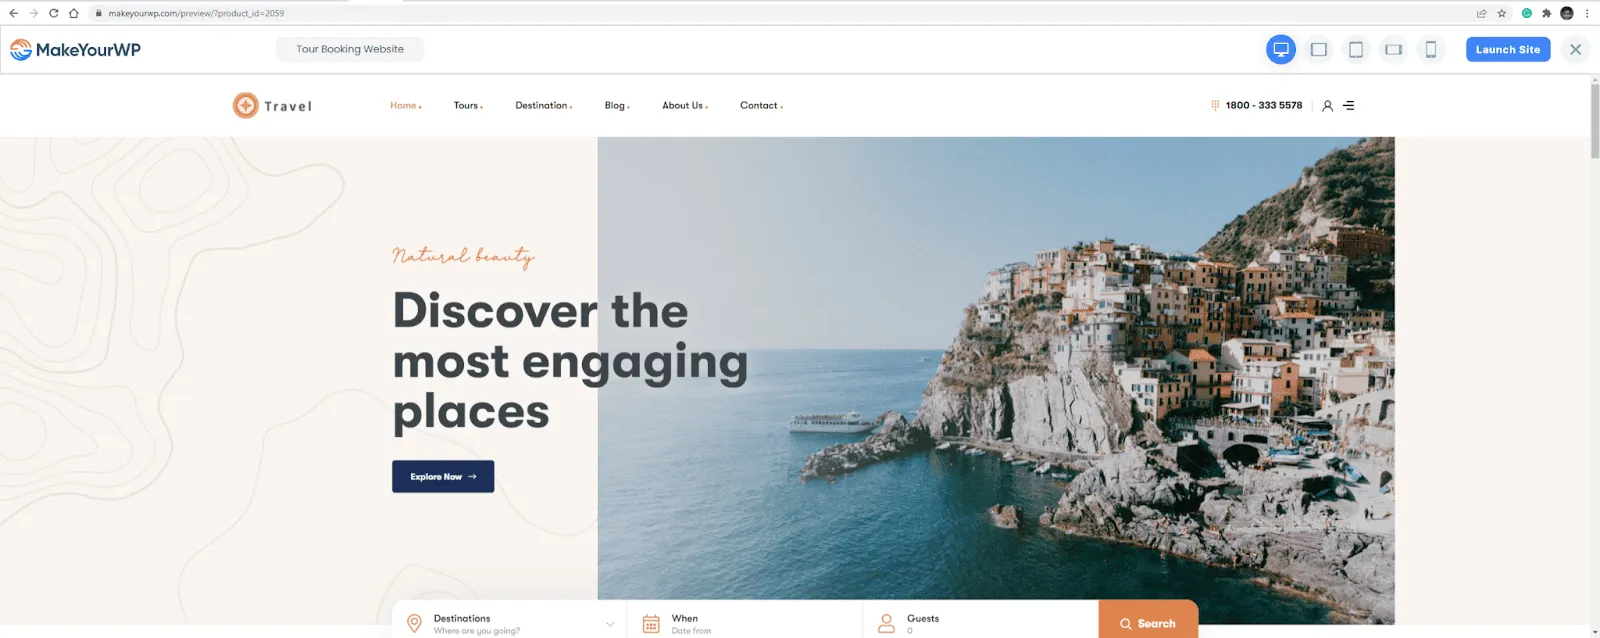
Now just scroll down and search for ‘Tour booking website’ in the search bar, you’ll find the Tour and Travel booking site template.
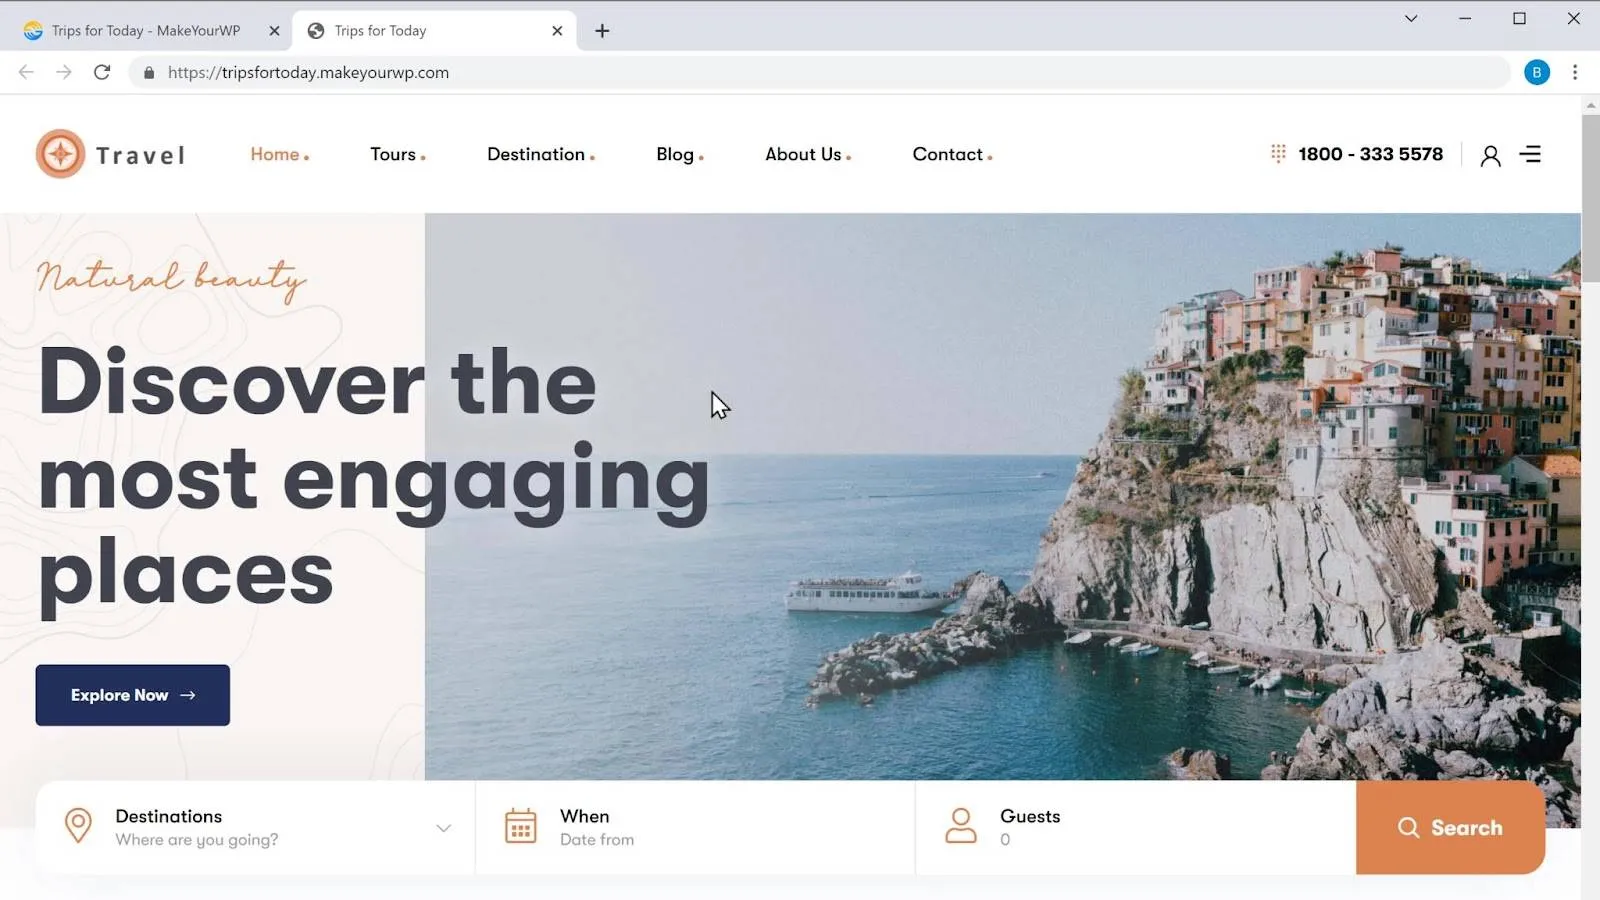
Just click here if you want to see how the Tour booking site looks. You can see the pre-designed website template that you can use, which comes with a few default tour packages.
Now to get this website, you can follow these steps.
A: Click the ‘launch site’ button

B: Enter your details and click next. Now enter your payment details and click Sign-Up.

Now you’ve successfully purchased your website. Now to launch your site, scroll down and click “launch a new site.”

Once you launch your site, you need to name your site.
C: Now, enter a temporary website address that you want in the URL section. For example, if you enter “tripsandtravel.com” as the Tour and Travel Booking website name. So, the website address will be ‘tripsandtravels.makeyourwp.com’.
After entering the URL, click launch new site, and you can see that your brand new website has been launched.

Now if you click ‘visit,’ you can see that you have got the same site that you saw on the link selected, and it has all the features of a Tour booking website!
Now, this is just a temporary link for your site, and you can easily change this to your own .com domain. We’ll see how you can do that later in the final part of this tutorial.
Our website is ready now, but you are just getting started. You still have a few more steps to go, and the first and foremost thing you can do is customize your site.
You can add and update Tour packages on your website in 3 steps.
2.1 Login to the admin area of your website
2.2 Delete sample tour packages
2.3 Create and Add your tour packages
2.4 Book a tour on your website
Step 2.1: Login to the admin area of your website
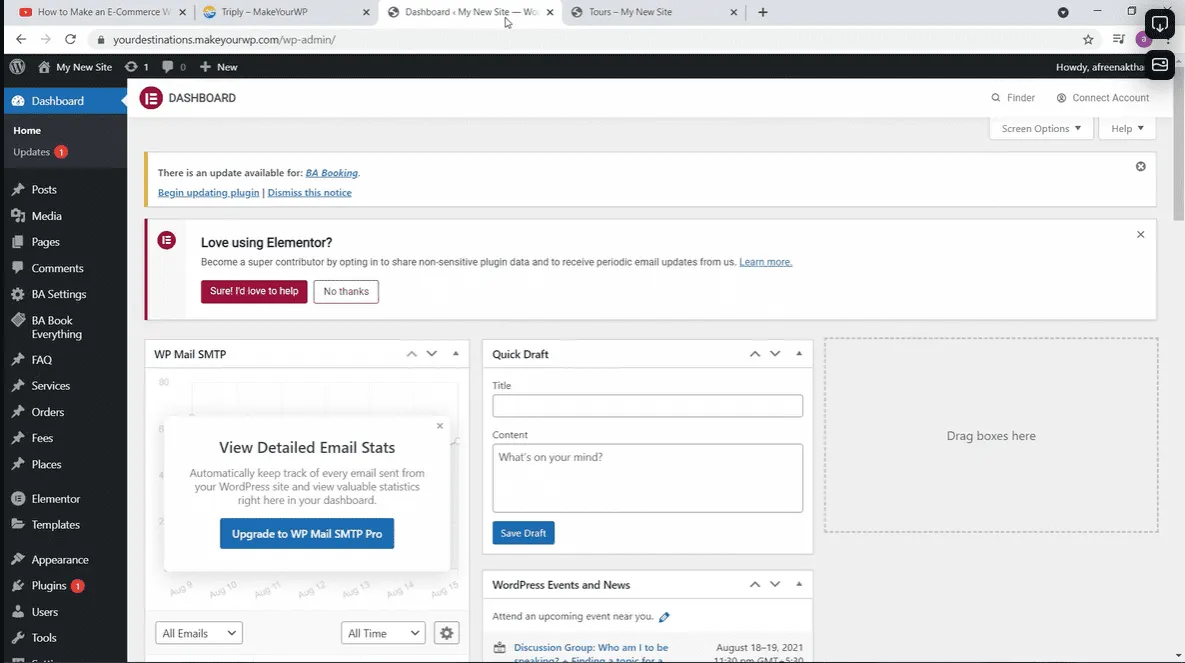
So to log in to our site, Just go back to makeyourwp. Now click Admin,
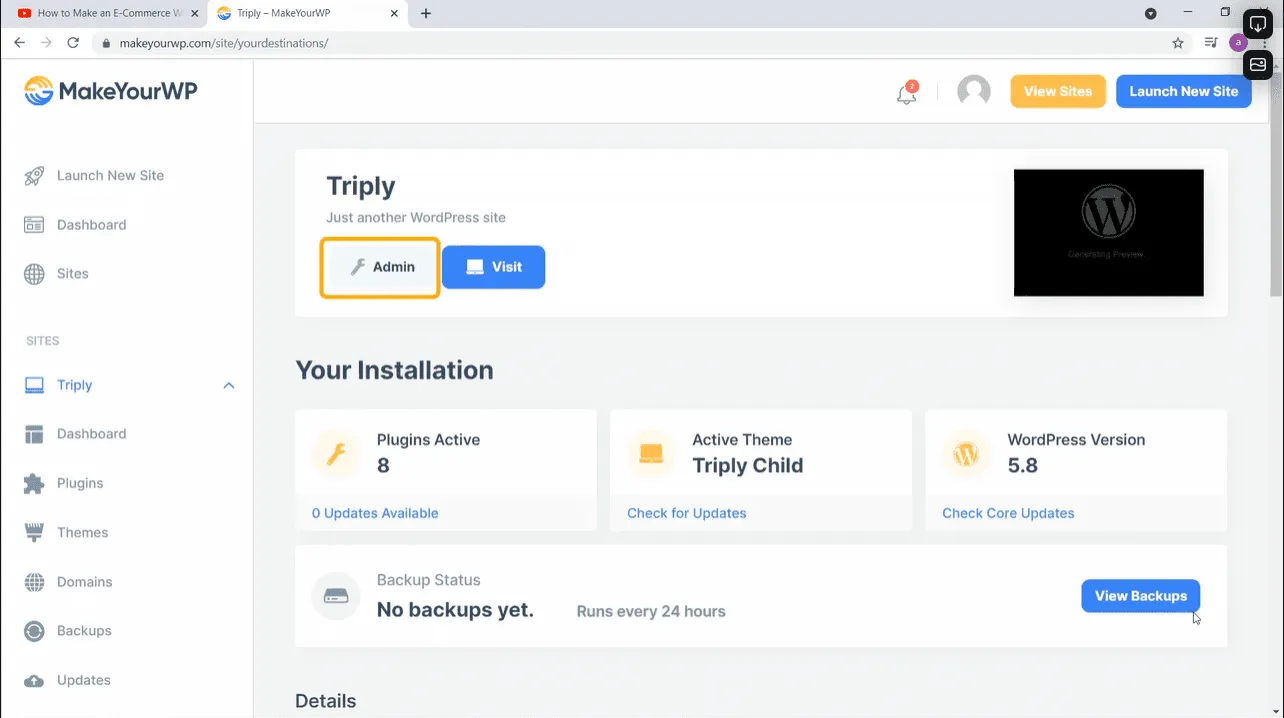
And as you can see, we have successfully logged into WordPress, where you can control your site.
Okay, now that we logged into our site let’s delete these sample tour packages.
Step 2.2: Delete sample tour packages,
Just go to ‘BA Book Everything’, Now click ‘All Booking Tours’, And you will find the sample tour packages that we have on our site.
Then click on this check box near the word ‘Title’, to select all the tour packages. Now click on ‘Bulk Actions’
and select ‘Move to Trash’. Now if you Apply, all the sample tour packages will be deleted.
If we go back to our site And click Refresh, You can see that we have deleted the sample tour packages. So next, let’s create and add our own tour packages to the website.
Step 2.3: Create and Add your tour packages
Just go back to your dashboard, now click ‘Add Booking Tour’,
And it will take you to this page. Now let’s enter the name and details of your package. So if you want this tour package to be available for a certain number of days, just scroll down, click ‘Available from date’, And select the date from which the Tour package will be available.
Finally, ‘Available to date’ and select the date your package ends. Now let’s scroll down and add the min age for guests who can book this package.
In the ‘Min Age’ section, enter the maximum number of guests allowed for this package. I’m going to enter 2. And scroll down. Now let’s allow the visitors to choose the start of their journey.
You can do that by adding a schedule for your tour package.
So click on the dropbox next to ‘Days’ and choose the number of days you want.
I’m going to choose 7 days. Now enter the timings for this schedule or for one day. Click on the dropbox near ‘Hours’ and ‘Minutes’, and choose your time. Then click ‘add time to schedule’. If you want to add another time for the same day, click on the dropbox ,and choose your time. Now click Add Time to Schedule, and you can see that the timings have been added for that day. Finally, click ‘save Schedule’ and scroll down. Now enter the address of the tour location.
So click ‘New Rate’, Enter the name of your pricing plan. You can enter different ticket prices for each group of people. So enter your prices, then enter the general ticket price of your tour package.
Scroll down, and click ‘Save rate’. Now scroll up, and you can select the type of tour for your package. Or if you want to add a new tour type, Just click ’Add New tour type’, And enter the name of your tour type. Now click ‘Add new tour type’, and it will be added to your package. Alright, now let’s add a featured image for your tour package, which will be the first image seen by your visitors.
Scroll down and click ‘set featured image’. Now click ‘Upload files’, then drag and drop the image from your computer.
Now click ’Set featured image’, and it will be added to your tour package. Once you’ve entered the details of your tour package, Just scroll up and click ‘Publish’.
Now if we go to our site and click Refresh, you can see the tour package which we created. Okay to make this package more attractive, let’s see how you can add cover images in a slider.
Let’s go back to our dashboard, scroll down, and click ‘Add or Upload file’.
Now click ‘Upload files’, then drag your image and drop it.
Now click ‘Use this file’, and your image will be added.
To add another image to your slider, just click ‘add slideshow image’.
Like we did before, Just drag and drop your image. Now click ‘Use this file’.
And the image will be added. In the same way, you can add any number of images you want. After you are done, finally click ‘Update’.
So now if we go back to our site, and click ‘Refresh’, the cover images will be added to our tour package. Next, let’s see how you can add a tour plan to your package.
Go to your dashboard, then scroll down. You will get a description section, where you can add your tour plan.
Enter the title and the details of your plan. Now to add an image for your plan, click ‘Add media’, Then click ‘Upload files’. Now click ‘Select files’, then drag the image and drop it here. Now click ‘Insert into the page’, and the image will be added to your tour plan. Finally, scroll up and click ‘update’.
So let’s go back to our site, and click ‘Refresh’. You can go to the Tour plan to see the tour plan which we just added. Now if you want to add another tour plan, Go back to your dashboard. Now scroll down to the description section, and click ‘Add Description’. Like we did before,
Add the details and In the same way, you can add as many plans as you want. Finally, click ‘publish’, and the tour plans will be added to our site. Next, let’s see how you can add the features that are available in the tour package.
So go back to your dashboard, scroll down and you will find this section.
Now to add the feature, go to the Included section. And enter that feature.
Now to add more features, just click Add Included section and you will get a new section.

Now here enter the feature you want. In the same way, add as many included features as you want. You can also add the features which you are not providing with the package.
So to do that, go back to your dashboard. Go to the Excluded section, and Like we did before, enter that feature here. Now to add another feature,
Just click “add excluded section”, and then add your feature here.
At last, scroll up, and click Update.
Now if we go back to our site, and click Refresh, you can see that the features have been added to our tour package.
Right now, our plan price is in dollars. Let’s say you want to change it to a different currency. So let’s do that.
So again let’s go back to our dashboard, go to ‘BA settings’, and then again click ‘BA settings’. Now go to Currency, and you can see that US dollars is selected. Now to change the currency, click the dropbox and choose the currency you want.

I’m going to choose the ‘Indian rupee’. Click ‘Save changes’ and the currency will be changed on our tour package. So to check it,
Let’s go back to our site, and click ‘Refresh’. You can see that the currency has been changed on our tour package.
Now you know how to create a tour package on your site. Now let’s see if this works. Let’s go to our website and try to book a tour.
Step 2.4: Book a tour on your website
The first thing we need to do here is to create a tour destination. So let’s do that.
A. Create a tour Destination
Your customers can just click the ‘search box’ on your website and search for the tour package they want. Now when we do that, you can see that we still have the default tour destinations on our site. Now we need to delete these default locations and add our location.
So go back to your dashboard, now go to ‘BA Book everything’,
Then click ‘Destinations’. Here you will find the default destinations that are available on our site. Now to delete them, just click on the checkbox, then click ‘bulk actions’, Select ‘Delete’, and click ‘Apply’. Now that we’ve deleted the default destination,
let’s add our tour destinations to our site. So to add them, Let’s go back to our dashboard and enter the name of the destination in the ‘name’ textbox. Now scroll down and click ‘Add new destination’. In the same way, you can add as many destinations as you want. Now in order for visitors to find our tour package for this destination, We need to add this destination to our tour package.
B. Add the tour Destination to the tour package
So to do that, go to ‘All Tours’, now go to your tour package, And click ‘Edit’. Now you can see the destination which we added. Just click on the box, and then click ‘update’. So now the destination will be added to our tour package. So let’s go back to our site, and click ‘Refresh’.
Now if we scroll down click destinations, you can see the destination which we added before. So now the visitor can search for the tour package they want. Let’s select the ‘destination’, and they need to choose the date for the journey. Then select the ‘number of guests’. And if they click ‘Search’, they will get the tour package that we added earlier. Now if the visitor wants to view the tour package, they can click on it, and get the details about the tour package. And if they click Tour plan, They will get a detailed plan of the tour package. Okay! We now have to add a meeting point where your visitors need to come to begin the journey.
C. Add a pickup or meeting point
Go back to your dashboard, Scroll down, and you will find the meeting point field. Now go to ‘Places’, and click ‘Add Place’. Now here, enter the name of the place and, its address. Finally, click ‘Publish’. Now to add another place,
Just click here, And it will take you back to your dashboard.
Now click ‘Add place’, and Like we did before, Enter the name and address of the place, click ‘Publish’, and the place will be added.
So once you’ve added the places, we can now add them as meeting points for our tour package.Just click here, and it will take you back to your dashboard. Now go to ‘BA Book Everything’, And click ‘All Tours’.
Then go to your tour package and click ‘Edit’. Now scroll down to the meeting point section, And you will see that the place we added has automatically been updated. You can also choose the timing for the meeting point. Now if you want to add another meeting point, Just click ‘Add meeting point’, and you will get a new section with the place already updated. Now choose the timing.
Okay, once you’re done,
Just scroll up and click ‘Update’. Now if we go back to the visitor’s tab, and click ‘Refresh’, You can see that the meeting points have been added to our site.
So now the visitor can go ahead and purchase the tour package.
To do that, first, they need to select the number of guests. Then select a meeting point, and if they click ‘Book Now’, It will take them to the checkout page.
Now they need to enter their contact details and then scroll down. Next, the visitor can choose a payment option. Now there are no payment options available, hence the visitor can choose the ‘pay later’ option and pay the amount later.
Now if they check the “terms and conditions” option and click “Complete my Order,” you can see that the order has been placed successfully.
And if they scroll down, you can see the details of the visitor’s order and the amount that needs to be paid.
Now as soon as the order is placed,
An email with the order details will be sent to the visitor’s inbox.
Now if the visitor goes to their email inbox they would’ve got an email from our website. Next, let’s see how you can process the order and manage the booking.
D. Process orders and manage bookings
Now when someone books a tour on your site, you will get an email about the order. So let’s go to our inbox, and open the email,
And you will get the details about the booking, and the visitor’s contact details, which you can use to confirm the booking and request payment from the visitor.
Once you’ve received the payment from your visitor, you can now update the status of the order on your site. So go back to your dashboard, now go to ‘Orders’, and then click ‘All Orders’. You can see the order which we received on our site.

So to update the status, click ‘Edit’, and select the status of your order. Since I have received the payment from my visitor, I’m going to select ‘payment received’. Once you’re done, click ‘update’.
Now if the tour package has reached the maximum number of guests, it will automatically disable the booking option for that day. So when another visitor tries to book the tour for the same day, it will not be available to them.
So this is how a visitor can book a tour on your website.
Now in order to make our website look more unique and authentic, we need to edit and change the contents of our site.
We’ll do this in just 2 steps.
3.1 Edit a page
3.2 Change contact information
Step 3.1: Edit a page
First, let’s go to the page that you want to edit. Since I want to edit the home page, I’m going to that page. Then click ‘Edit with Elementor’,
And it will take you to this editing section, where you can edit any part of this page. Now let’s say you want to change Just select the text,
and enter your text. I’m going to enter “tripsandtravel.com”.
In the same way, you can change any text you want on this page. Just select the text, And then start typing. Now if you want to change the background image, just click on that image, then click ‘Choose Image’,
and then drag and drop the image from your computer.
Now click ‘insert media’, and the image will be changed. In the same way, you can change any image you want on this page.
Once you’ve made all the changes, click ‘update’, and your changes will be saved. So now if we go back to our site, and click ‘Refresh’. The changes will be updated on our site.
In the same way, you can edit any page you want. Just go to that page, then click Edit with Elementor, and you can start editing your content.
Okay!
Now let’s say you want to change the logo, Just click ‘Customize’.
Now click change logo, then click ‘Select files’. Then drag your logo,
And then drop it in the center of the page. Now click select, and your logo will be changed. Once you’ve changed the logo, click ‘Publish’.
Now let’s say you want your visitors to find your contact number easily. Instead of the default contact information, what if you want to add your own contact number?
Step 3.2: Change contact information
So to change the contact number, Just click ‘Edit with Elementor’. Since the contact number is given in the header section. We’re going to select the Header Builder option. So let’s select it, and it will take you to the editing section. Now click ‘Navigator’, and you will get a set of options.
Now to change the contact number, Just click this ‘section’, then click this ‘column’. And click ‘Icon List’. And you will find the contact number displayed on our site. So to change it, just click on the number, and remove the default number. Then enter your contact number. Now below it, again remove the default number, and again enter your contact number. Once you’re done, click ‘update’. Now if we go back to our site, and click ‘Refresh’. You can see that we have successfully changed the contact number on our site.
So this is how you can edit the contents of your site. Finally, we have almost completed building our site. But wait, if you check your website’s name, you find that our website address ends with ‘makeyourwp.com’. Now instead of this, what if you want your website to have a simple address, like yourwebsitename.com? We can do that by getting a Domain for our website.
We’ll do this in just 2 steps.
4.1 Purchase your domain
4.2 Connect the domain with your website
Step 4.1: Purchase your domain
Well you may ask me, “What is a Domain?” A Domain is just the name of your website that your visitors search for on Google, to reach your website.
So to get your own domain name, Just click here And it will take you to webspacekit.com, where you can get a domain for your website. Now in this textbox, enter the name you want for your website. I’m going to enter “tripsandtravel.com”. Now if you click ‘Search’, you can see that the domain name is available. Now to get the domain name for your website, just click ‘Add to Cart’, and then click Continue.
Now it will ask you to select a hosting plan. Okay, Hosting is just a place where all your website’s files are stored, like your website’s images, text, etc.

But here’s a surprise for you. Since we created this website using MakeYourWP, you don’t have to purchase your hosting separately. Like we said before, you need not worry about managing your website, its files and its security.
Everything is managed by MakeYourWP’s team.
let’s click ‘Skip’, and it will take you to this cart page. Now you will get this domain for 1 year, and after one year, you need to renew your domain to keep using it.
So to get this domain, ‘let’s fill up the details’. Now choose your payment method, then enter your payment details. Now if we click ‘order now’ and the payment will be successfully made. And if you click here, you can see that we have got the domain. Okay, but in order to use this domain, we have to connect it to our website.
Step 4.2: Connect the domain with your website
So to connect this domain,
We’re going to do 2 steps.
A. The first step is to add a domain to your website.
Let’s go to ‘makeyourwp.com’, and then go to ‘domains’.
Now scroll down, and enter the domain name which you purchased. So I’m going to enter “tripsandtravel.com”. Next, we have to add an IP address to your domain.
B. Add this IP address to your domain.
So to add it, Let’s go to ‘Webspacekit’, and then click on ‘domains’.
Now select the domain which you purchased, and then click ‘Manage DNS’. Now click the textbox, and next to the “A” record. We need to add our IP address which is shown here. So let’s go back to this page,
and then copy the IP address. Then come back to our domain,
and paste the IP address in that textbox. Once you’re done, click save changes.
Now to connect the domain, let’s go back to MakeYourWP, and click ‘Connect domain’, and our domain will be successfully connected to our website. So to check it, let’s open a new tab, and type our new domain name, which is “www.tripsandtravel.com”.
Now if we press enter, You will see that we’ve successfully connected our domain and we’ve got our tours and travels website which we just created. Now if we click Tour, You can see the tour packages that we had added on our site. So now your visitors can just type your domain name and access your site quickly.
Tourism and Travelling is an ever-growing business. Providing the necessary travel information with attractive tour packages in one single place will get you more traffic from people who search for this. It is always important to understand your strengths while making a website.
Use creative ideas to provide exciting tour packages to make you stand out from your competitors and help you get more revenue.
MakeYourWP is our recommended choice because it provides you with the perfect readymade template you need to build the tour booking website you want. It also makes the process of building your website much easier.
Now, if you have any questions about starting a tour booking website with MakeYourWP or any other queries?
Feel free to discuss them in the comments section below!