Living in the digital era, having a website is crucial for any business.
Research has found that 6 out of 10 customers expect businesses to have an online presence.
Most travellers decide on a hotel by visiting their website, and you have every chance of losing customers to your competitors by staying offline.
If you own or operate a hotel and haven’t taken that step into the online world, now is the time.
Also, having a hotel website means customers can always find you – anytime, anywhere. You can list your opening hours, contact information, images of your hotel, contact forms to facilitate enquiries from potential customers for feedback from existing ones.
So why wait any longer when customers are looking for you!

Let’s jump right in and start creating a fully functional and attractive website using the MakeYourWP Readymade Hotel Booking Website Template.
In this tutorial, we will look at the following topics in detail.


The above are a few points on why you should have a hotel booking website. And we hope they will help you with your hotel’s success.
MakeYourWP helps set up and manage your website very quickly, where you just need to choose a template of your choice. You can then tweak it as per your choice in an easy-to-use control panel and instantly create a website. All the technical details are taken care of, including hosting, themes, plugins.

Pick the pre-designed hotel booking template → Customize your website → Configure settings → Accept your first booking!
MakeYourWP provides you with the right set of tools that you can use to start building your website right away.
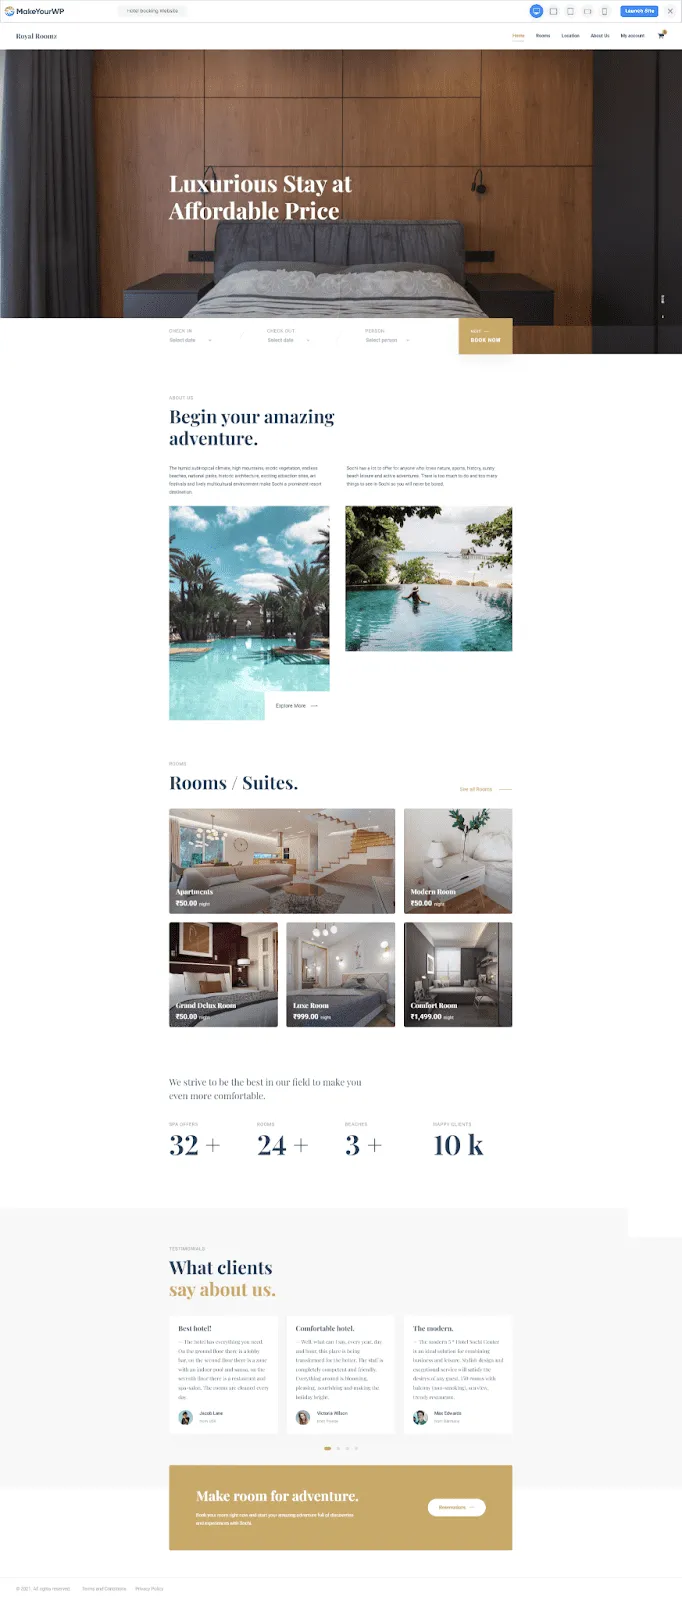
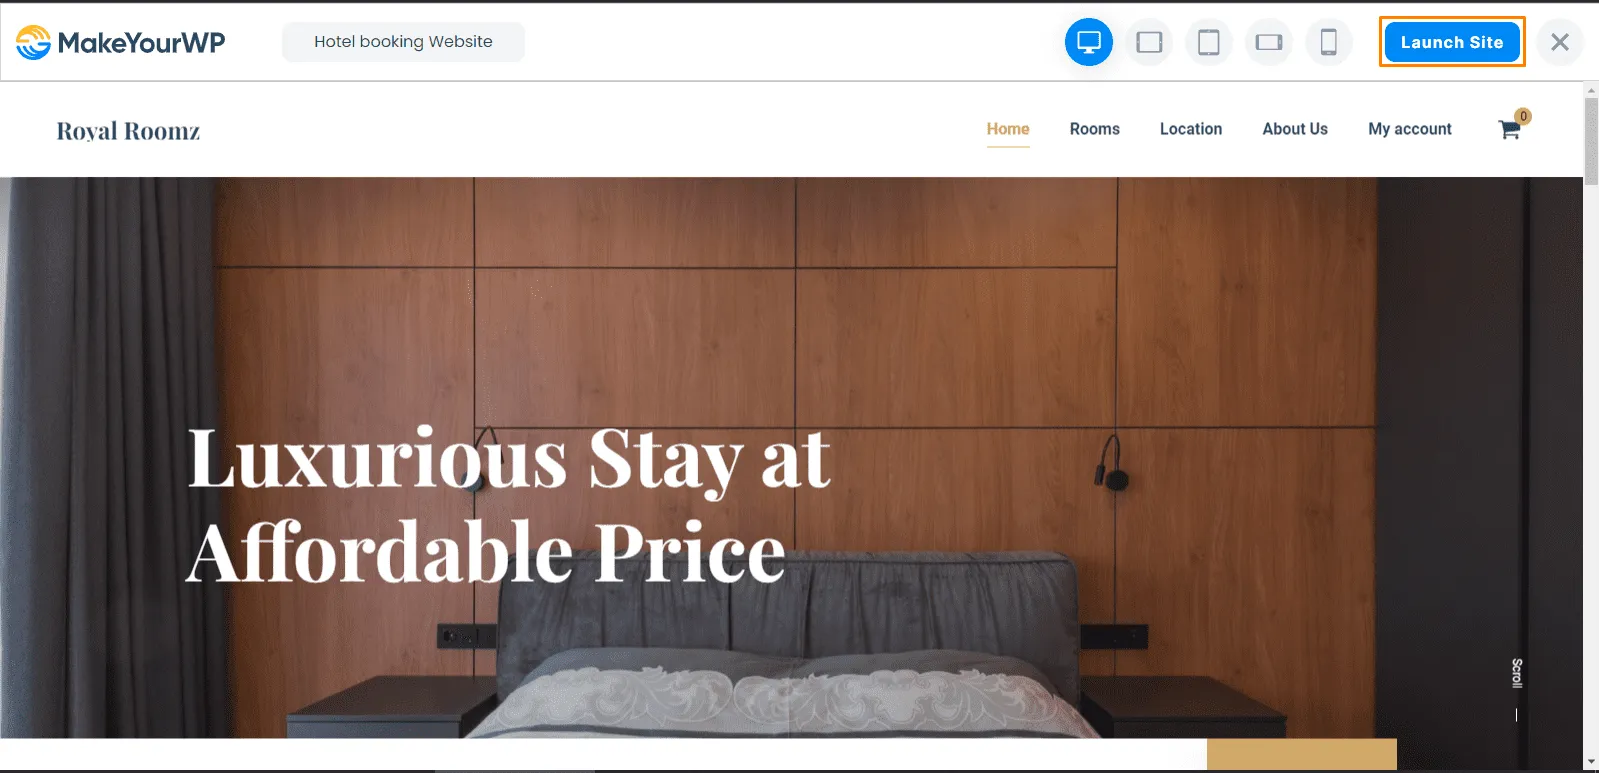
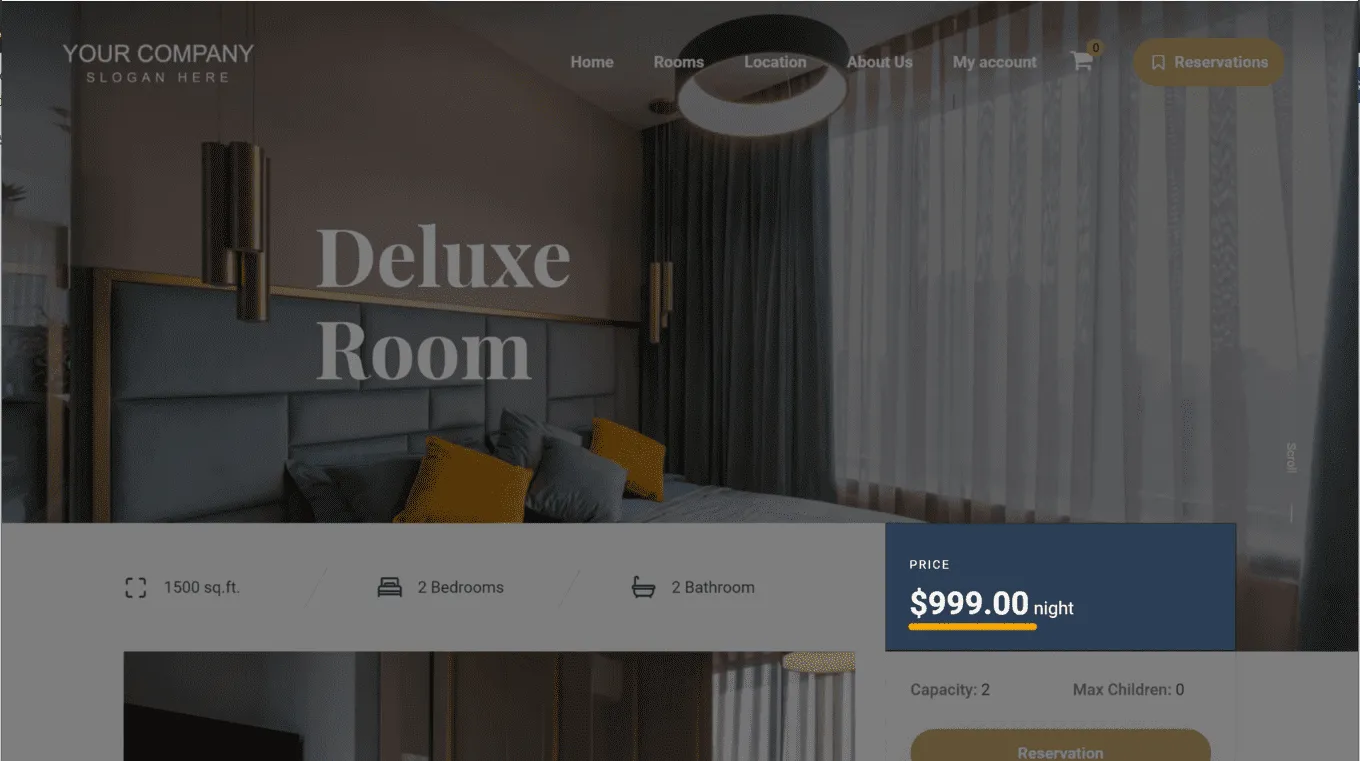
Using MakeYourWP, you’ll be able to create a hotel booking site like this.
And if a visitor wants to book a room in your hotel, they can enter the check-in and check-out date along with the number of people. And if they click ‘book’, they can see all the rooms available in your hotel.
Visitors can select any room they want. And here they can see the images of the room and the facilities you provide.

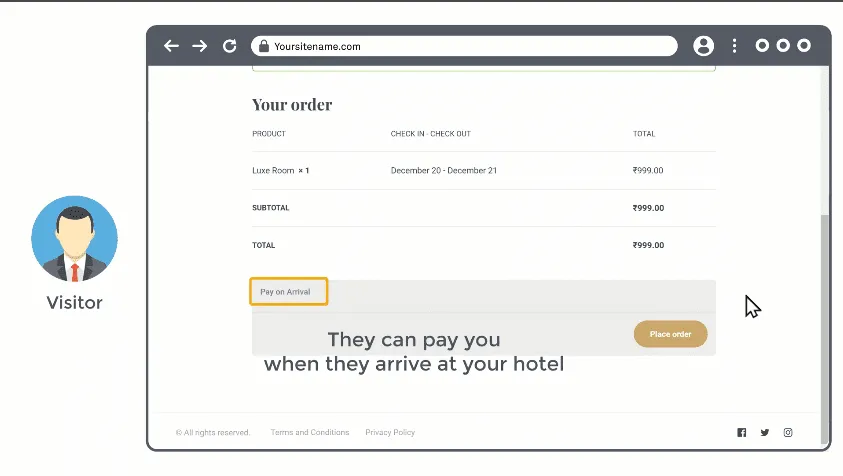
If they want to book this room, they can click reservation and select the number of rooms they want. They can fill in their details and click ‘place order’ to book the room which they can pay once they arrive at your hotel.
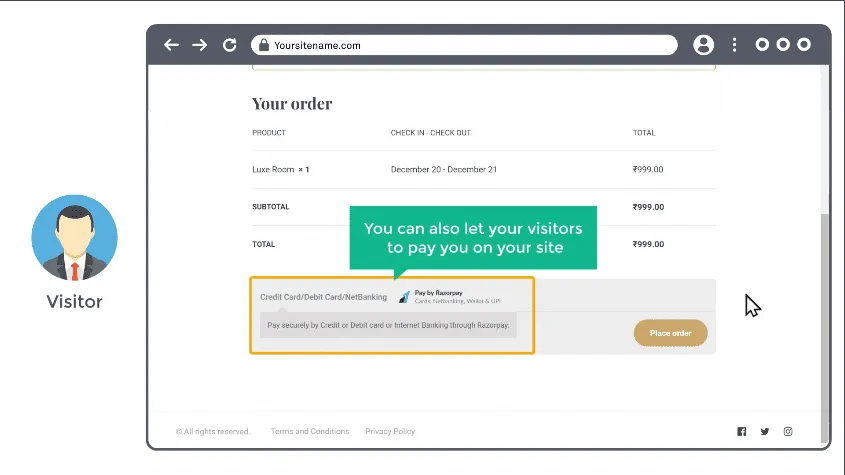
You can also let your visitors pay on your site using these payment methods to book a room.
So once someone books a room on your site, you’ll receive an email in your inbox where you can see the booking details of the customer.
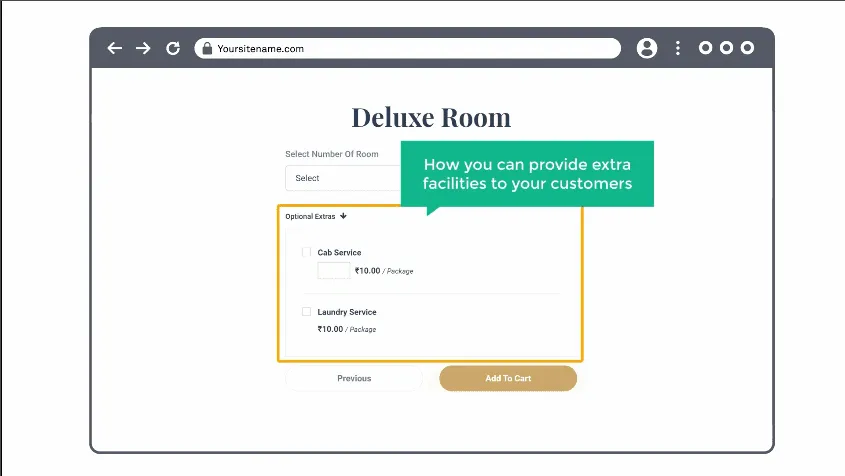
You can provide extra facilities like this to your customers.
And finally, MakeYourWP allows you to customize your site to any style you want, just by using drag and drop.
So let’s delve right in and see how to create a hotel booking website.
You can create a hotel booking website in just four parts.
1. Launch your hotel booking website
2. Setup your rooms/Hotel
3. Get your domain name for your hotel booking website.
4. Edit the content of your website
So now you know what you’ll get after following this tutorial. So, let’s begin.
This is where you get your new website live on the internet. So to launch your website, just click here, and it’ll take you to MakeYourWP website.

Just click here to see how the hotel booking site looks. In addition, you can see the pre-designed website template that you can use, which comes with a few default content.
Now to get this hotel booking website, you can follow these steps.
A: Click the ‘launch site’ button
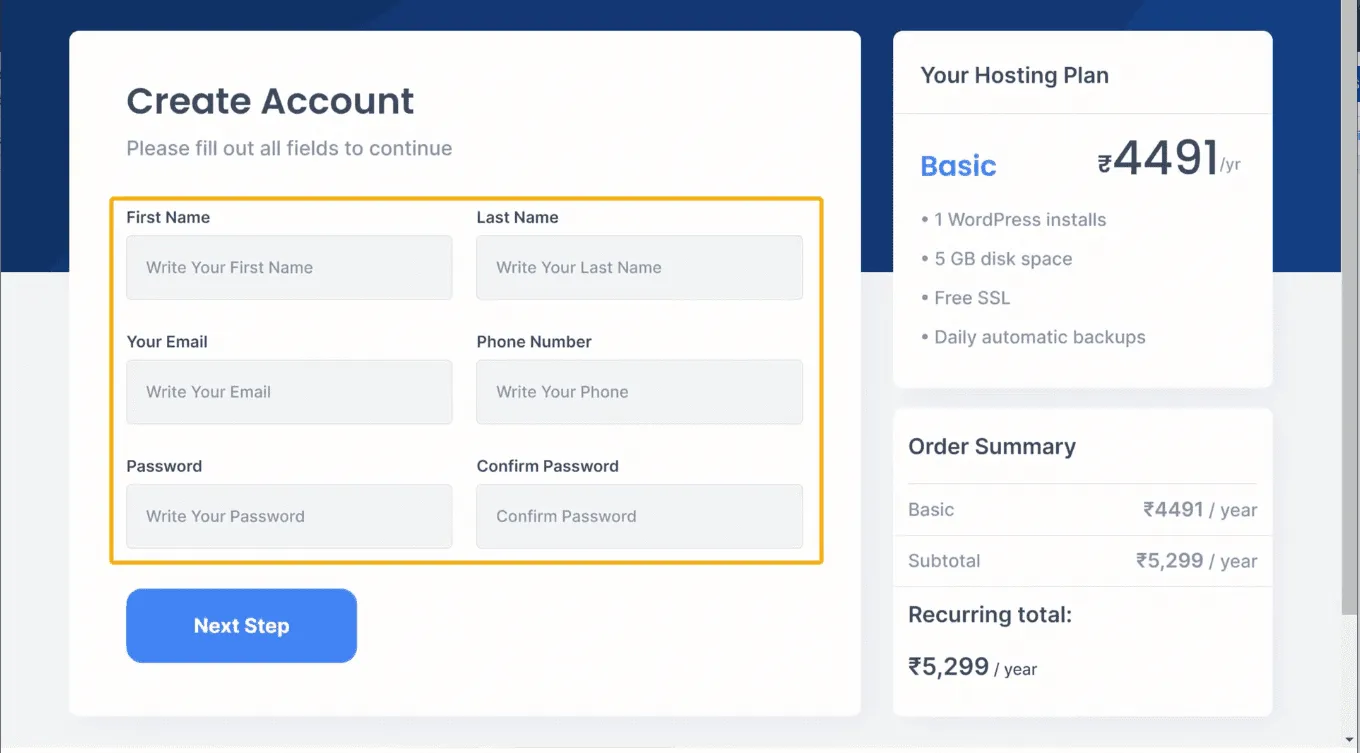
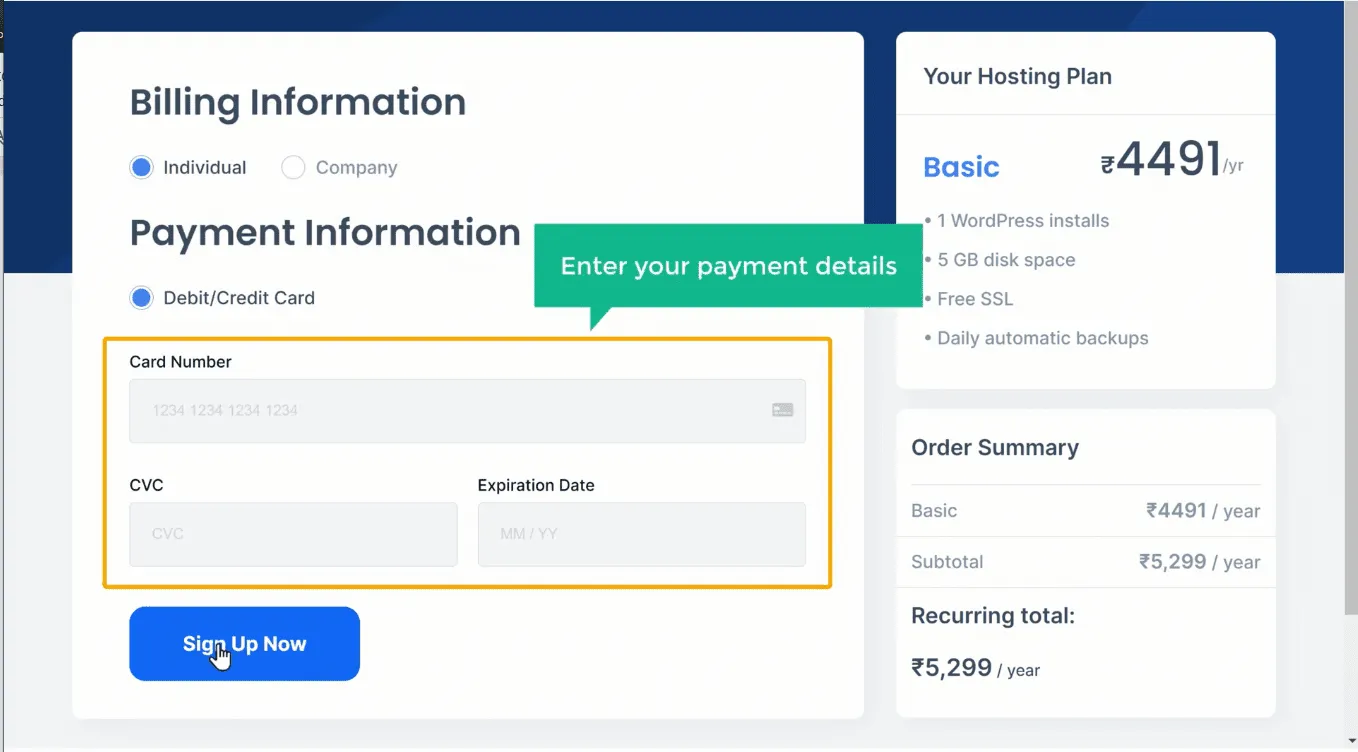
B: Enter your details and click next. Now enter your payment details and click Sign-Up.
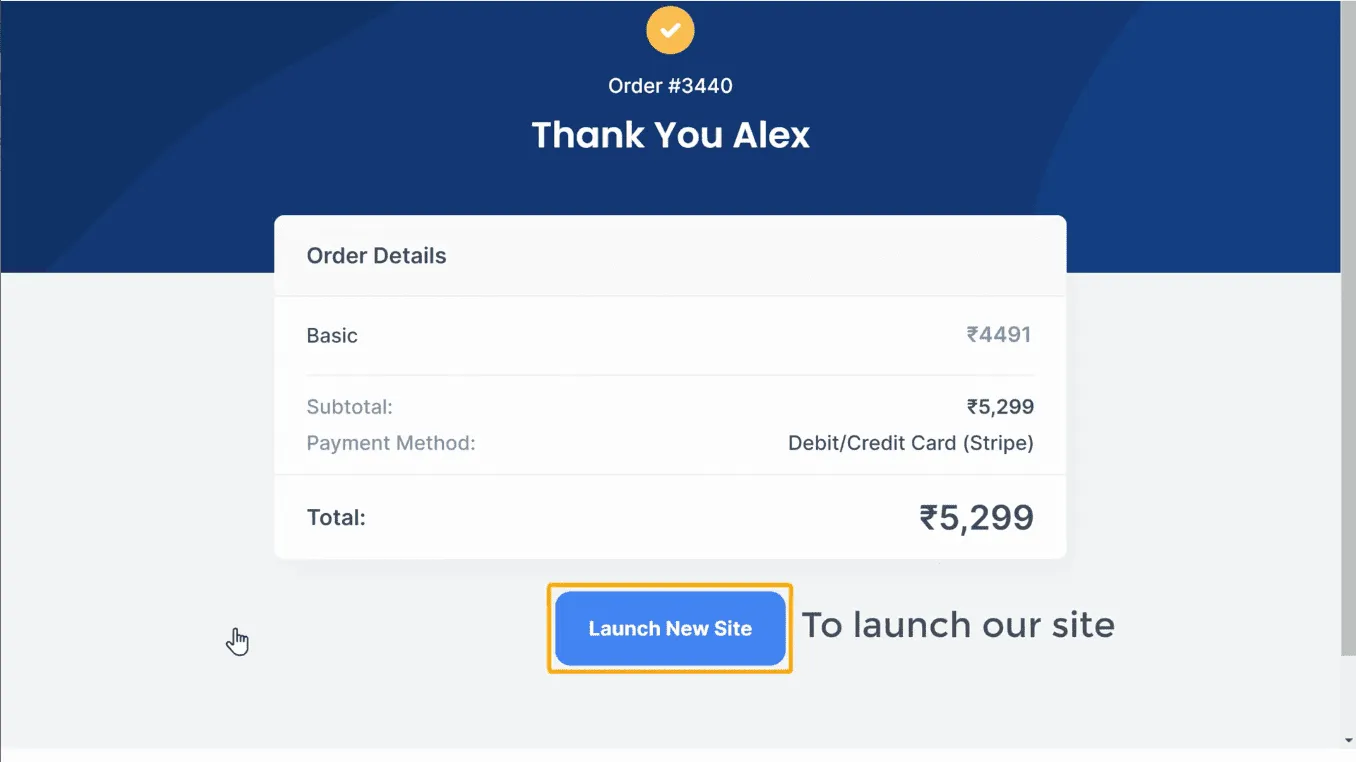
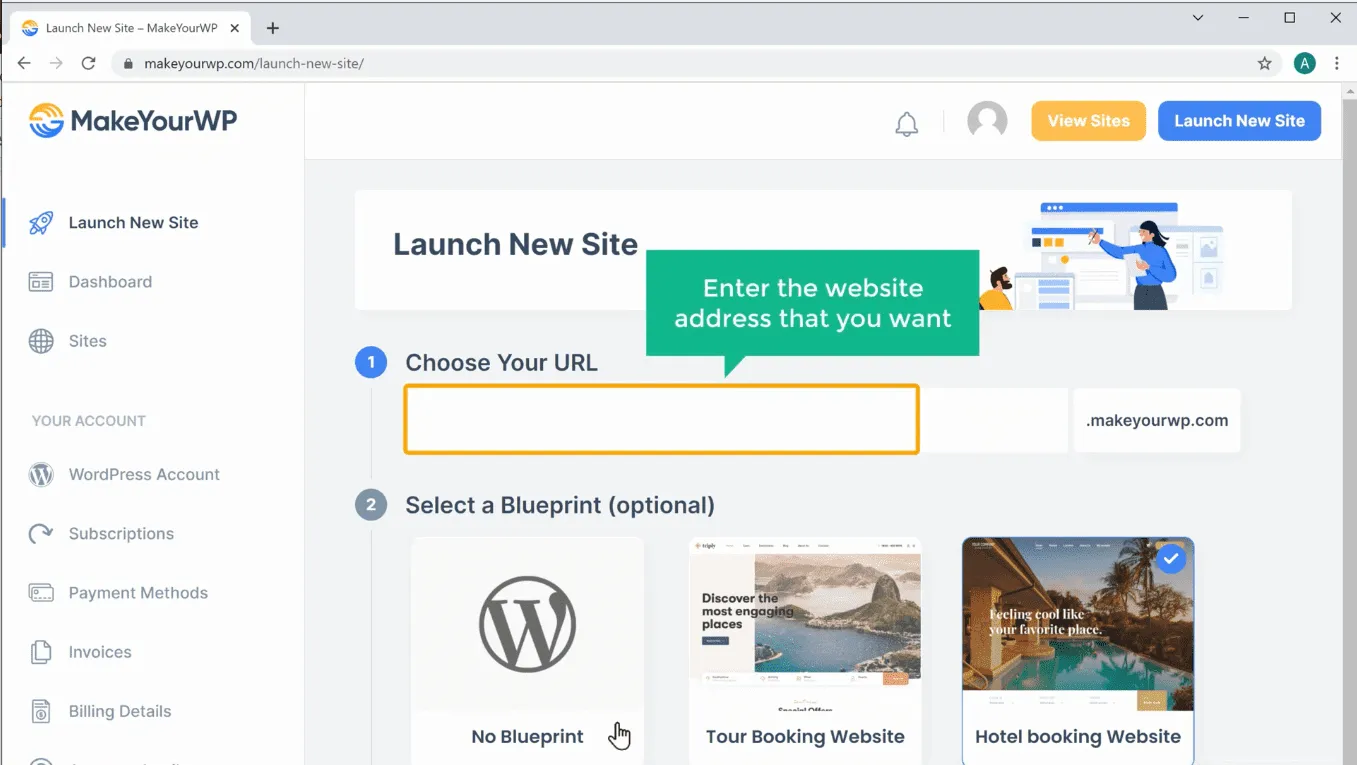
Now you’ve successfully purchased your website. Now to launch your site, scroll down and click “launch new site.”
Once you launch your site, you need to name your site.
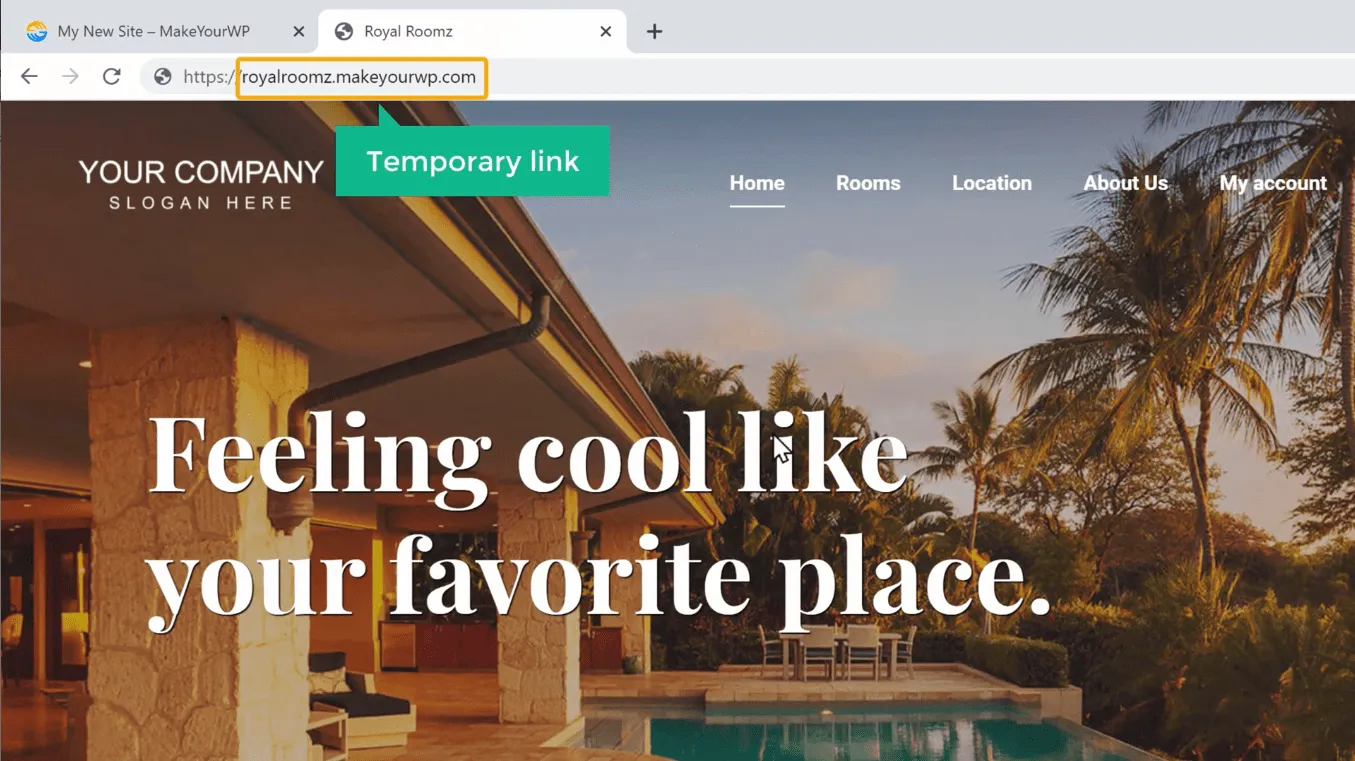
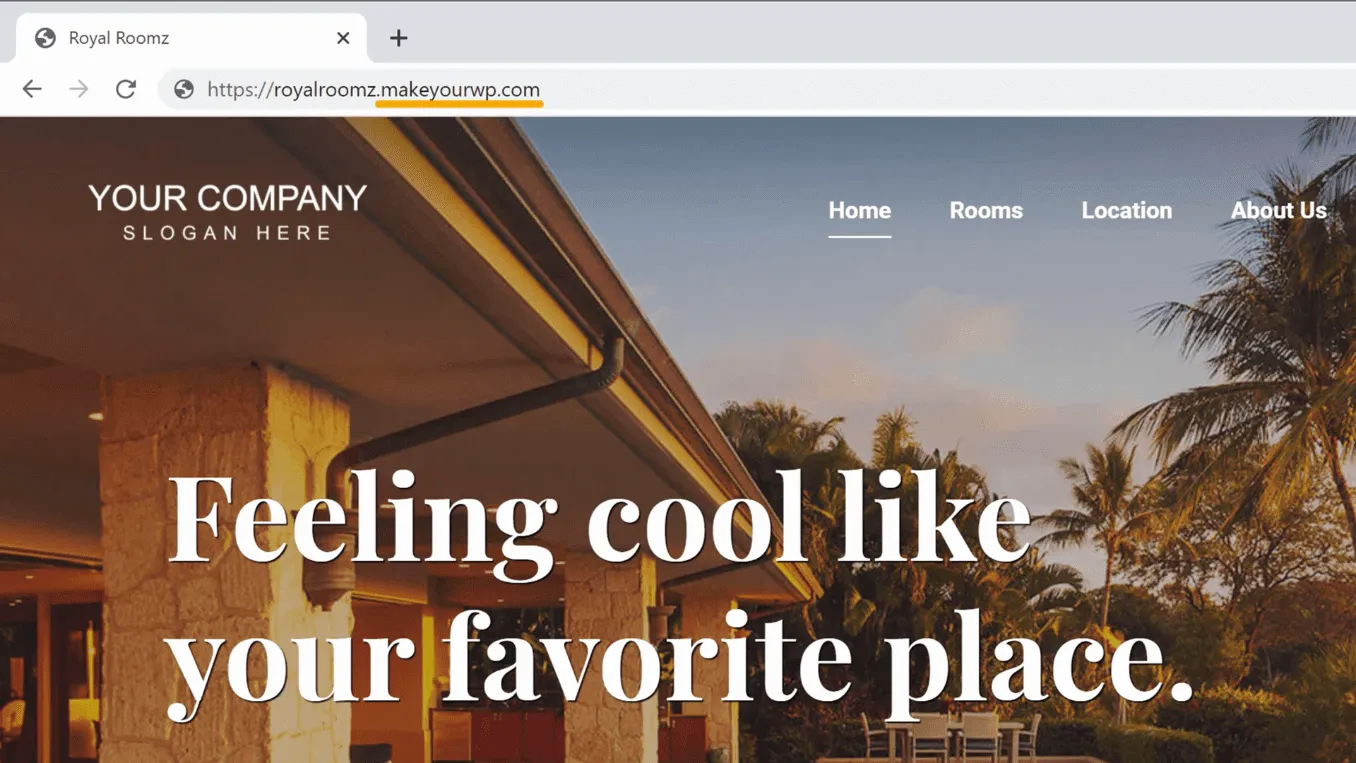
C: Enter a temporary website address that you want in the URL section. For example, if you give “RoyalRoomZ” as the hotel name, the website address will be ‘royalroomz.makeyourwp.com’.
Now if you click ‘Launch new site’ and then click ‘visit’, you can see that you have got the same site that you saw on the link selected, and it has all the features of the hotel booking website!
Now, this is just a temporary link for your site, and you can easily change this to your own .com domain. We’ll see how you can do that later in the final part of this tutorial.
Your website is ready now, but you are just getting started. You still have a few more steps to go, and the first and foremost thing you can do is customise your site.
So next, let’s go to Part 2 of this tutorial, where you will see how you can set up your rooms/Hotel on your website.
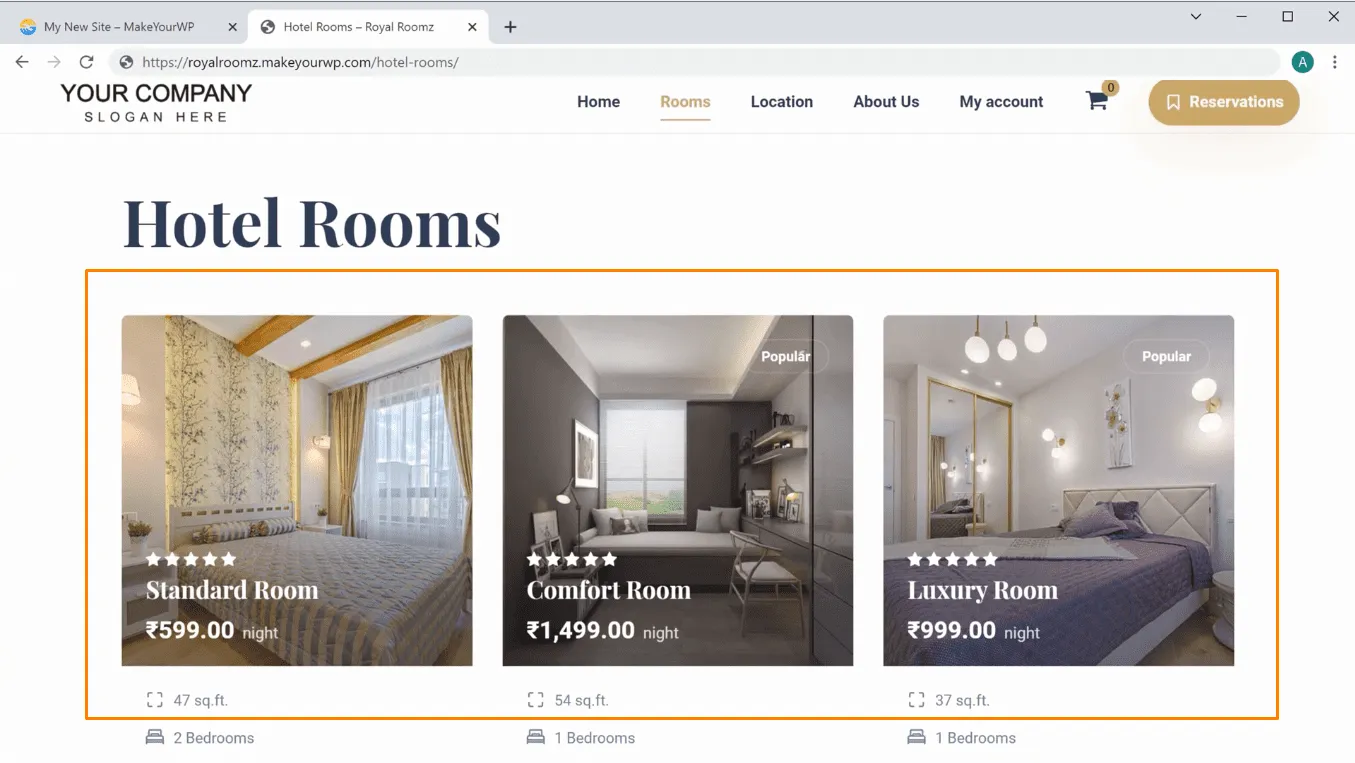
Once you set up your website, you can add rooms to your site, and your customers can book rooms. If you go to your site and then to ‘rooms’, you can see these sample rooms. Now instead of these sample rooms, you can add your rooms here.
To add rooms, you can follow these three steps.
2.1: Login to your website
2.2: Delete the sample rooms
2.3: Add your room
Step 2.1: Login to your website
To edit your site’s content, you need to log in to your website. To do this, go to MakeYourWP and click ‘admin’. You can see that you have logged in to WordPress.

Once you have logged in, you can go to the next step.
Step 2.2: Delete the sample rooms
To delete the sample rooms click on ‘Rooms’, and here you can see some default rooms on your website. So to delete them, just click to select all the rooms and then select ‘Move to trash’. Now, if you click ‘apply’, you can see that all the sample rooms have been deleted.

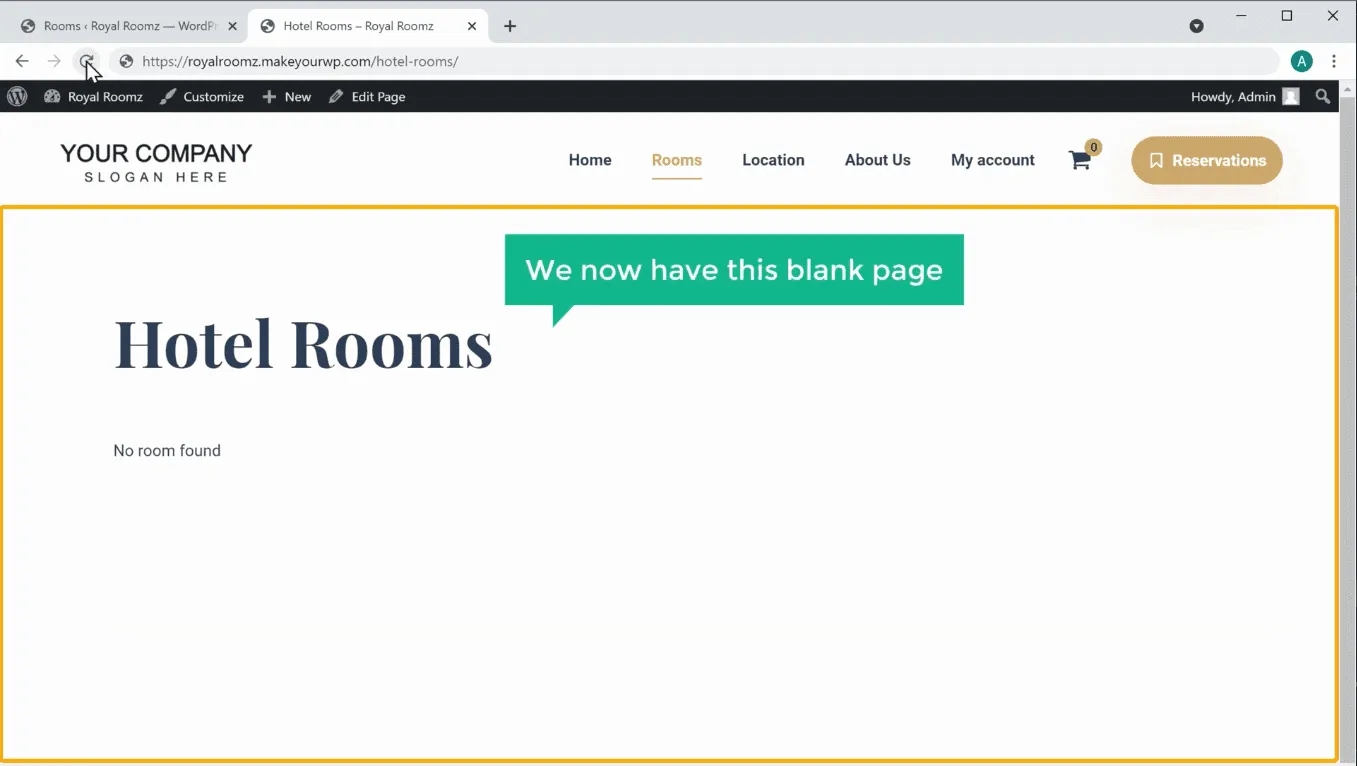
So now if you go to your site, and click ‘Refresh’. You can see that you now have this blank page, which means you can add rooms.
Once you have deleted the sample rooms, you can go to the next step.
Step 2.3: Add your room
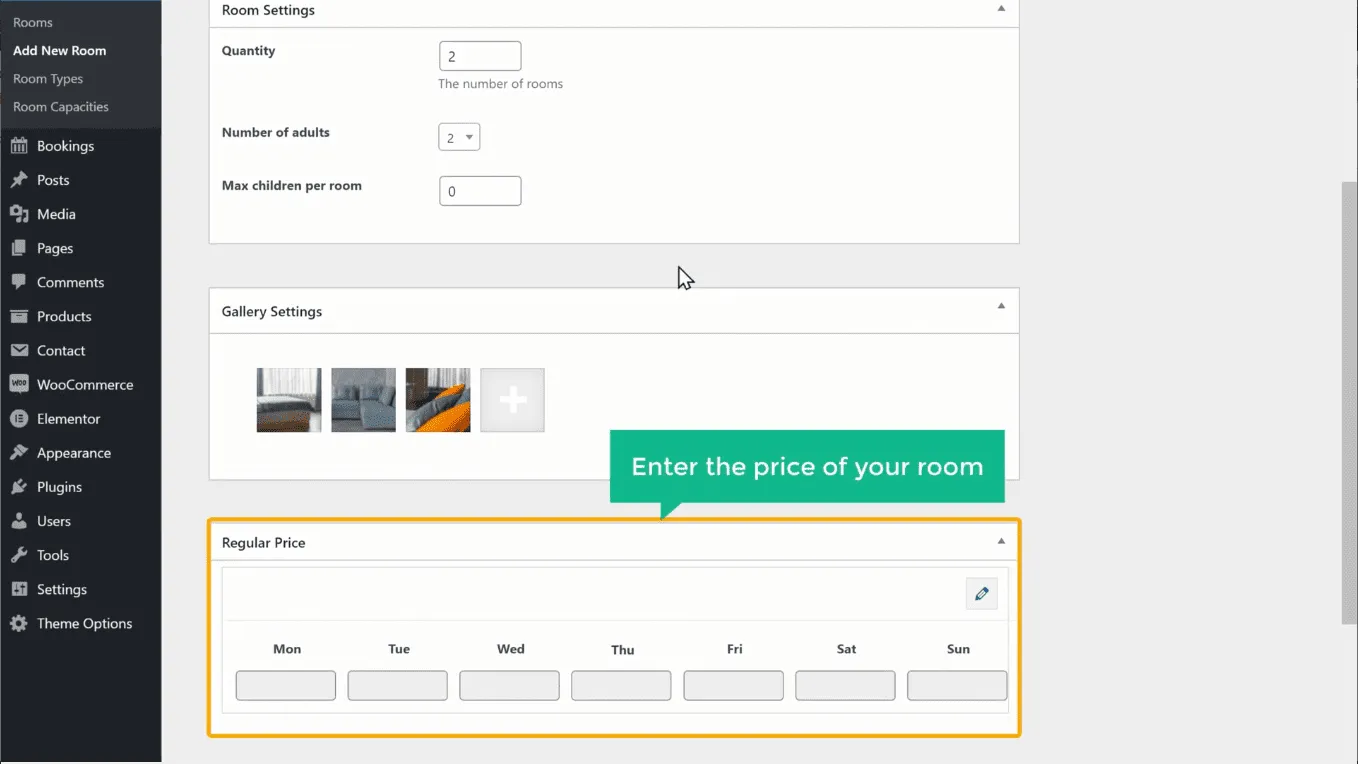
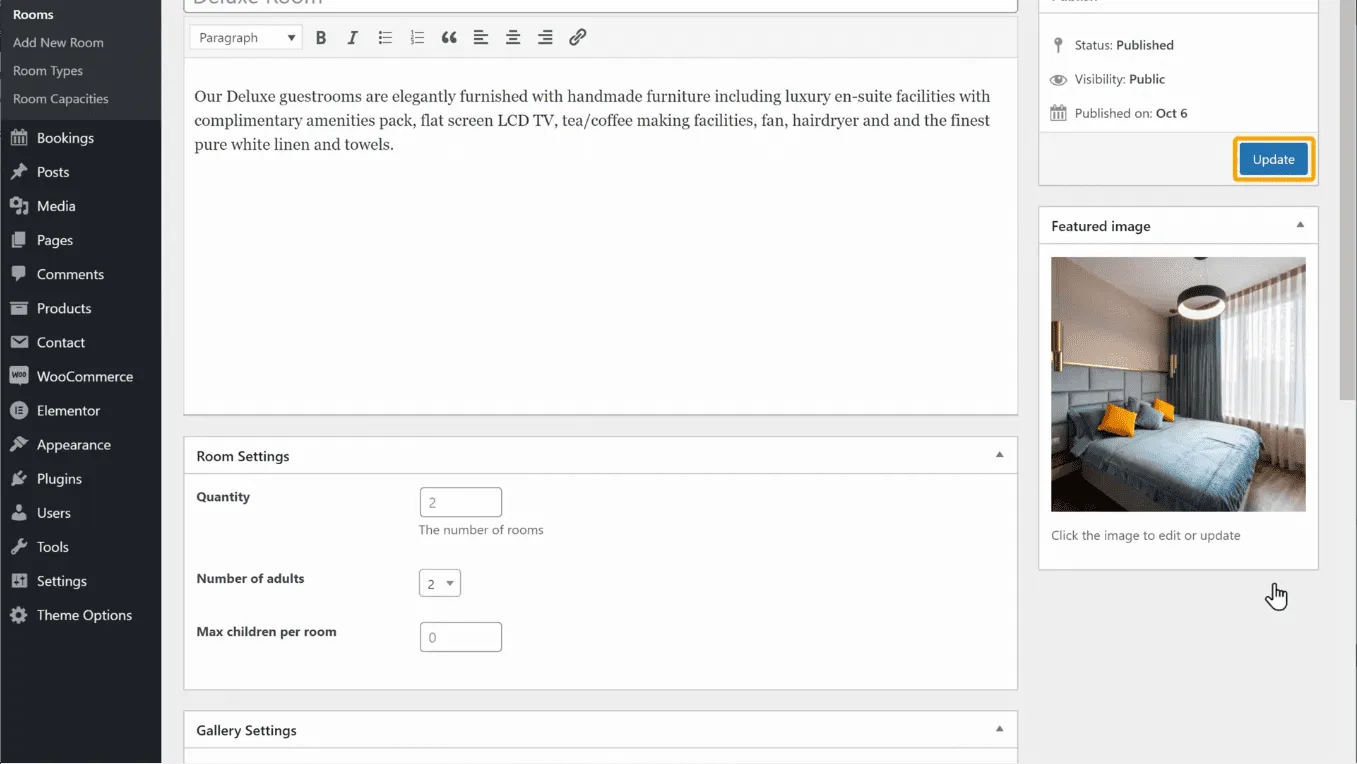
So to add your room, just go back to your dashboard and click ‘Add new room’. It will take you to this page to enter a name and description for the room. Scroll down and fill up other details you want, like the number of rooms, people that can be accommodated in the room etc.
And here, you can add the images of your room. So just click here and drag the photos from your computer and drop them here. You can see that images are added.
You can now enter the price of your room and set prices for each day.
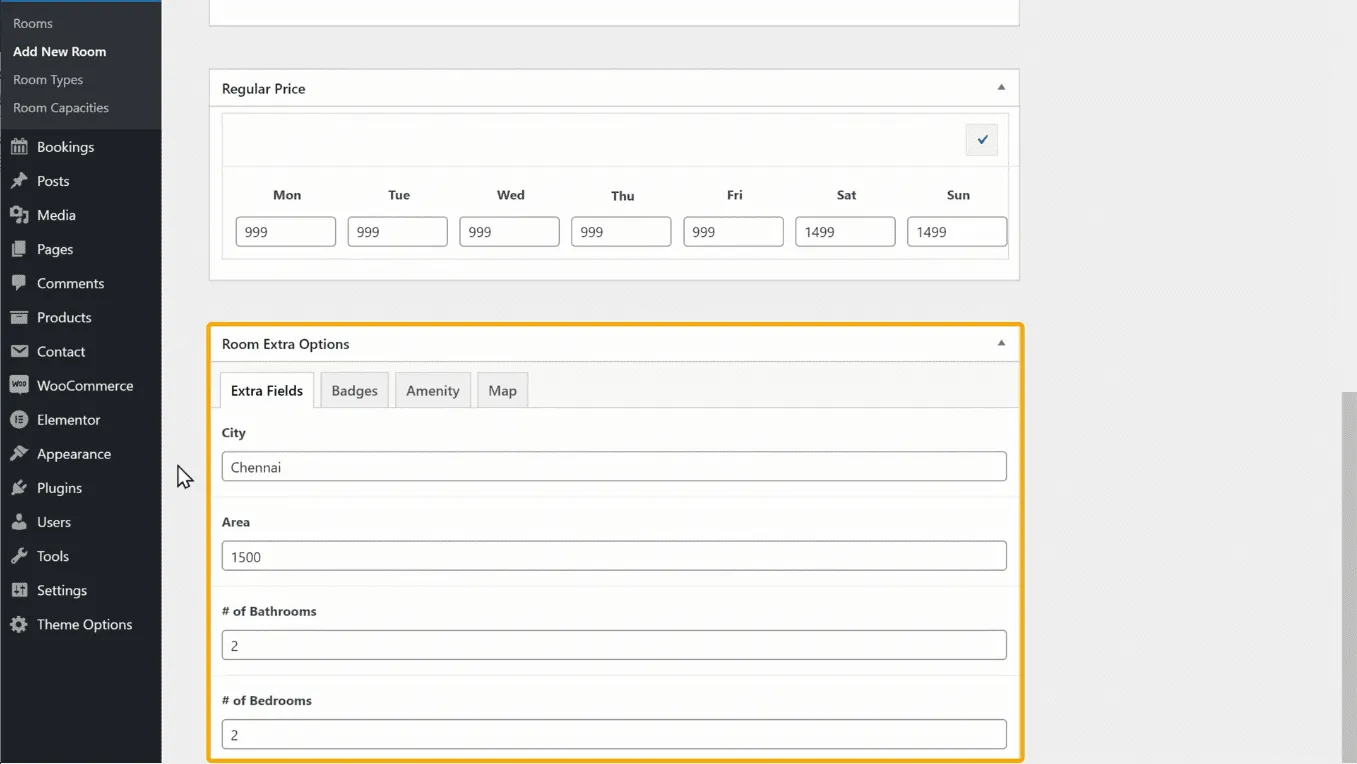
If you scroll further down, you can add extra details of the room as given below.
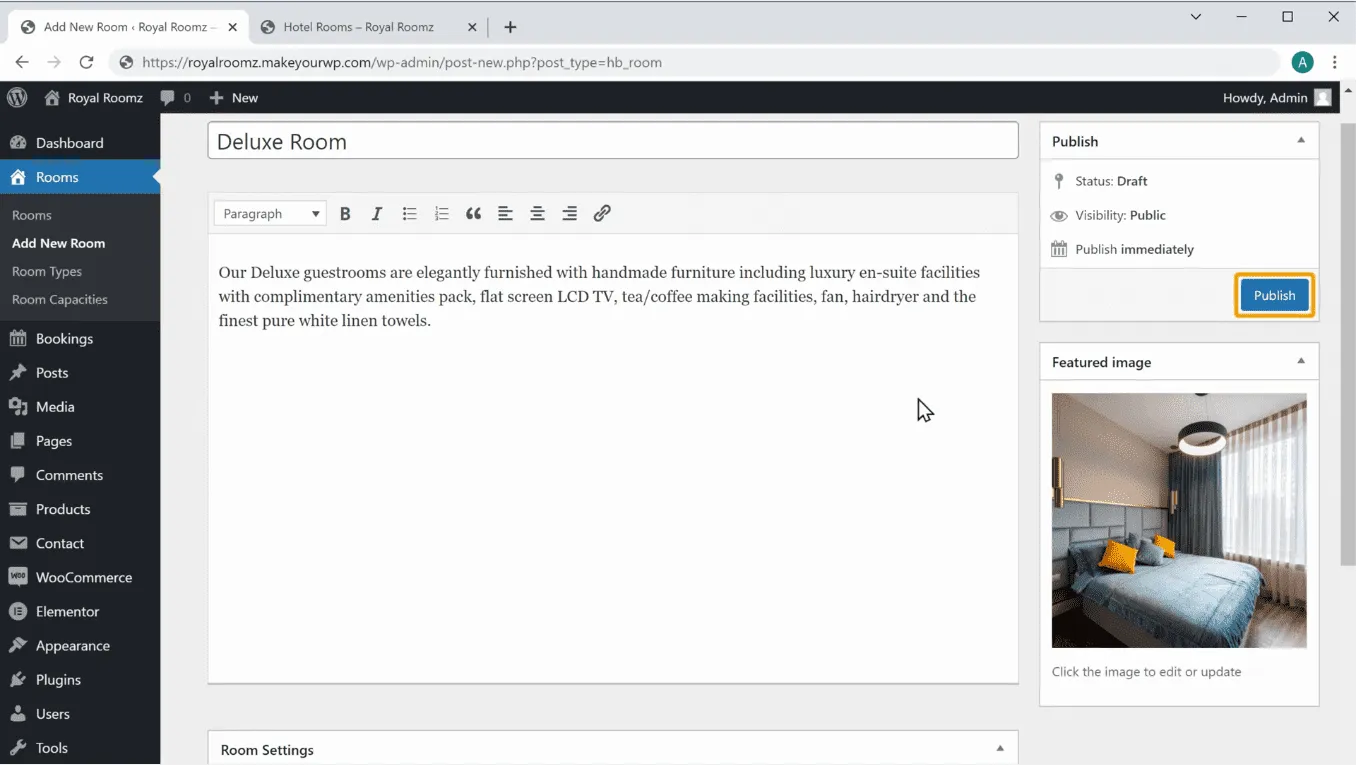
Once you are done, scroll up. You can add your featured image here. And the picture which you add here will appear on your site like this.
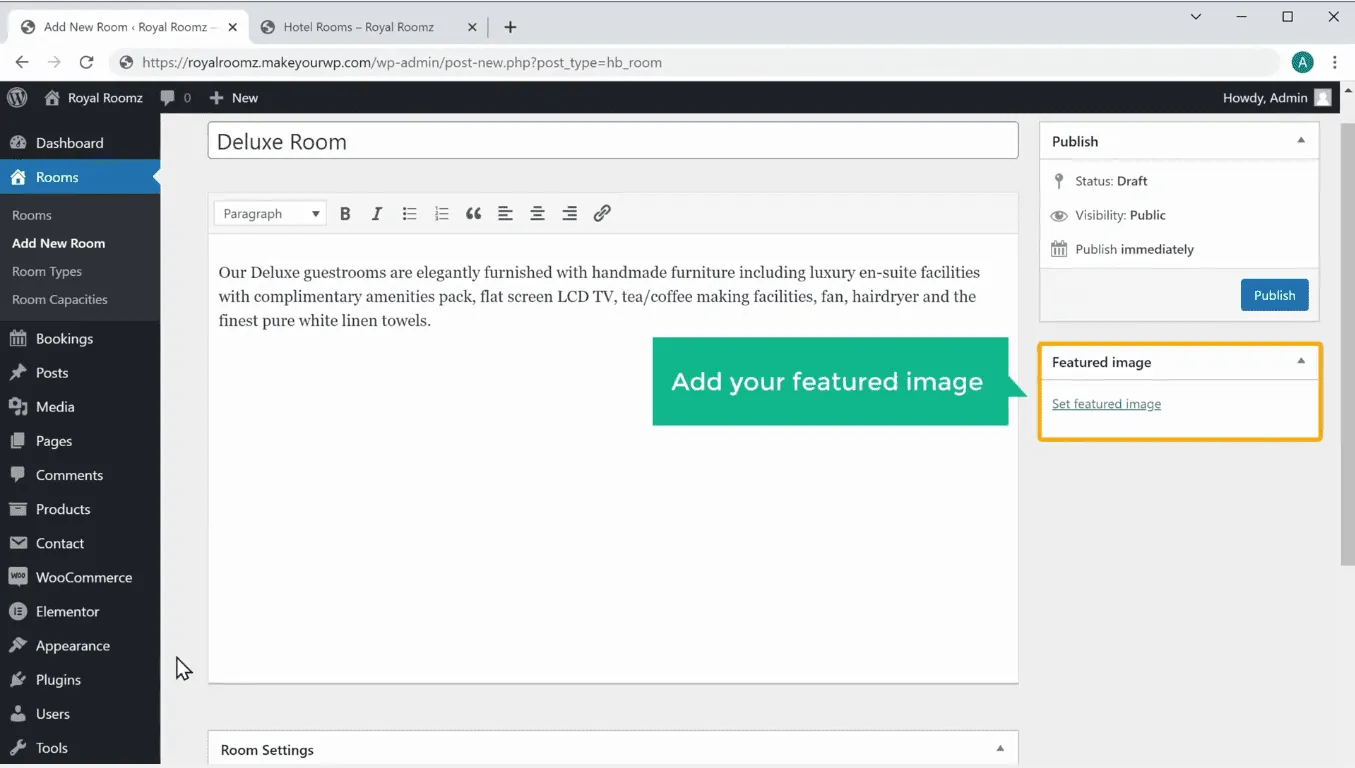
So to add the image, click ‘set featured image’ and drag and drop the image from your computer. You can see that the image is added.

Once you have entered all the room details, click ‘publish.’
Now if you go to your site and click ‘refresh’. You can see the room which you just added.
So this is how you can add your own room to your site. In the same way, you can add any rooms you want.
Now here, you can see that the room price is in US dollars.
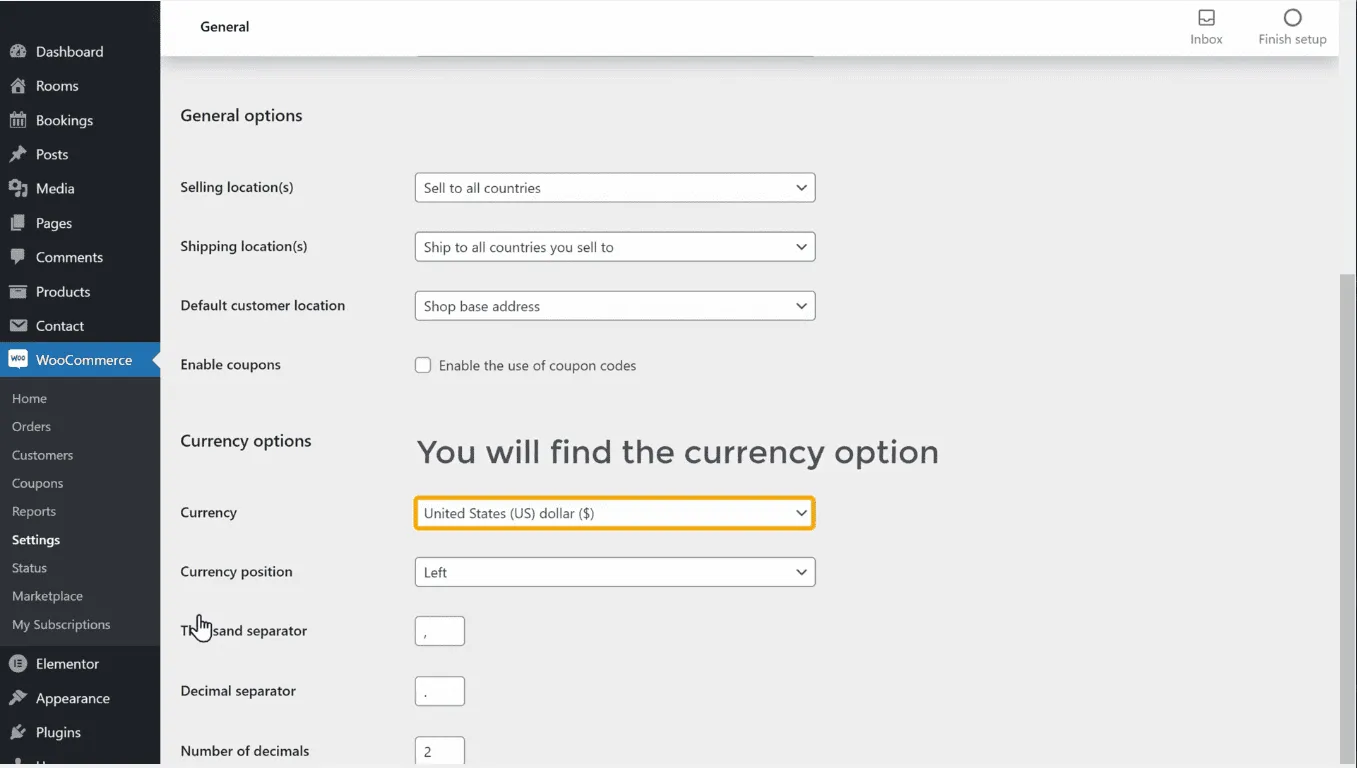
Now, instead of this currency if you want to have a different currency, then go to your dashboard. Now go to ‘woocommerce’ and click ‘settings’. If you scroll down, you can see the currency option. If you click here, you can see the available currencies. Just select the currency you want and click ‘Save changes’.
If you go back to your site, click ‘refresh’. You can see that the currency has changed.
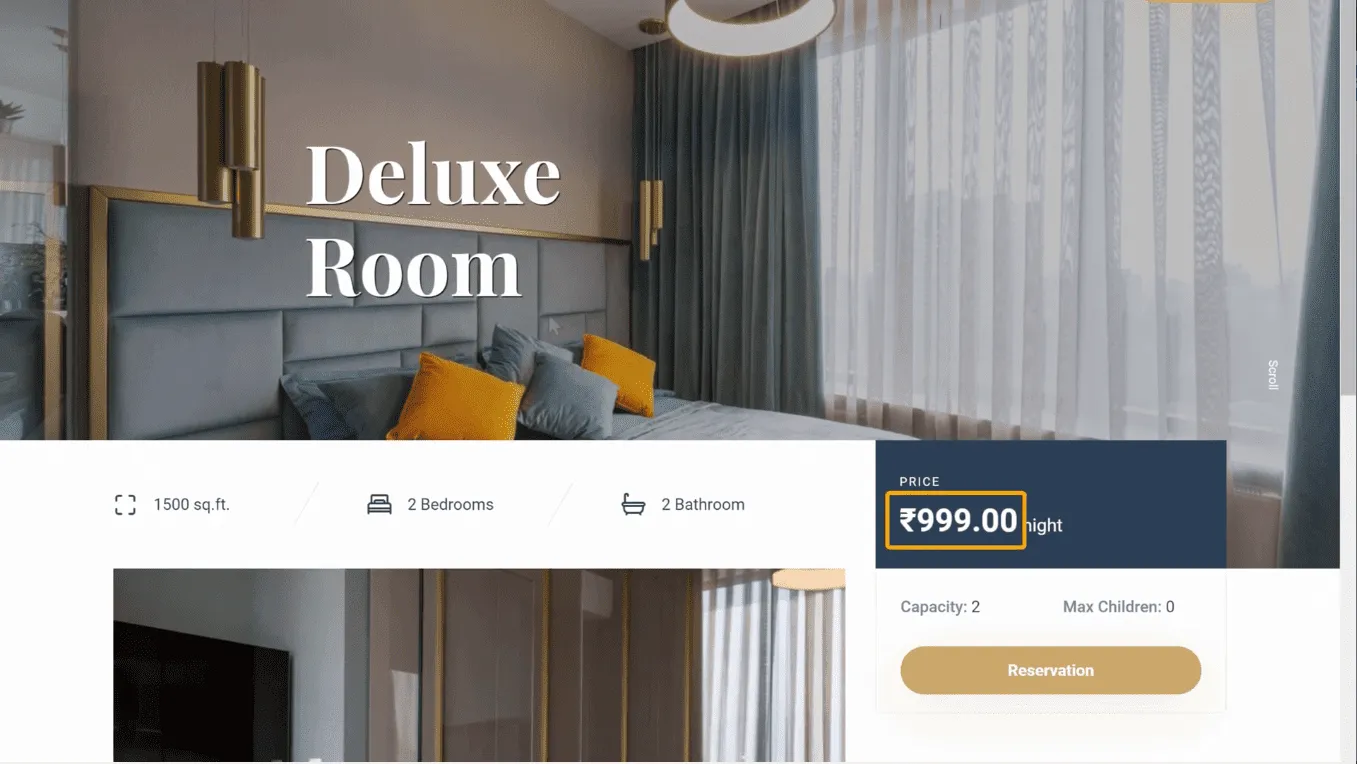
So this is how you can change the currency.
Next, let’s see how a customer can book a room on your site.
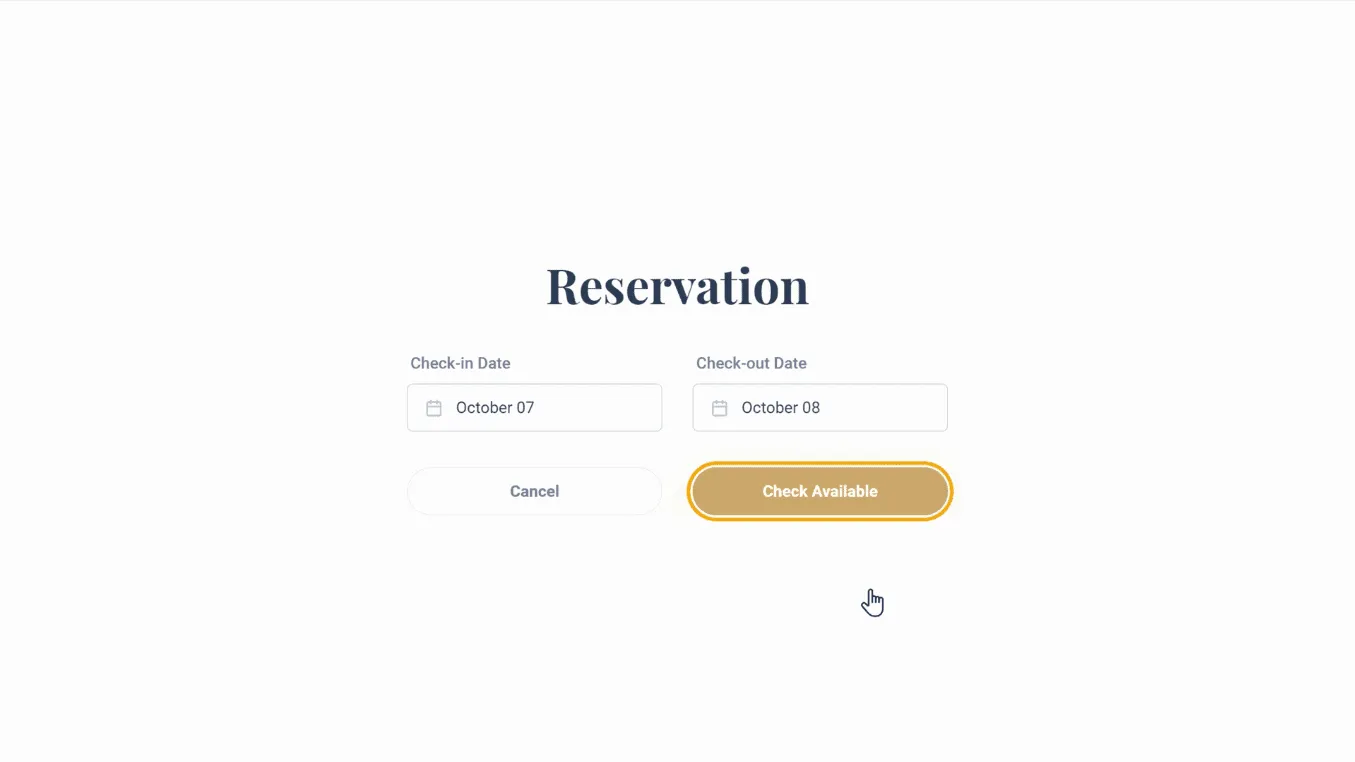
So to book a room, they can click on ‘reservation’. Now they can select a Check-in and Check-out date and click “Check available”.
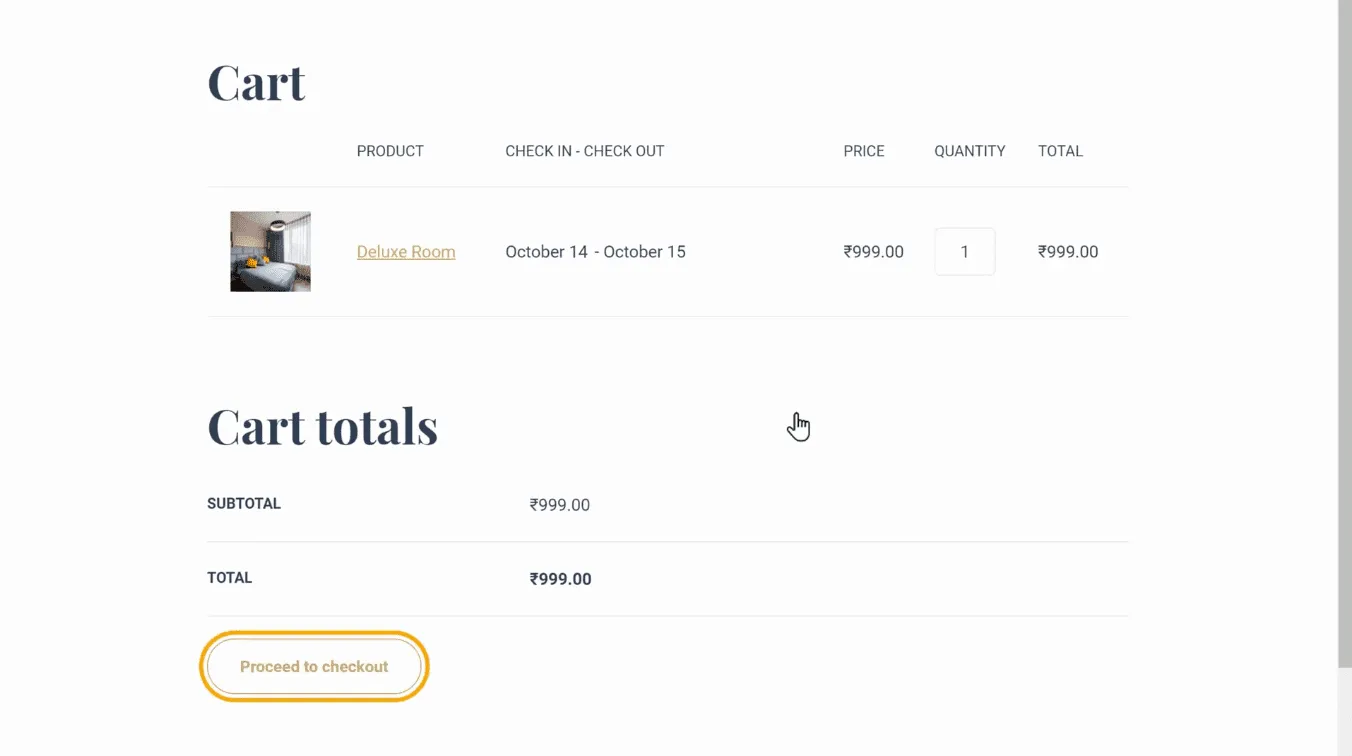
They can select the number of rooms they want and click ‘Add to cart,’ and then click ‘proceed to check out.’
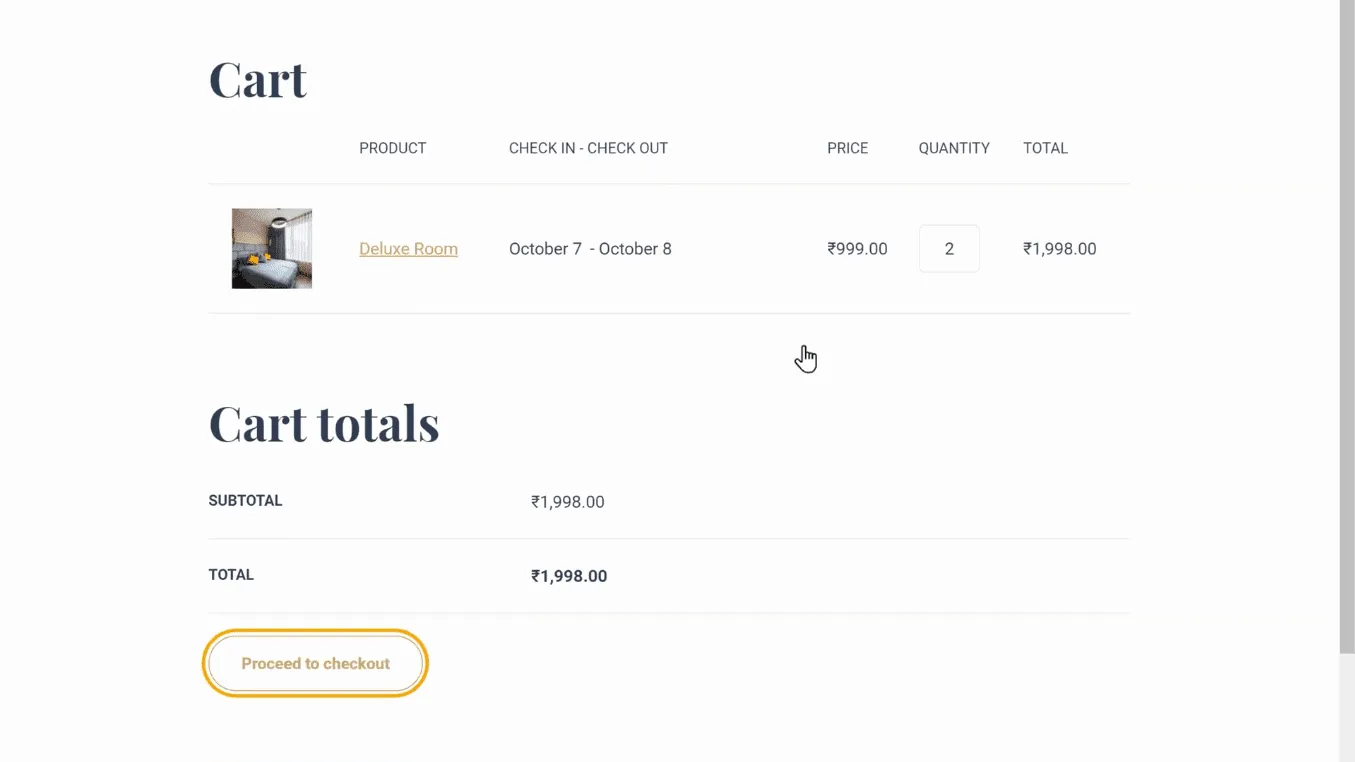
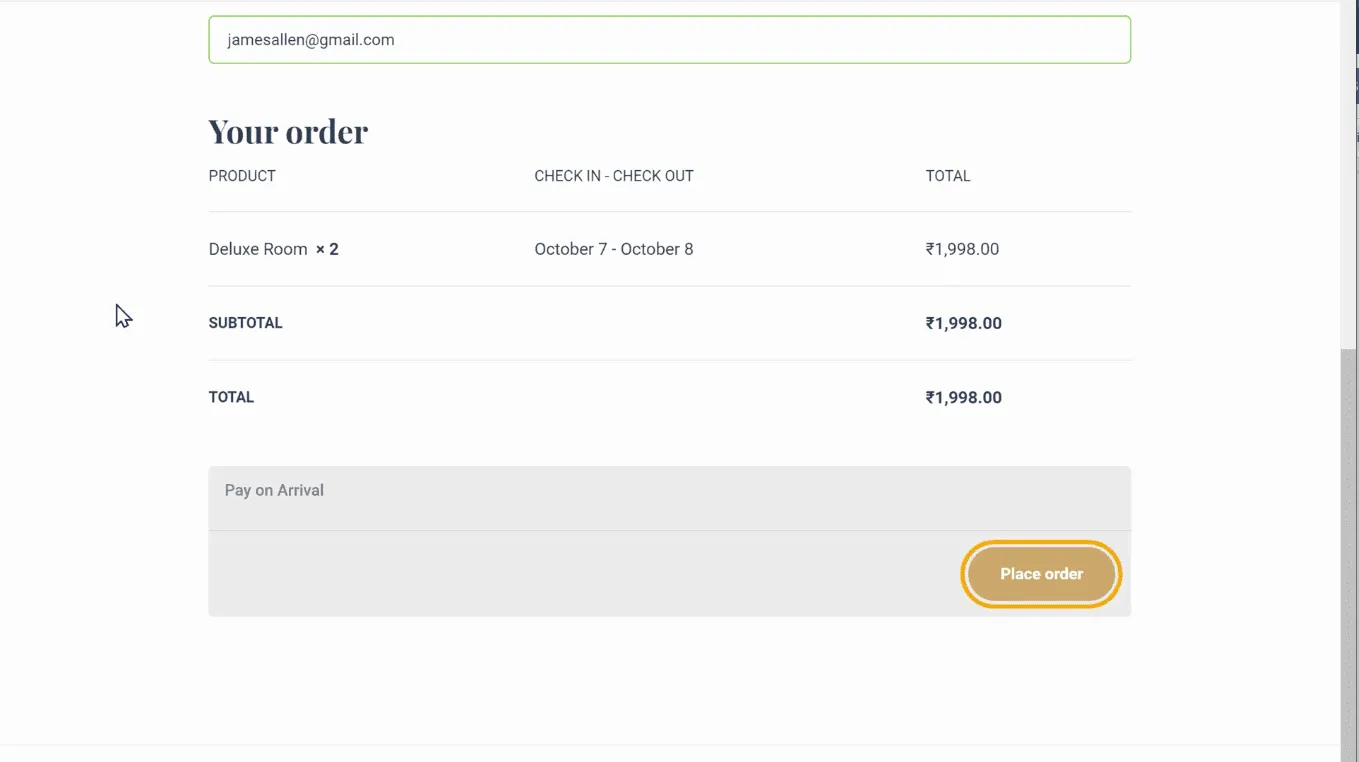
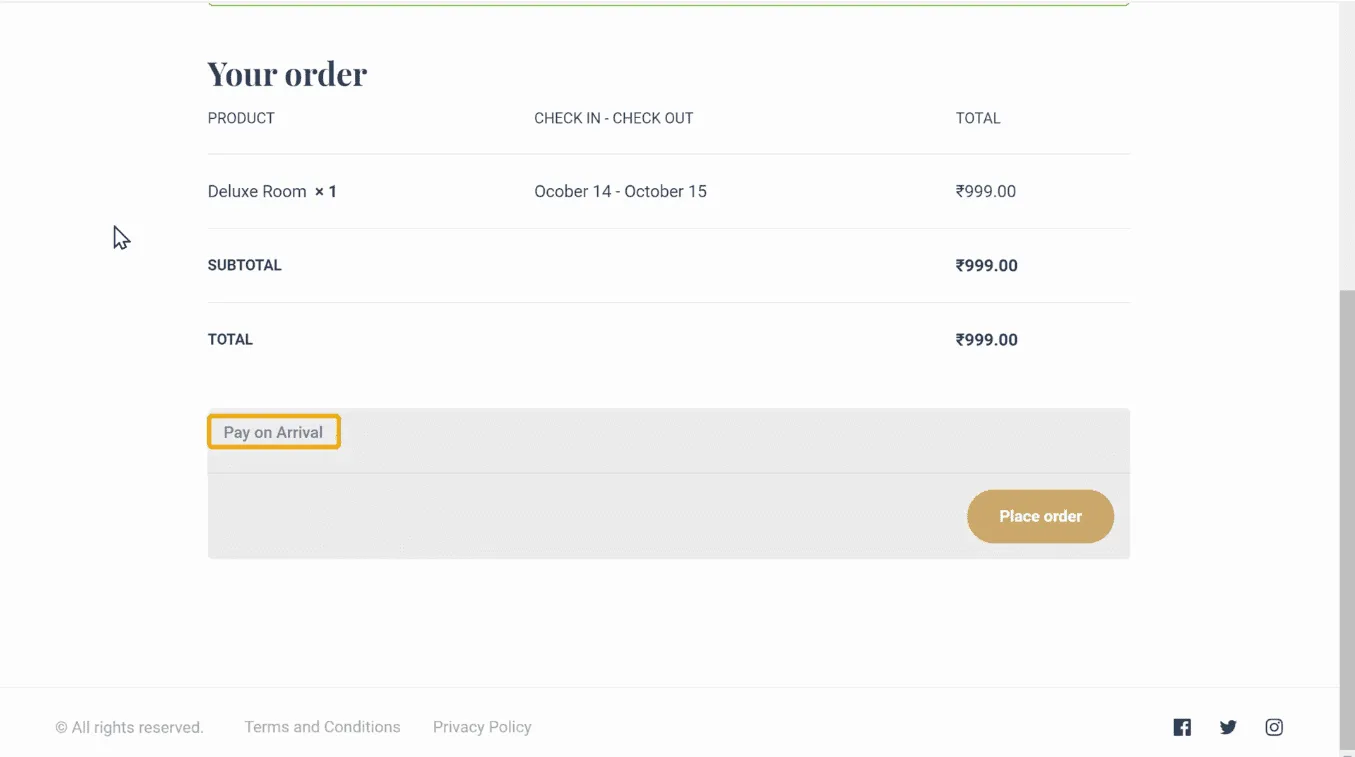
Now your customer can enter their details and scroll down. Here they can see that they can “pay on arrival”, which means your customers can make payment when they arrive at the hotel. Once they click ‘place order’, they can confirm the booking.
So this is how your customer can book a room on your site.
Now, as soon as someone books a room from your site, you will receive an email. If you go to your inbox, you can see that you have received an email with the booking details.
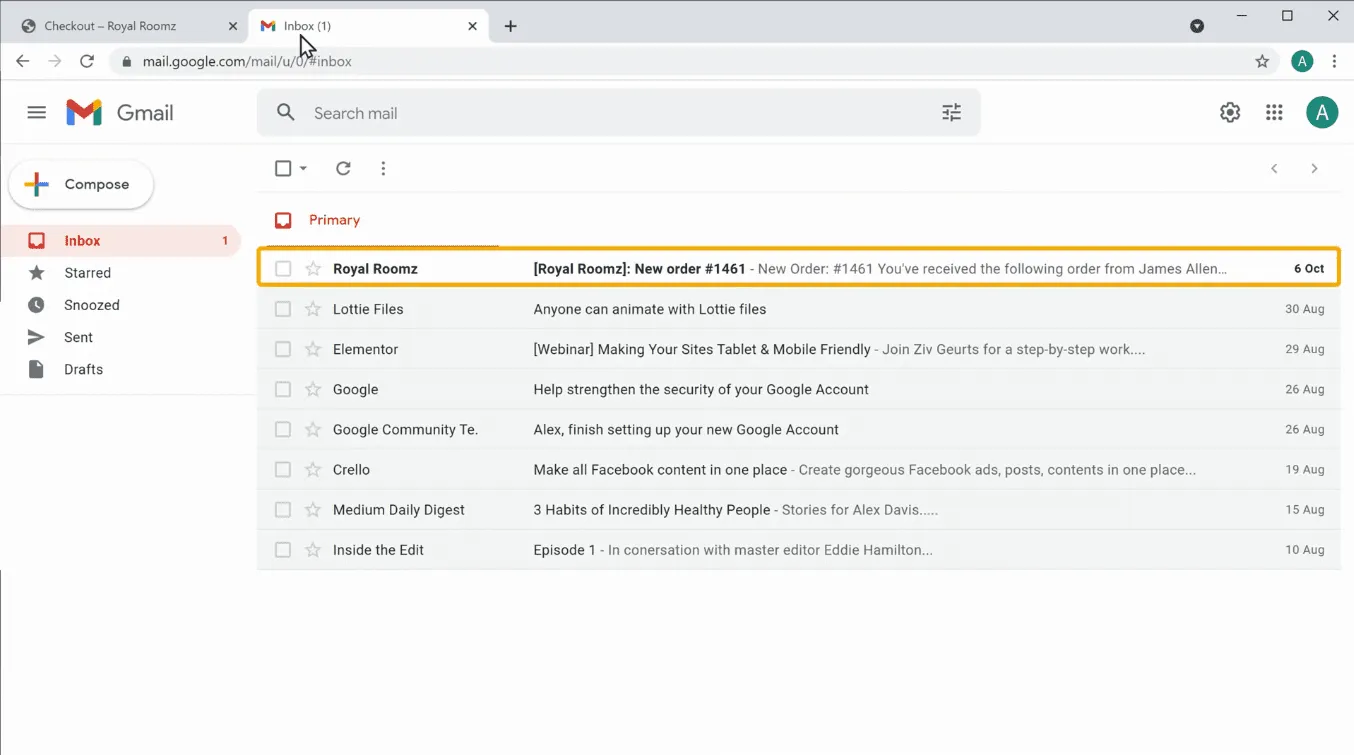
This is how you can know when someone books a room from your site.
Your customer too, can view their order after booking a room from your site. If they go to their inbox, they can see that they have received an email with the order details.
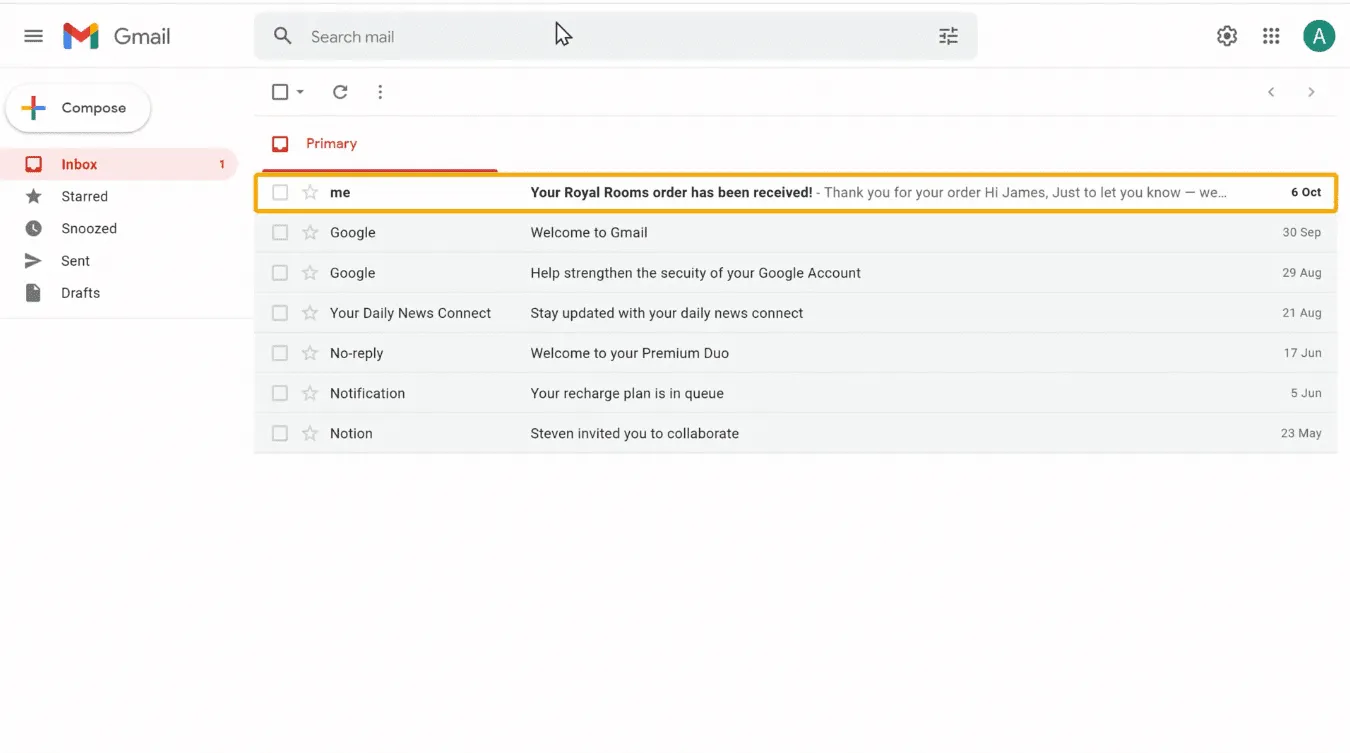
This is how your customer can view their order after booking a room.
Now, what happens when another customer books a room on the same date?
So next, let’s try to book a room on the same date. Go to your site and ‘rooms’. Click on this room, and then click ‘reservation’. Next, select the same Check-in and Check-out date and click ‘check available’. You can see that it says the room is not available.
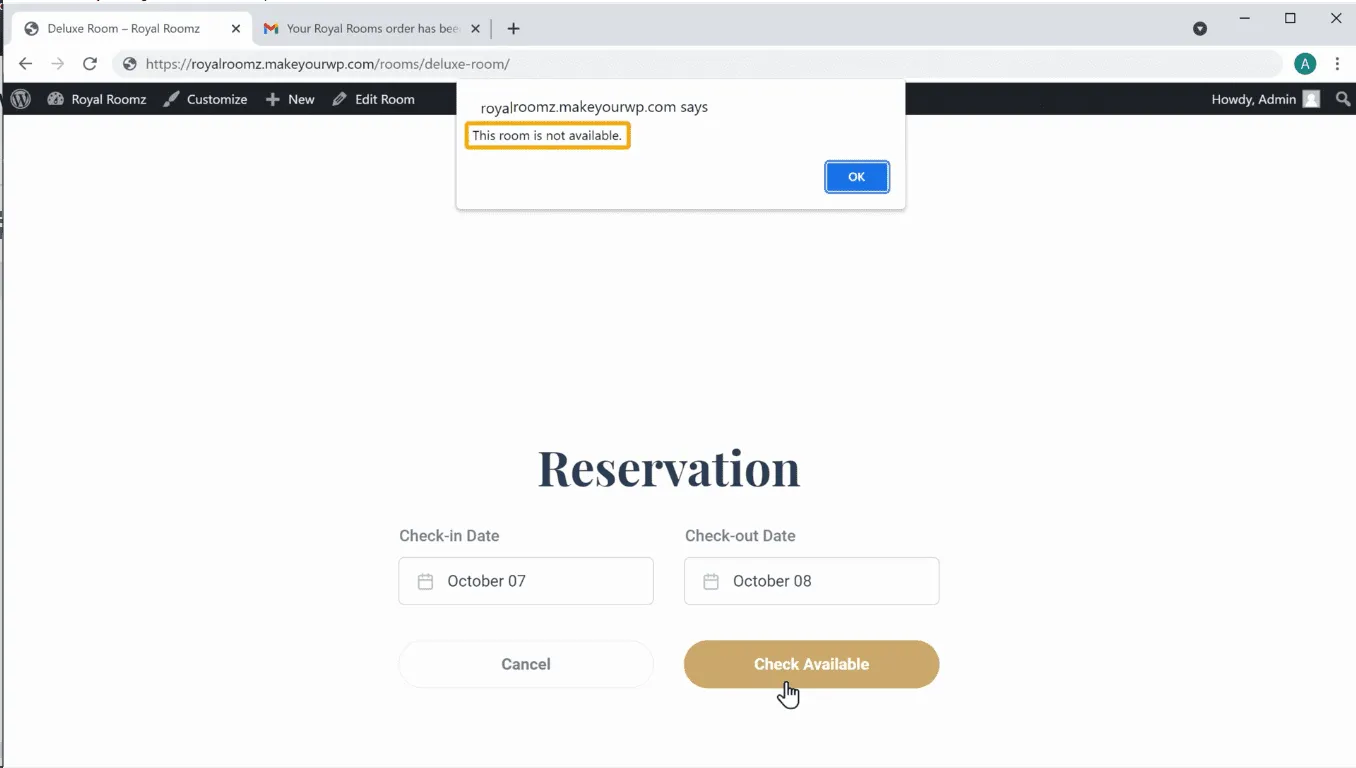
To book the room, you can select some other dates if you want. Once you choose the Check-in and check-out date you can click ‘check available’. You can see that the room is available on the date you selected. Next, select the number of rooms you want, click ‘add to cart’, and click ‘proceed to ‘checkout’.
You can now fill up your details, and if you scroll down, you can see that you have a ‘pay on arrival’ option.
Instead of letting them pay at the hotel, you need to set up a payment method if you want your customers to make payments on your site.
Next, let’s see how you can set up your payment method. So to set it up, you can follow these three steps.
Just click here, and it will take you to this site.
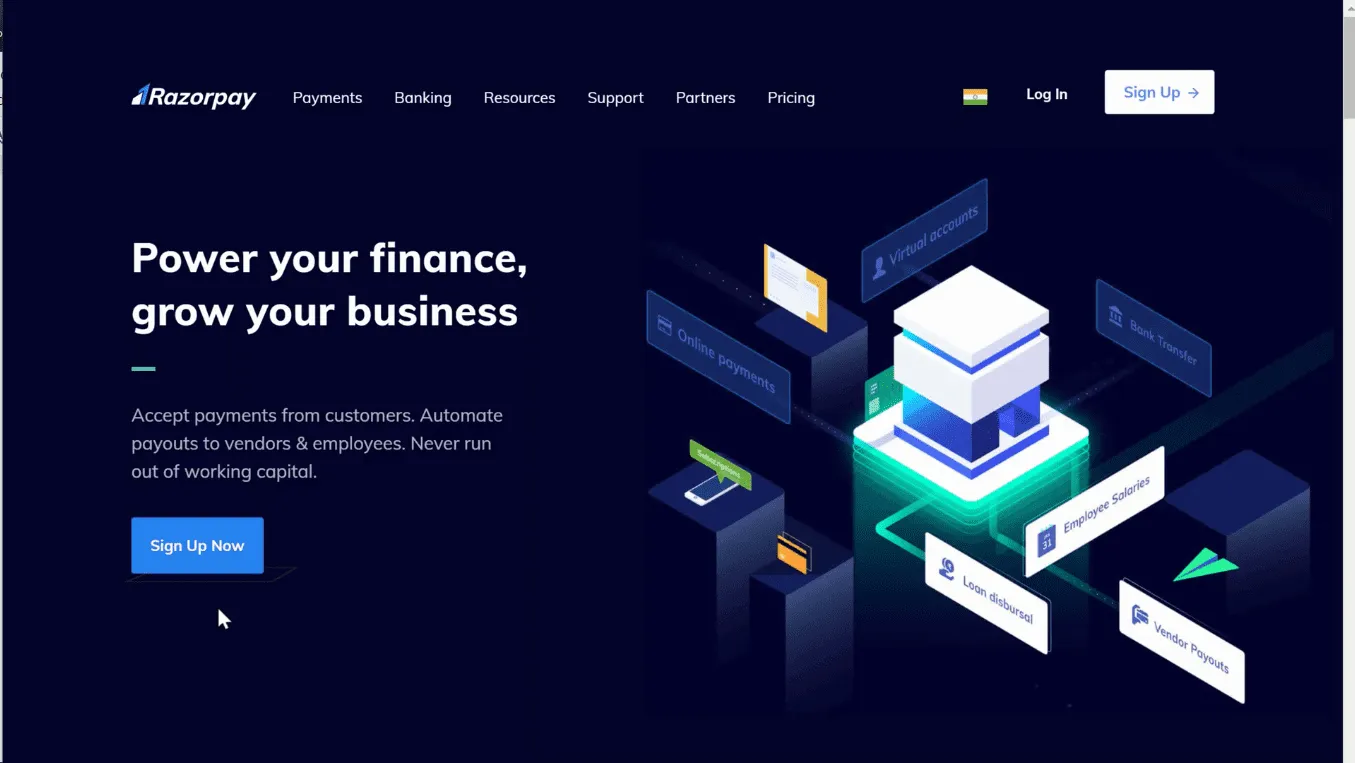
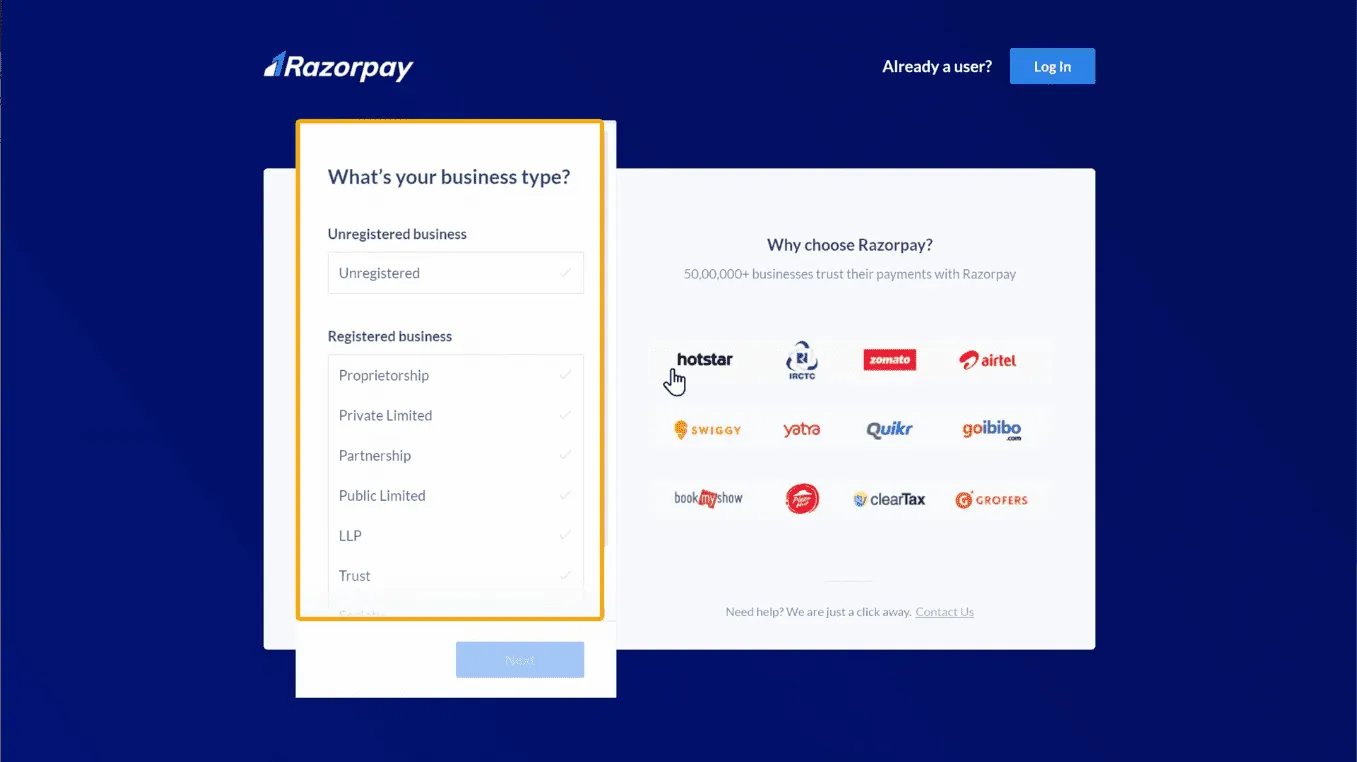
Click ‘signup’, and you need to enter your email address to create your account. You can also use your google account to create an account in Razorpay. Now, here you need to choose whether your business is registered or not.
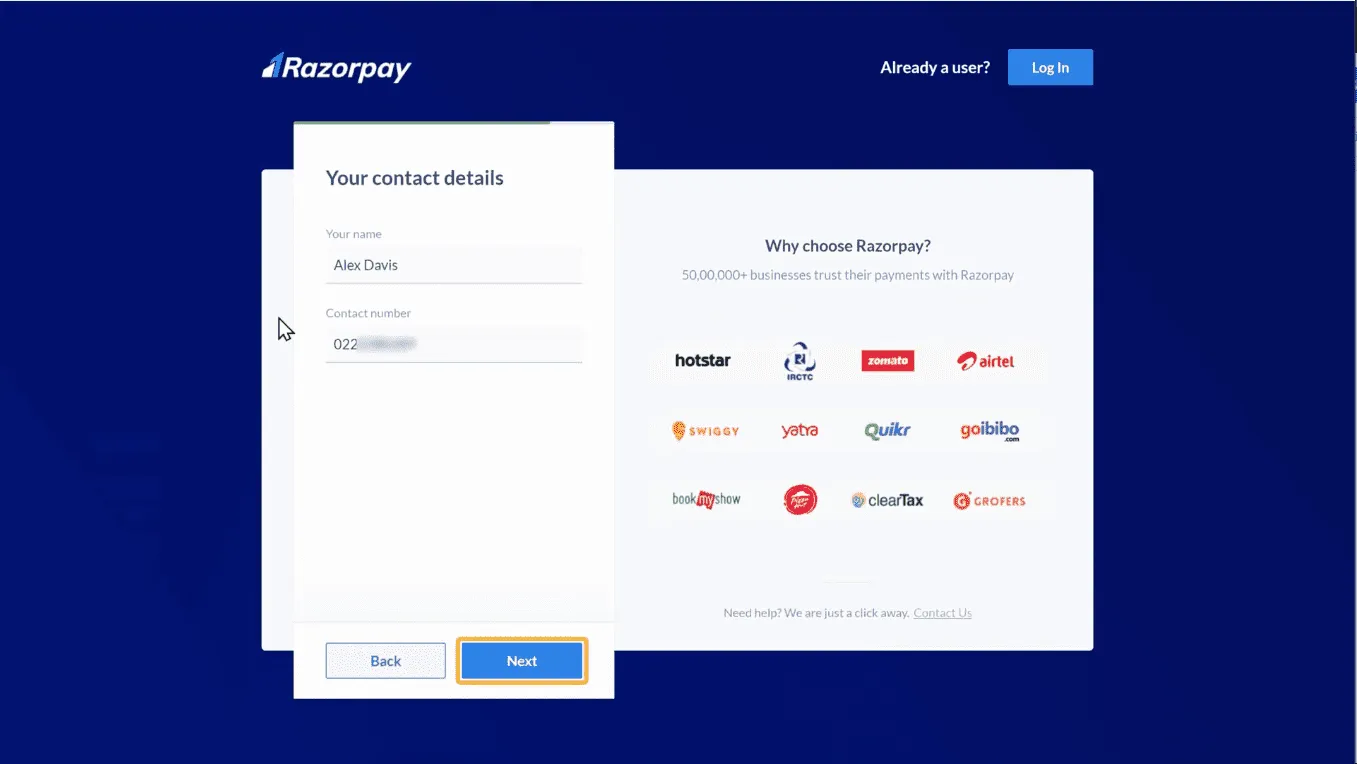
Once you’ve selected your business type, click next. Enter your name and contact number here and click ‘Next’.
It will take you to your Razorpay dashboard. So now you have successfully created an account in Razorpay, and you can now go to the next step.
To accept payments from your customers, you need to activate your razorpay account. So to activate the account, just click ‘Activate’, and you will get this KYC Form.
Next, you need to fill up these details and submit them to activate your account. So fill in the details such as Type, category, description, order value, how you would like to accept payments from your customers, and finally, your website URL. Once you have done that, click ‘Save & Next’.

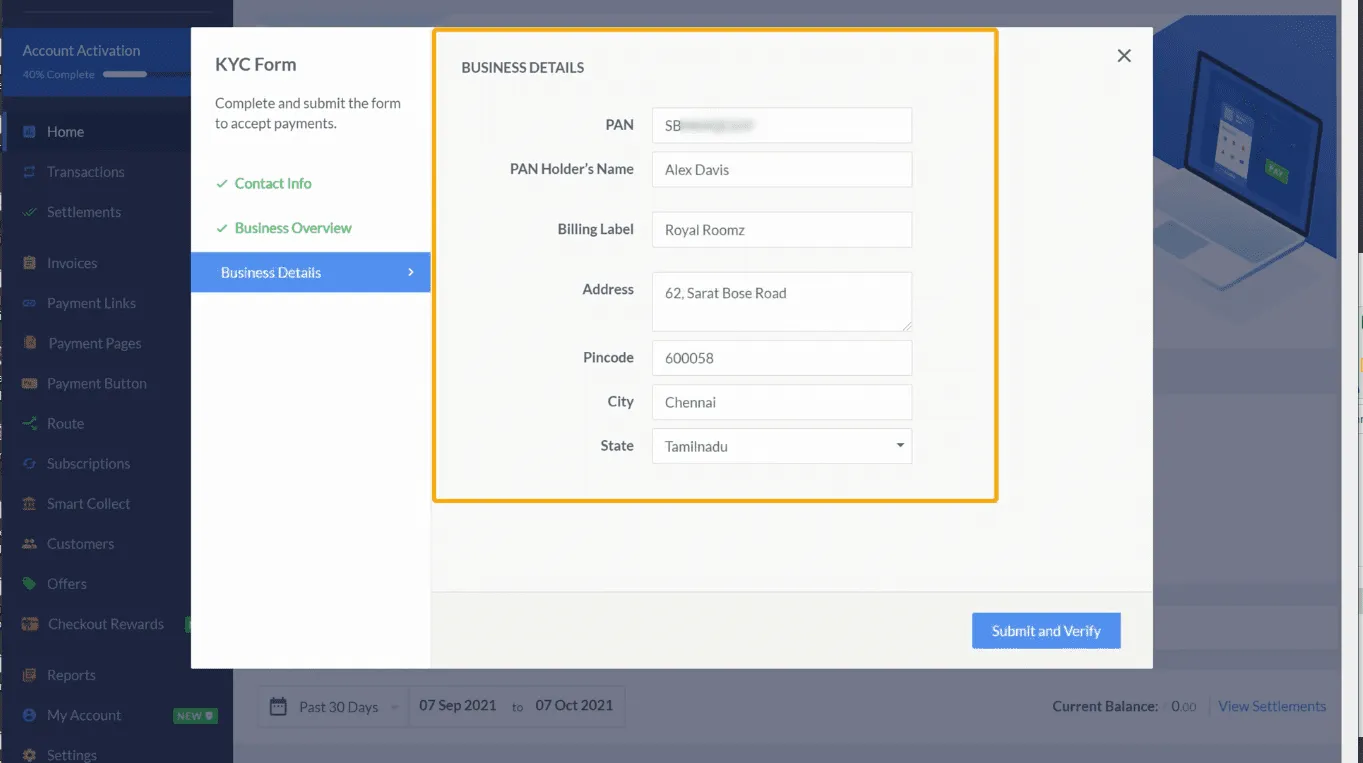
The next step is to enter your business details such as PAN, your business name, website name, address etc. Then, click, ‘Submit and verify’ once you fill in the details.
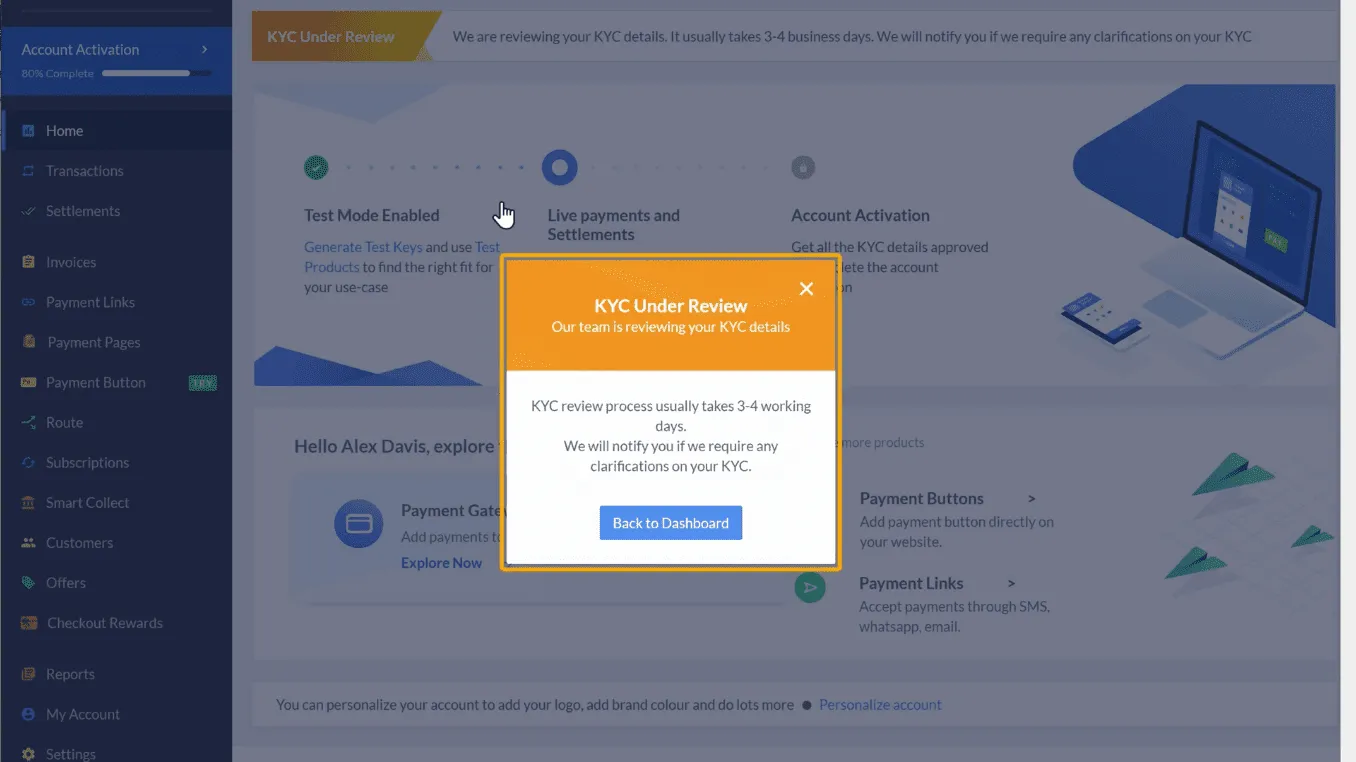
And then you will get this box. So now you need to complete this KYC Form, to accept the payments from your customers. So to complete it, click on ‘Complete KYC’.

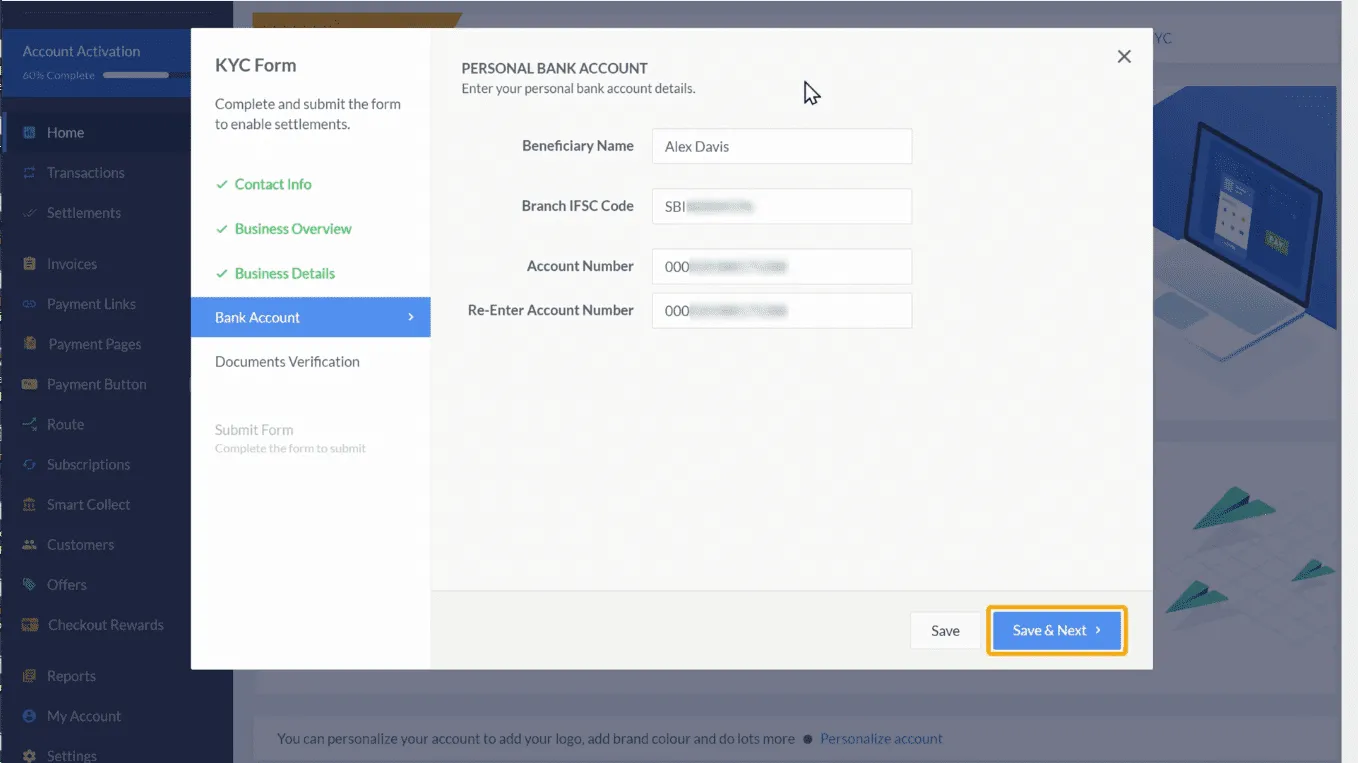
Now, here you need to enter your bank details, where you want to receive your payments. When a customer makes a payment on your site, you will receive payment to this bank account. Once you fill in these details, click ‘Save & Next’.
And finally, here you need to upload your documents for the address proof. So to upload the document, just click here and select and upload your document by drag and drop.
In the same way, you can upload any other document. Once you are done, just click ‘Submit Form’ and here again click on the checkbox and then on ‘Submit Form’. You have successfully submitted the KYC form. It will be verified within 3 to 4 working days.
So after four days, if you go back to your account, you can see that your Razorpay account has been activated.
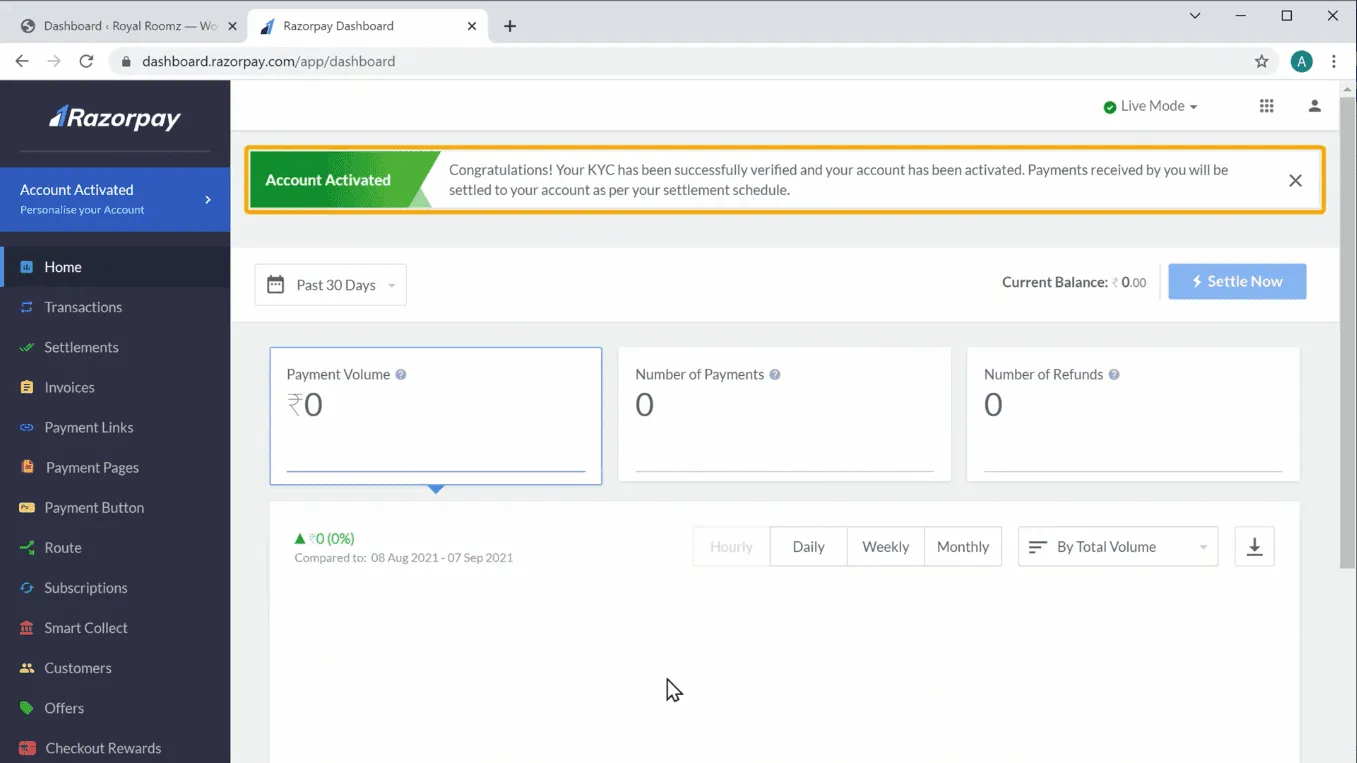
So now you will be able to accept payments from your customers, and the amount will be transferred to your bank account directly.
You can now go to the final step.
Now to let your customers make a payment on your site, you need to connect your Razorpay account with your website.
Let’s go to your wordpress dashboard, and go to ‘Woocommerce’. Click ‘settings’ and then click ‘payments’. Disable the ‘cash on delivery’ option and then click on Razorpay. It will take you to this tab, where you need to enable this option and API keys to connect the Razorpay account with your website.
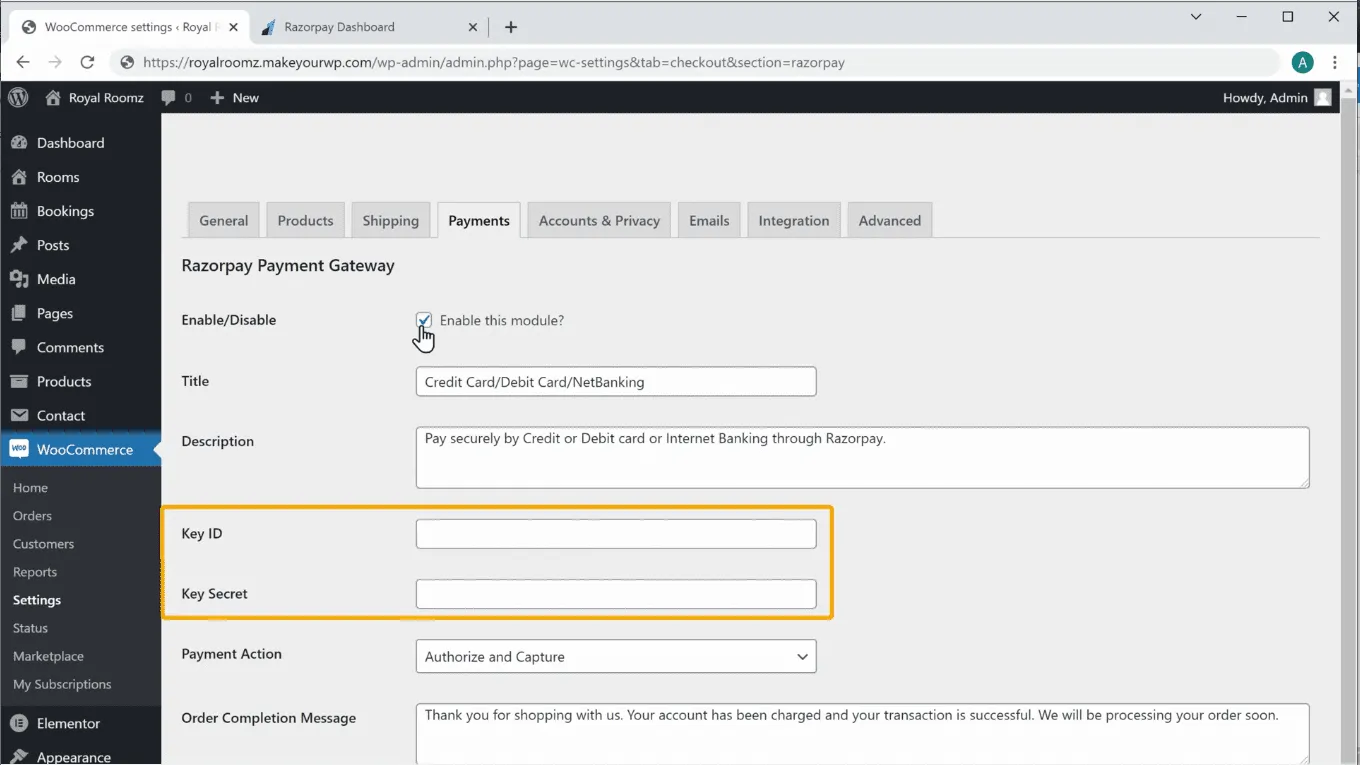
So to get these details, go to your Razorpay account and click ‘settings’. Now click ‘API keys’ and click ‘Generate live key’.
Now you need to copy these details and paste them on your site. Once you’ve entered these details, just scroll down and click ‘save changes.
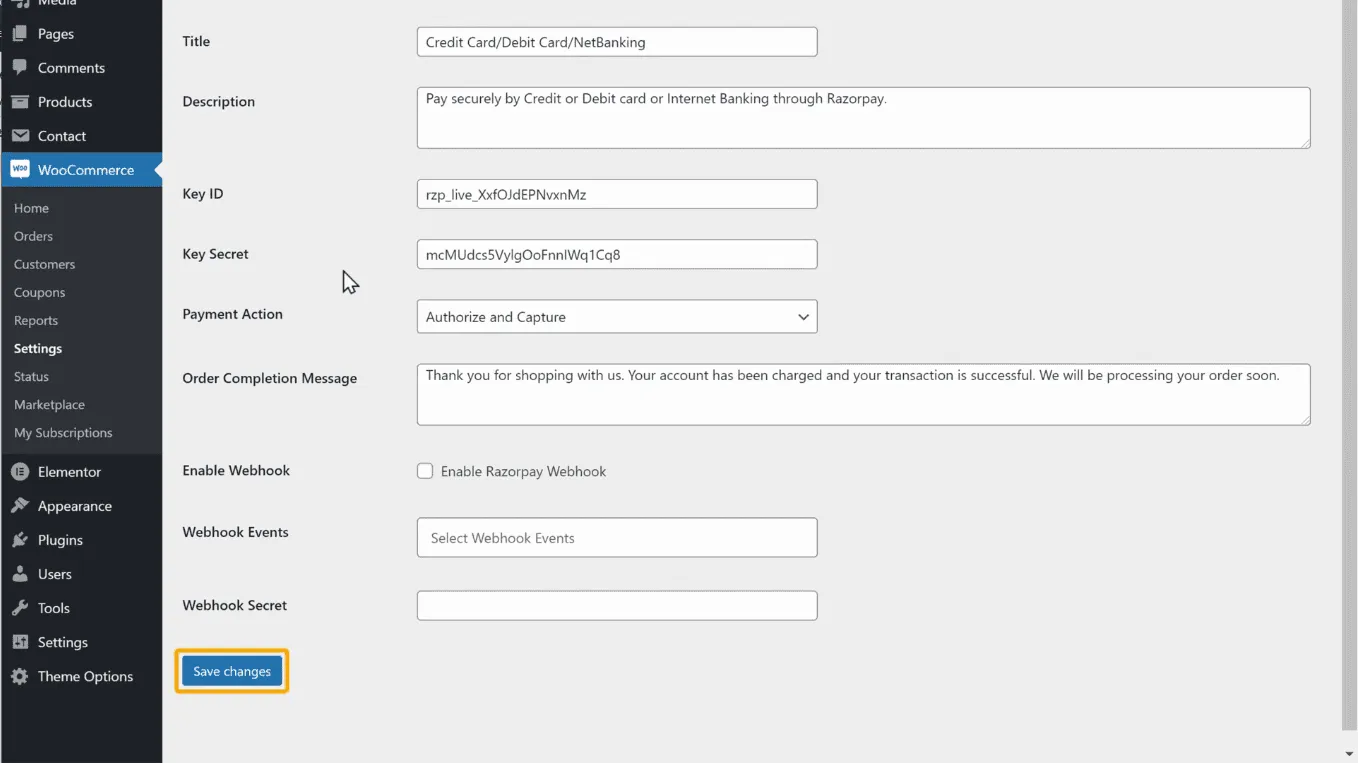
Your Razorpay account will be connected with your website, and your customers will be able to make payments on your site using Razorpay.
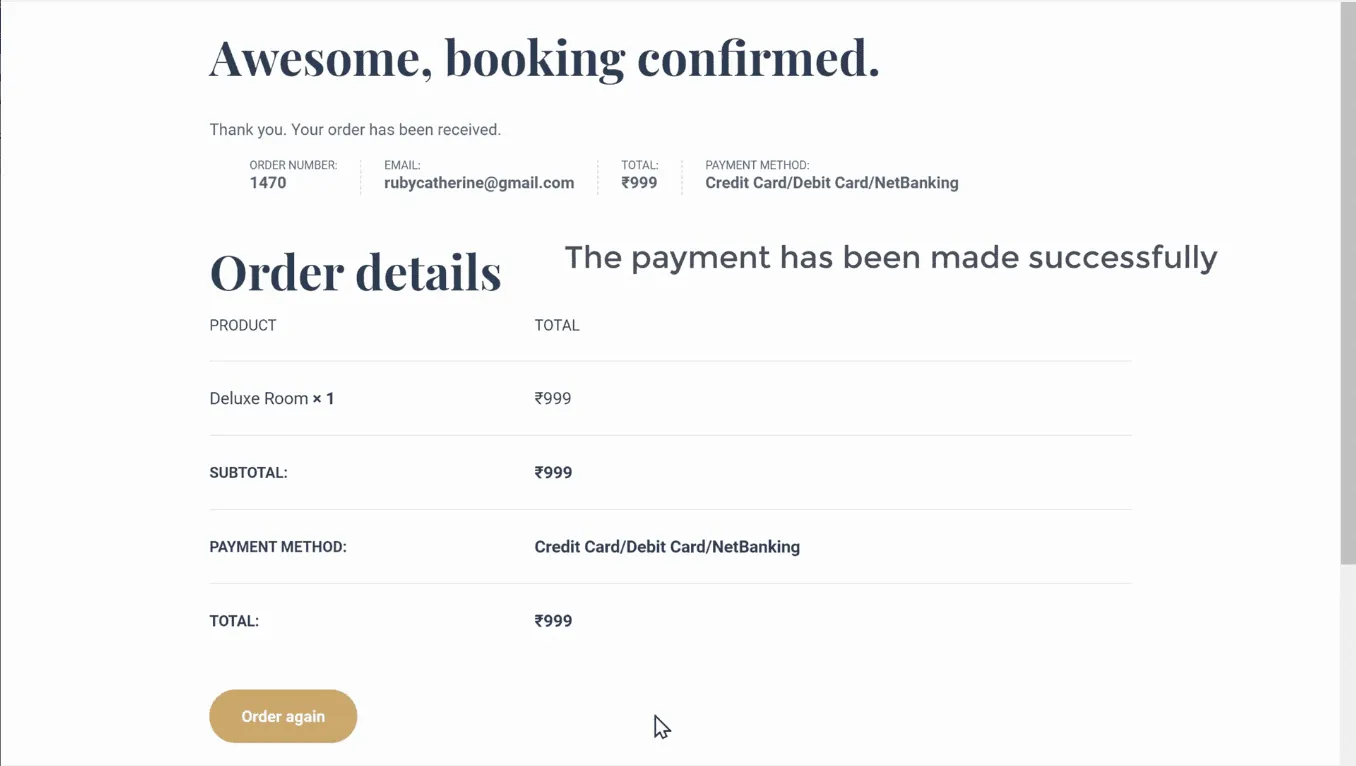
So to check how it works, let’s go to the checkout page and click ‘refresh’. You can see that the Razorpay payment method has been added, and customers can make payments on your site.
So if your customer clicks ‘place order’, they will get different options to make payment. Once they make a payment, you can see that an order has been placed successfully.
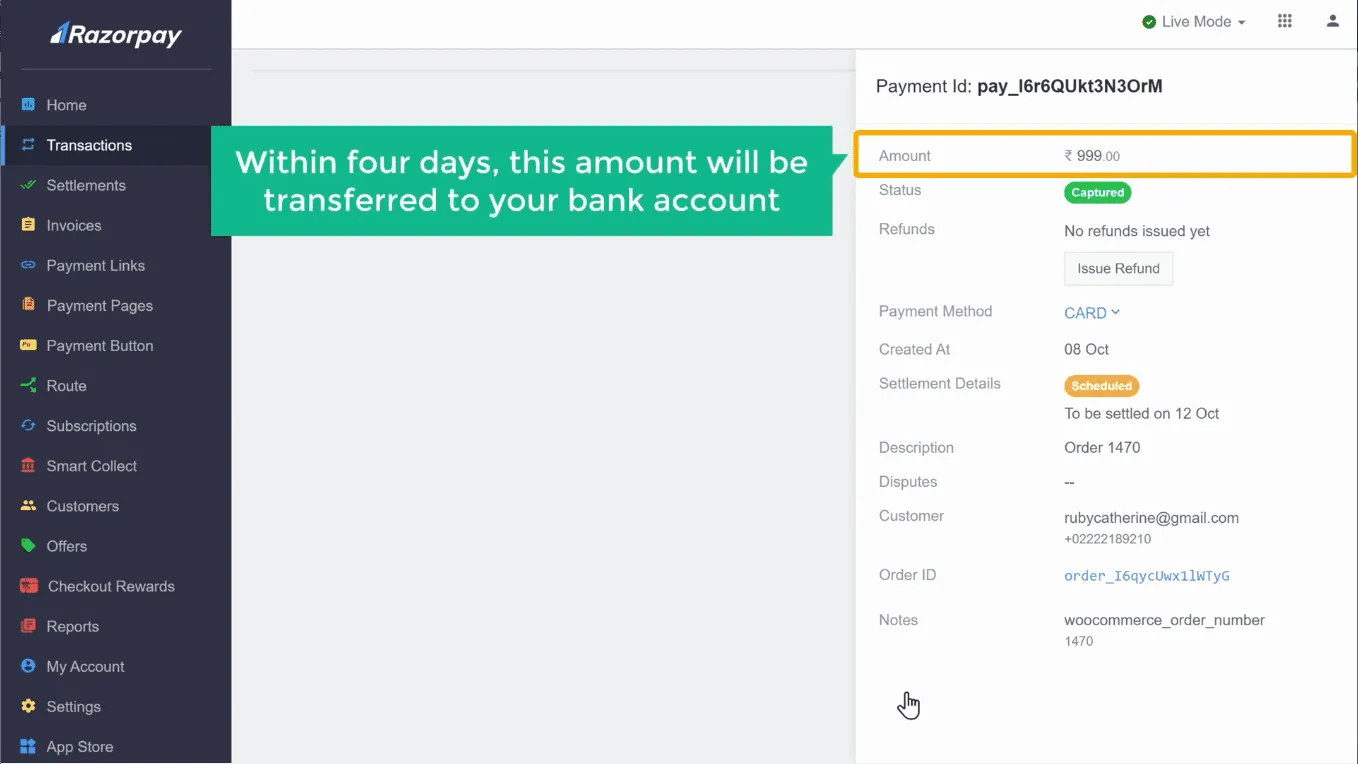
Once the order has been placed, you will receive two emails. The first email is from WordPress, which has the order details, and the second one is from Razorpay with the details of the payment. And within four days, this amount will be transferred to your bank account.
Now, after four days, if you open your inbox, you can see that you have got an email from Razorpay which says the payment has been transferred to your bank account.
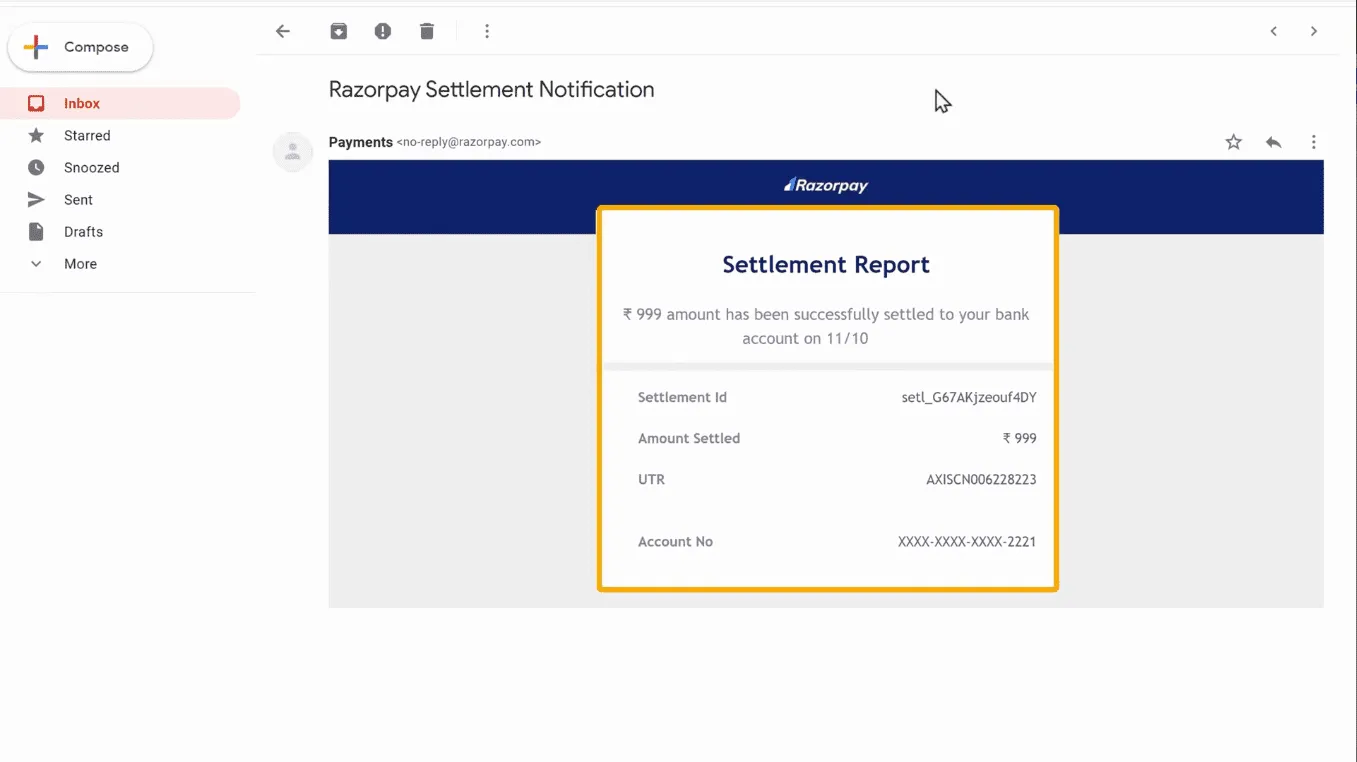
Now you know how your customer can pay you online and book the room.
Okay!
So now, instead of getting the full payment online, what if you want to get some money in advance and get the balance payment when the customers arrive at the hotel?
Let’s go to your dashboard and click ‘woo commerce’ and ‘coupons’ to get the payment in advance. Then click ‘add coupon’ and enter any name you want. Then select the percentage discount you want your customers to pay in advance. So a per cent of the amount can be spent on your site, and the balance per cent of the amount they can pay during the check-in time.
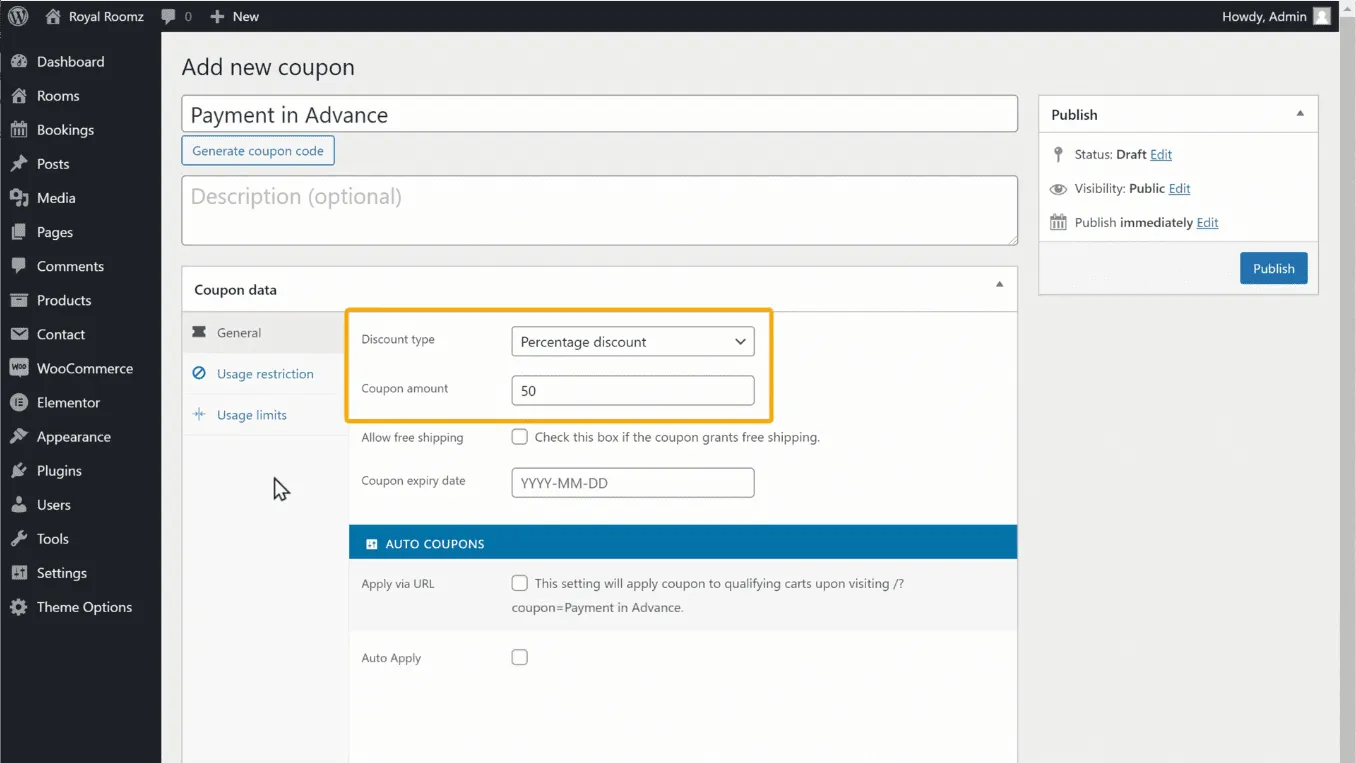
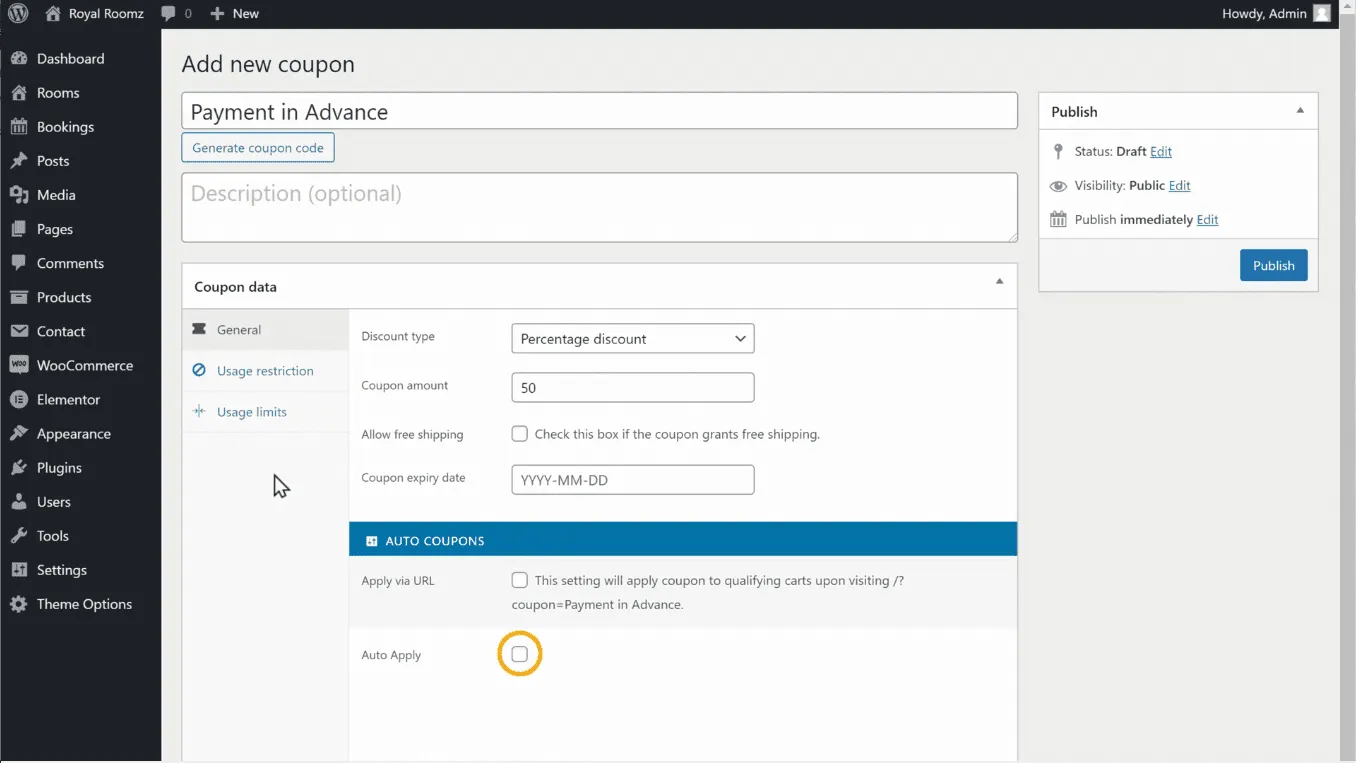
Now, to automatically show the ‘Payment in advance’ option when the customers book the room, click here and then on ok. So it will be applied automatically on all bookings.
Now you can enter any name you want here and once you are done click ‘publish’,
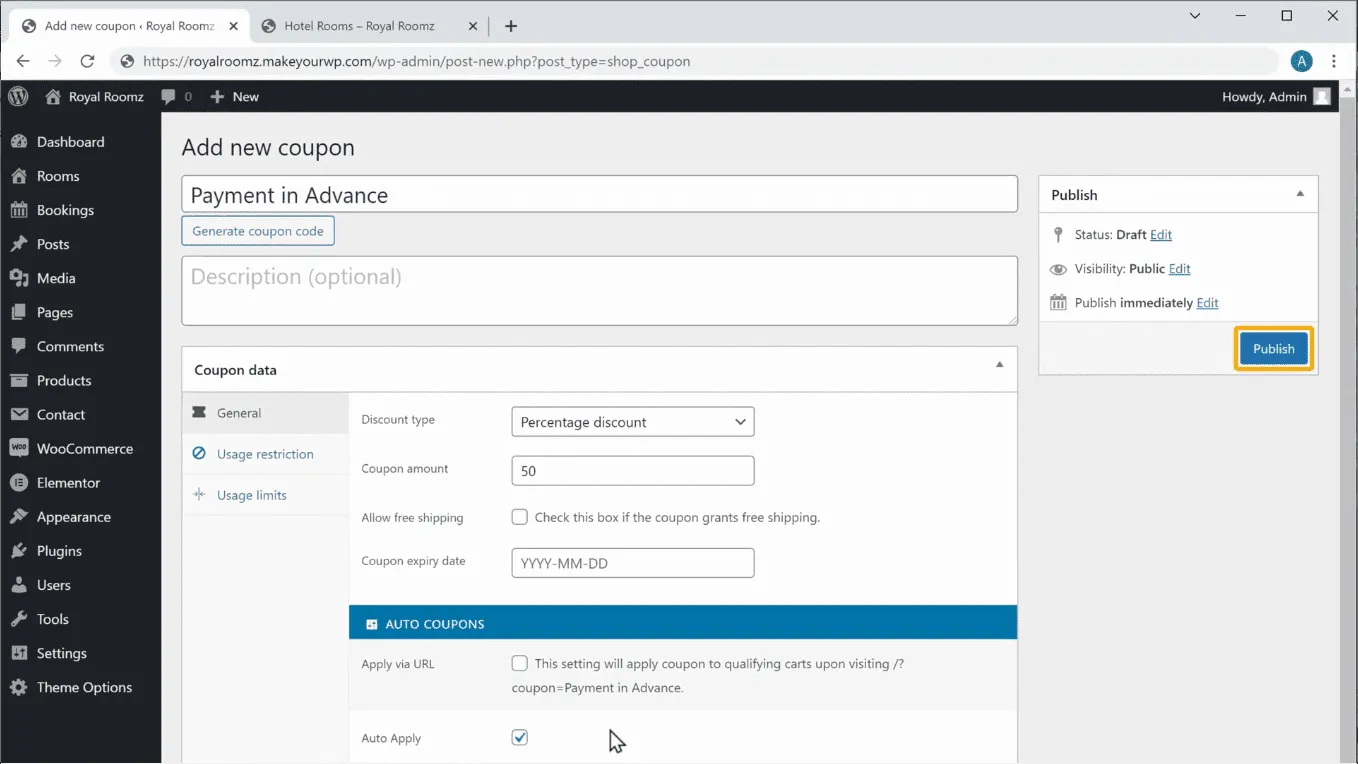
The payment in advance option will be added to your site.
So go to your site, click on this room, and click ‘reservation’. Select the “Check-in and Check-out date” and click ‘check available’. Select the number of rooms you want and click ‘add to cart’. You can see that the payment in advance has been added.
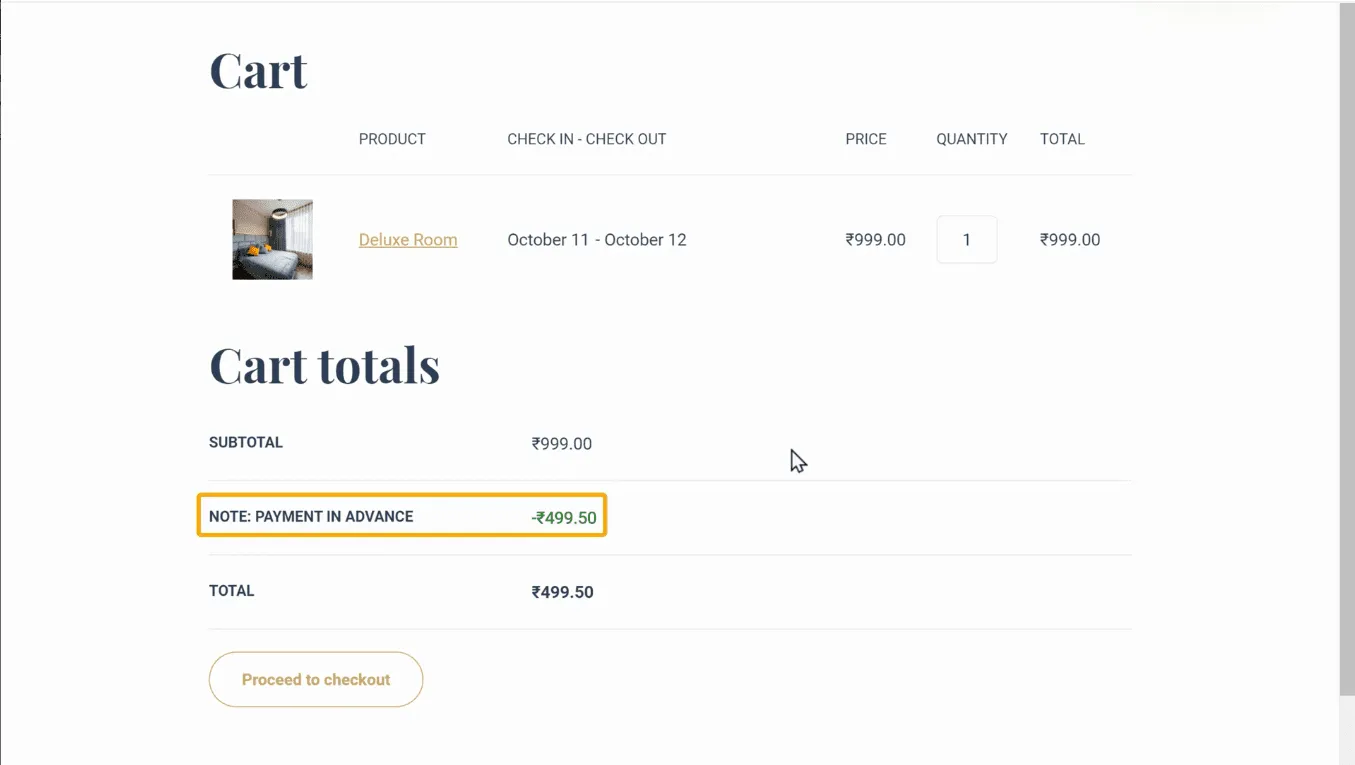
So this is how you can get the money in advance from your customers.
Okay!
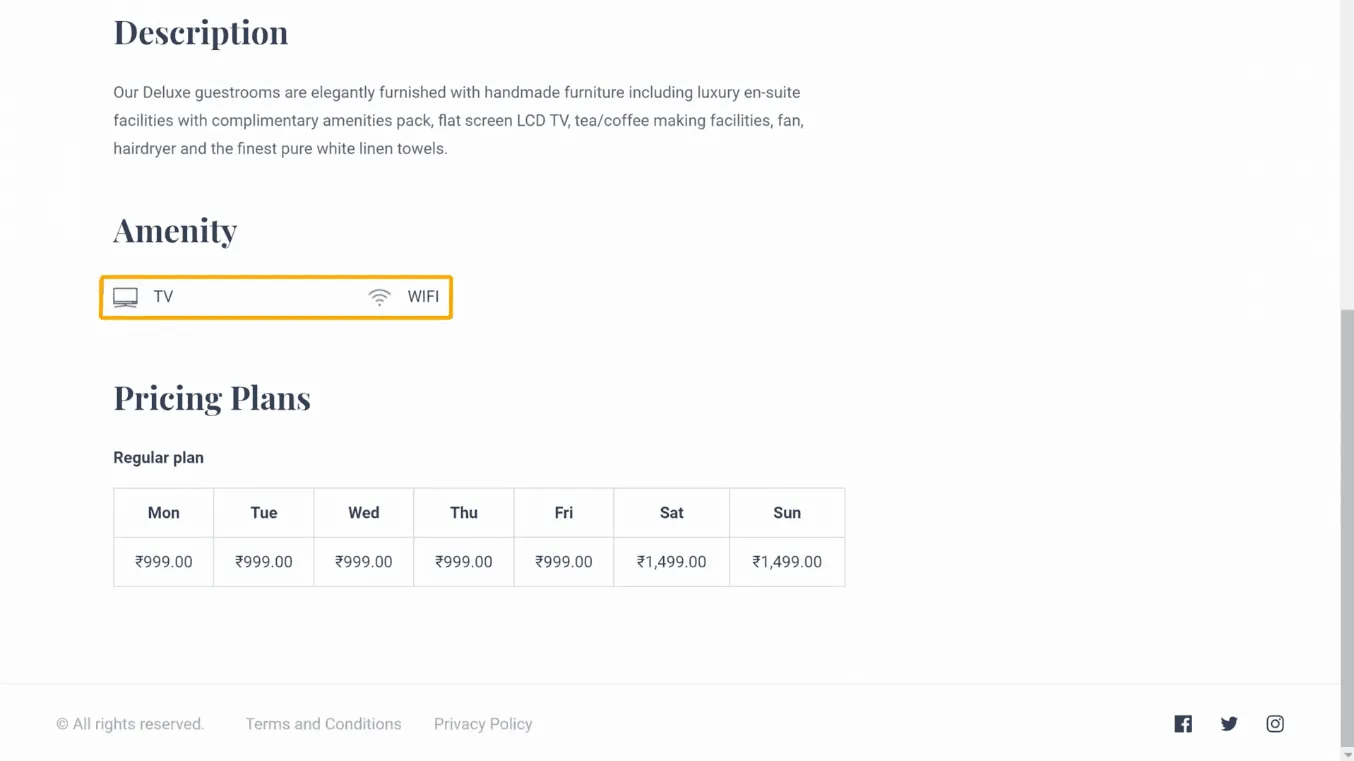
Now let’s see how you can add the free facilities/amenities to your room like TV, Gym, Wifi, etc.
So to add the facilities, let’s go to your site and click on this room. Right now you can see that you don’t have any facilities. So to add that, just click ‘edit room’, and it will take you to this page. Now scroll down, and in “Room extra options”, click ‘amenity’ and click “Add row”.
The new row/field gets added, and you can add the facilities now. First, give the name of the benefit and an image. Then, in the same way, you can add any facility you want. Once you are done, scroll up and click ‘update’.
Let’s go to your site, and go to ‘rooms. Now click on the room and scroll down. You can see that the facilities have been added and your customers need not pay for any of these facilities.
Okay!
Next let’s see how you can add paid services/extra options for your customers, like cab service, laundry service, etc. So to add the services, go to your dashboard and go to ‘bookings’. Now click ‘extra options’ and click ‘Add new’. Next, enter the name of the service you want to add, and once you are done, click ‘publish’.
In the same way, you can add any service you want.
Now to make these services available to your customers, you need to add these services to your room.
So to do that, just go to ‘rooms’ and click edit here. Now scroll down and add the additional services by just clicking here. Once you select them, scroll up and click ‘update’.
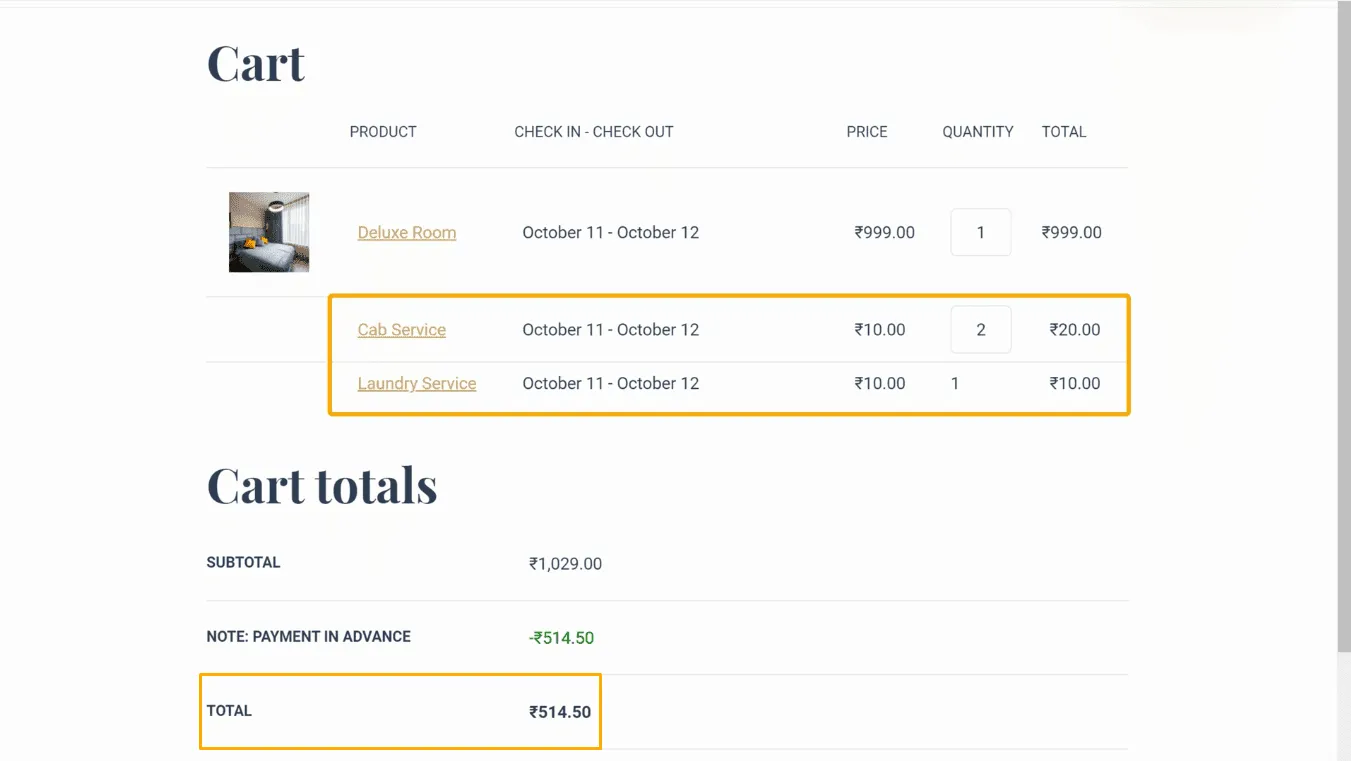
Now let’s check that by trying to book the room on your site. So go to ‘room’ and click refresh. Now click ‘Reservation’ and select ‘Check-in and Check-out date. Next, click ‘check available’, and you can see the paid services that you just added. Next, select the number of rooms and select the service you want. Once you are done, click ‘add to cart’.

You can see that the paid services have been added to your cart and you can see the total amount.
So now you have successfully created a complete hotel booking website.
If you go to your website, you can see that your website address ends with makeyourwp.com.
Instead of this, if you want your website to have a simple address like “royalroomz.com” that looks more professional, you can get your domain name for your site. This brings us to the next part of the article.
A domain name is the name of your site and hosting stores all your site files in one place. Therefore, having a good name is essential as it represents your business online. Take your time and weigh up multiple options before you choose one.
You need to choose a good hosting provider that offers excellent performance, automated backups, top-notch security, and more. You already have hosting on MakeYourWP for your site, and you will see how you can get a unique domain for your hotel booking website.
A: Enter any name/domain that you want for your website
To get your domain name, just click on this link, and it will take you to webspacekit.com.

Now, enter any name you want for your website and click ‘search’. You can see that this domain name is available. To get this name for your website, just click ‘Add to cart’ and click ‘continue’.
It will ask you to select a hosting plan. As you already have hosting for your site on MakeYourWP, let’s click ‘skip’. And it will take you to this cart page. You can see that you are getting your domain for one year, and after one year, you need to renew your domain to keep using it.

So to get this domain, fill up these details and enter your payment details. Click
‘Order now’. If you click here, you can see that you have your domain.
B: Connect this name/domain to your hotel booking website.
So to connect this domain, you can do two steps.
Step 3.1: Add a domain to your website
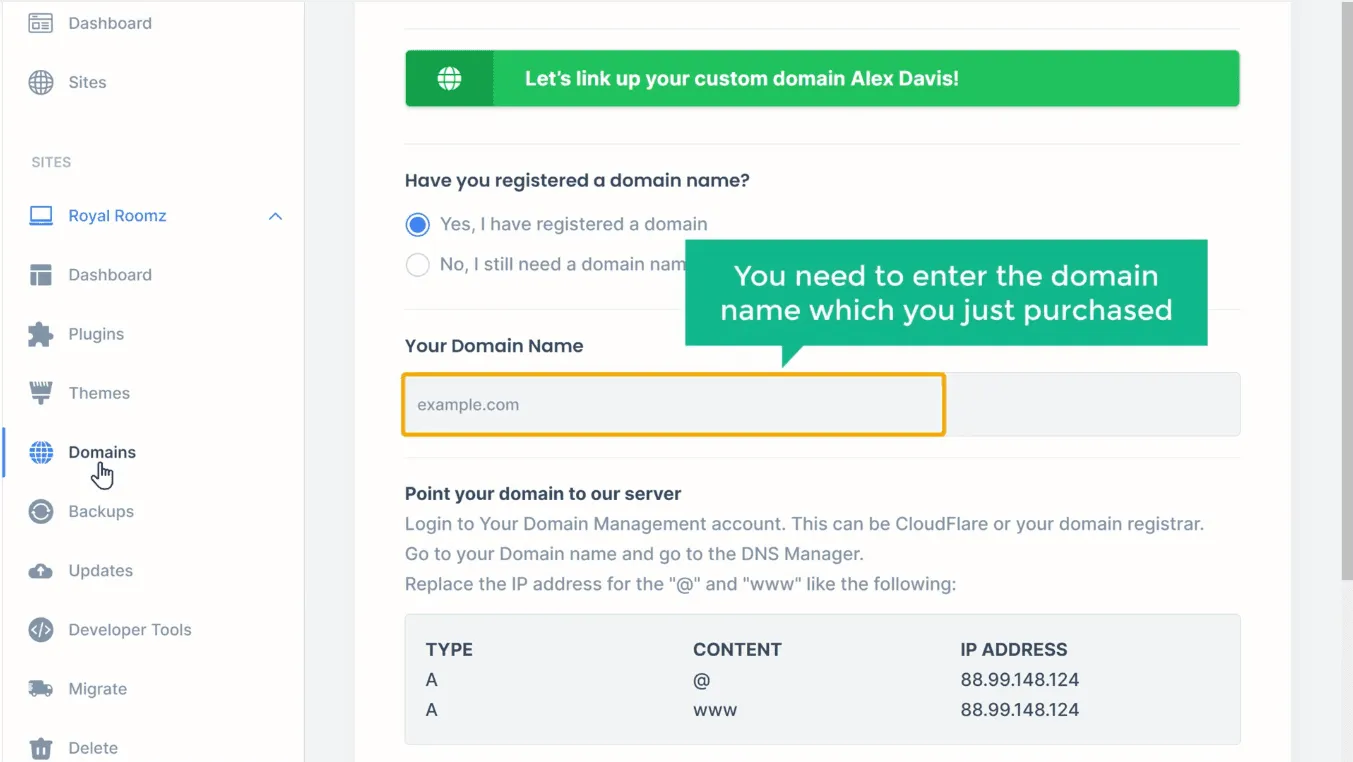
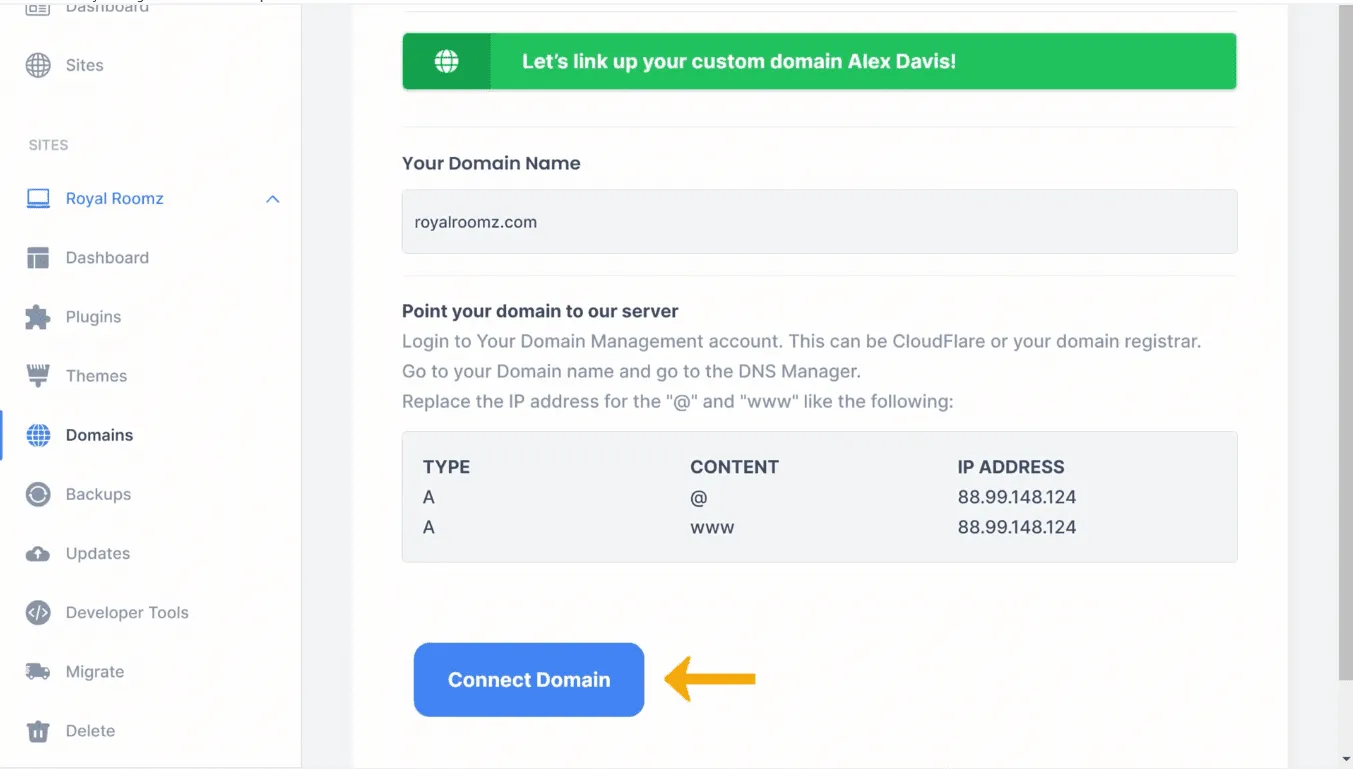
Go to makeyourwp.com, and then go to domains. Here, you need to enter the domain name which you purchased.
Once you’ve entered your domain, let’s go to the final step.
Step 3.2: Add this IP address to your domain.
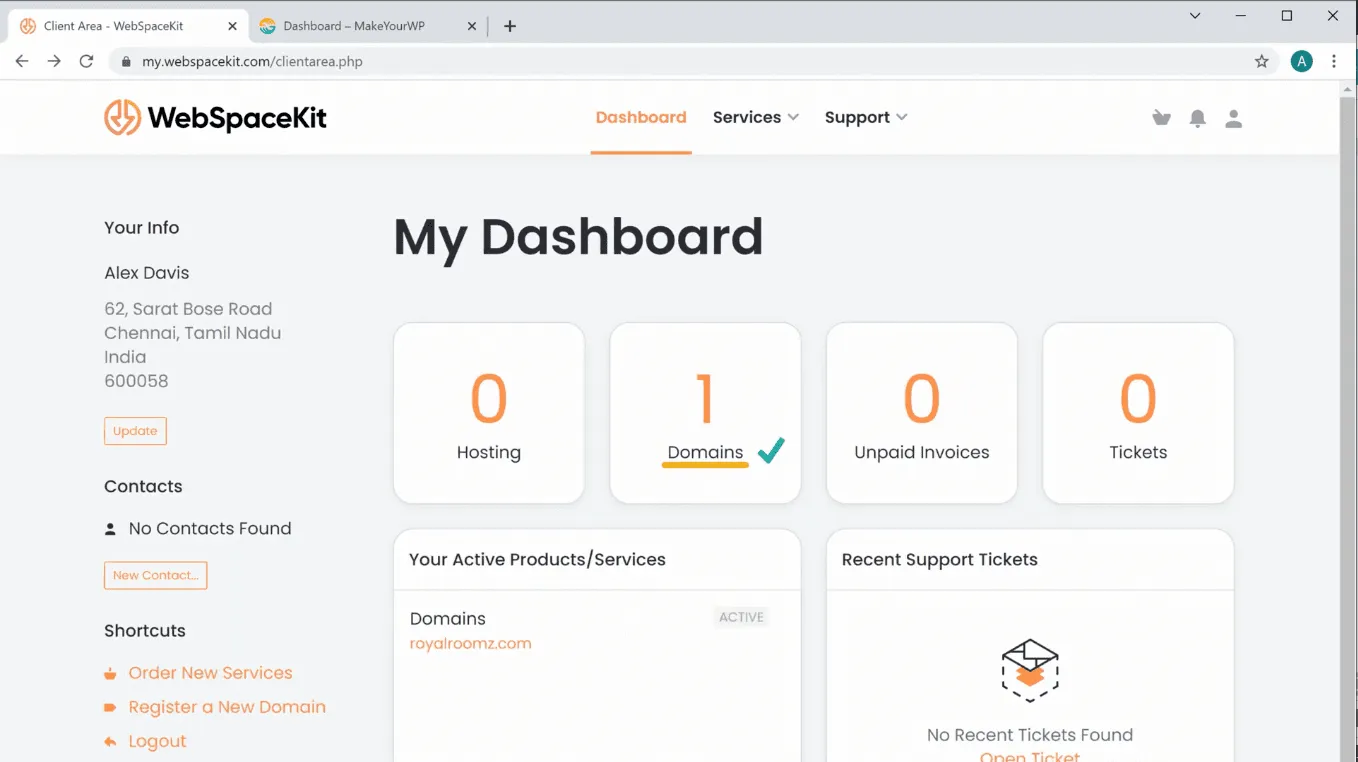
So to add the IP address to your domain, Let’s go to your WebSpaceKit dashboard and click on domains.
Now select the domain, which you purchased and then click ‘Manage DNS’. Next to the ‘A’ record, you need to add your IP address shown here. So let’s go back to this page, copy this IP Address, then come back to your domain and paste the IP address here. Once you are done, click ‘save changes’.
Now go back to ‘MakeYourWP’ and click connect domain.
Now open a new tab and type your new domain name, royalroomz.com. You can see that you’ve got your hotel booking website which you just created. So now, your visitors & customers can go to your domain name to access your site and your rooms.
Now you have a complete hotel booking website.
In the future, let’s say you have got an update to your theme and want to update your theme; you can do that easily, which brings us to the next step.
C: Update to your theme
Let’s go to your wordpress dashboard and go to ‘appearance’. Now click ‘themes’, and here you can see that a new version of your theme is available. If you want to get the latest version just click here.
A new tab will be open and now if you go to this tab. You can purchase the latest version of your theme to get the latest updates.
Now, if you don’t want to update your theme, you can be in the current version, and your website will remain the same, and all your content will be safe.
Once you have got the domain for your site, let’s go to the final part of this article.
To edit any page on your site, you just have to go to that page and click edit with elementor, and it will take you to this editing section.
A: Change the text
If you want to change the text here on the homepage, just select this and enter your text. In the same way, you can edit any text you want on this page.
B: Change the background image
If you want to change this background image, just click here. Now drag and drop the image from your computer. As you can see, the background image has been changed.
In the same way, you can change any image you want.
Now let’s say you want to change this image; just click on it and scroll down here. Then click images and then drag and drop the image from your computer. As you can see, the image has been changed.
Once you are done with all the changes, to save your changes, click ‘update’. If you go to your site and click ‘refresh’. You can see that all the changes have been applied.
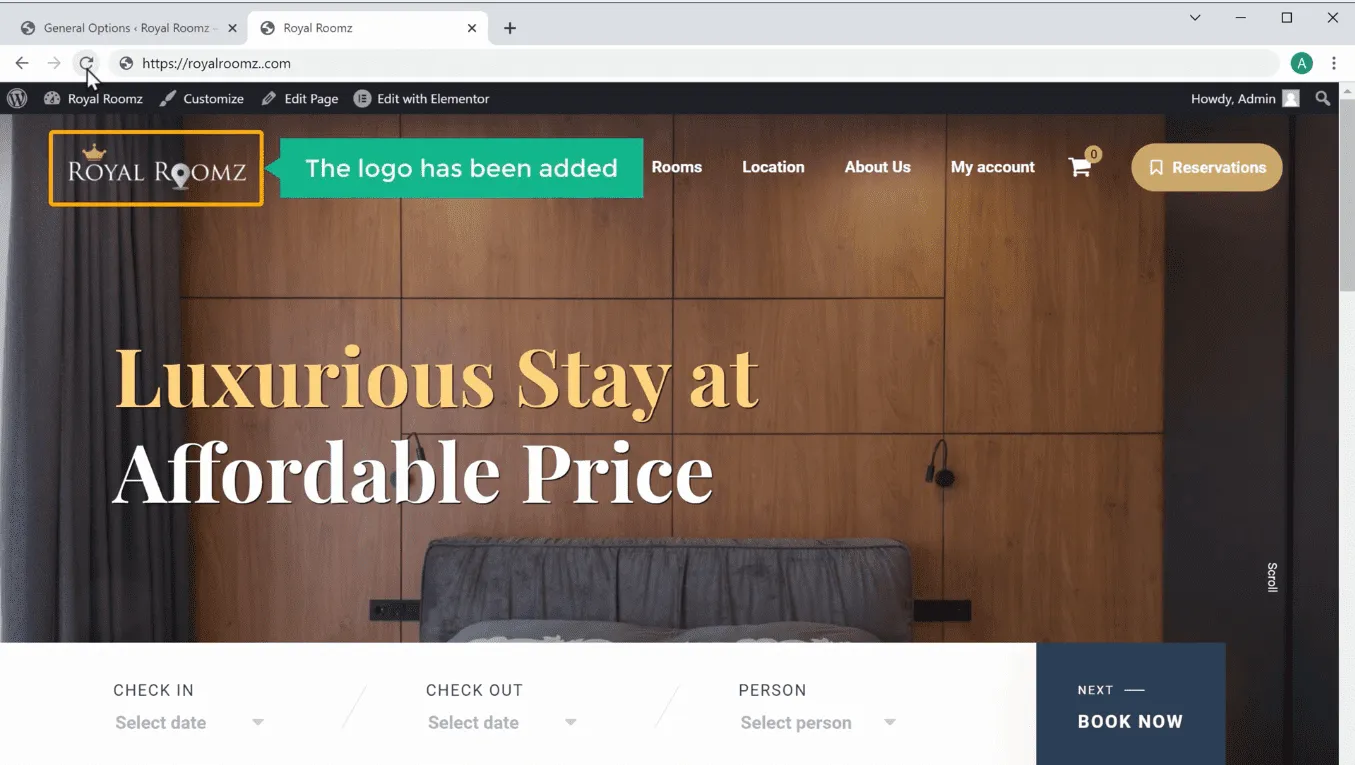
C: Add your logo
Just go to your dashboard, and click ‘theme options’. You will get this page. Now go to the header, and to remove the default logo from here, just click here. Now click ‘Add image’ and drag and drop the logo from your computer. The logo will be added. To save the changes, click ‘update’.
If you go back to your site and click ‘refresh’, you can see that the logo has been added.
So this is how you can edit the content of your website.
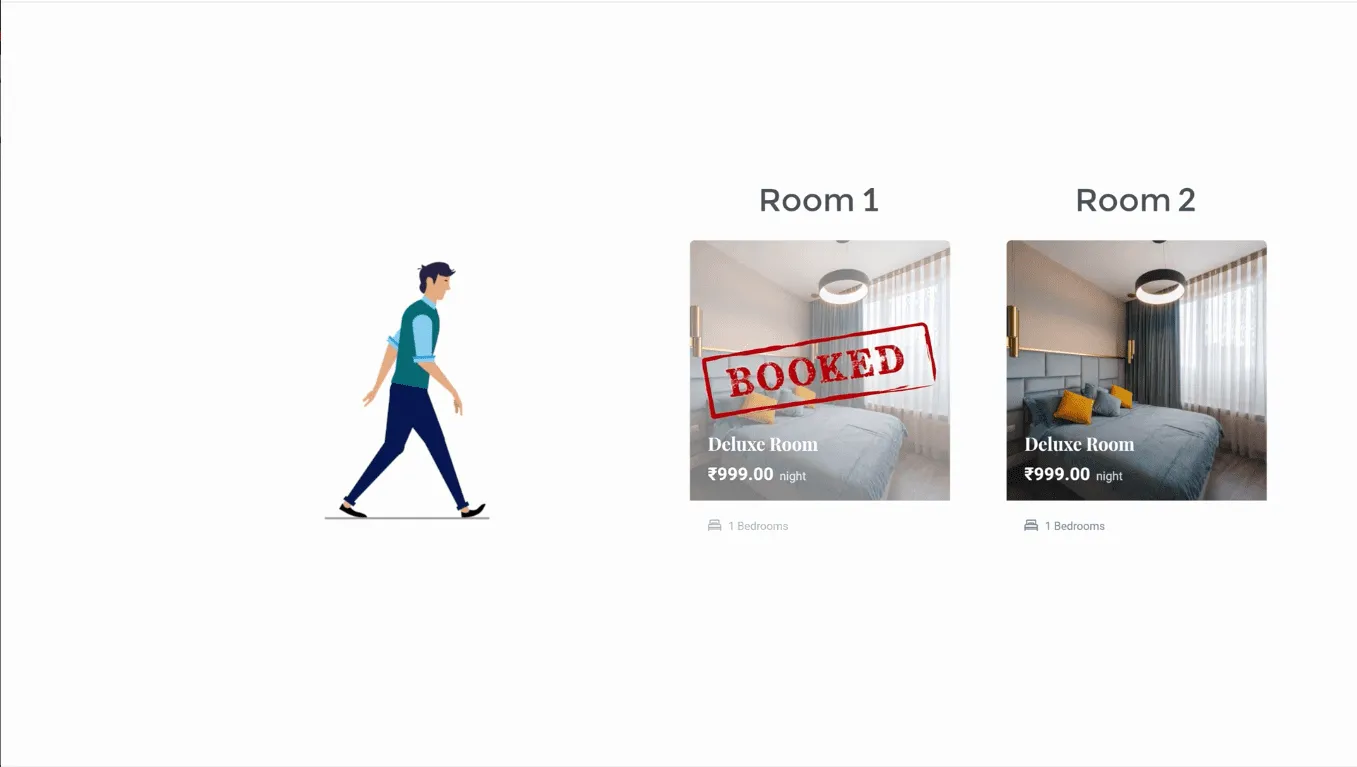
Let’s say you have two rooms, and a customer has directly visited your hotel and booked a room. So now, if you go to your site and try booking a room, you can see that you still have two rooms available.
How will you let others know that a room has already been booked?
So to do that, you need to add that booking to your site. Go to your dashboard, and go to ‘ bookings’. Now click on ‘bookings’. Now here you will find all the bookings you have received.
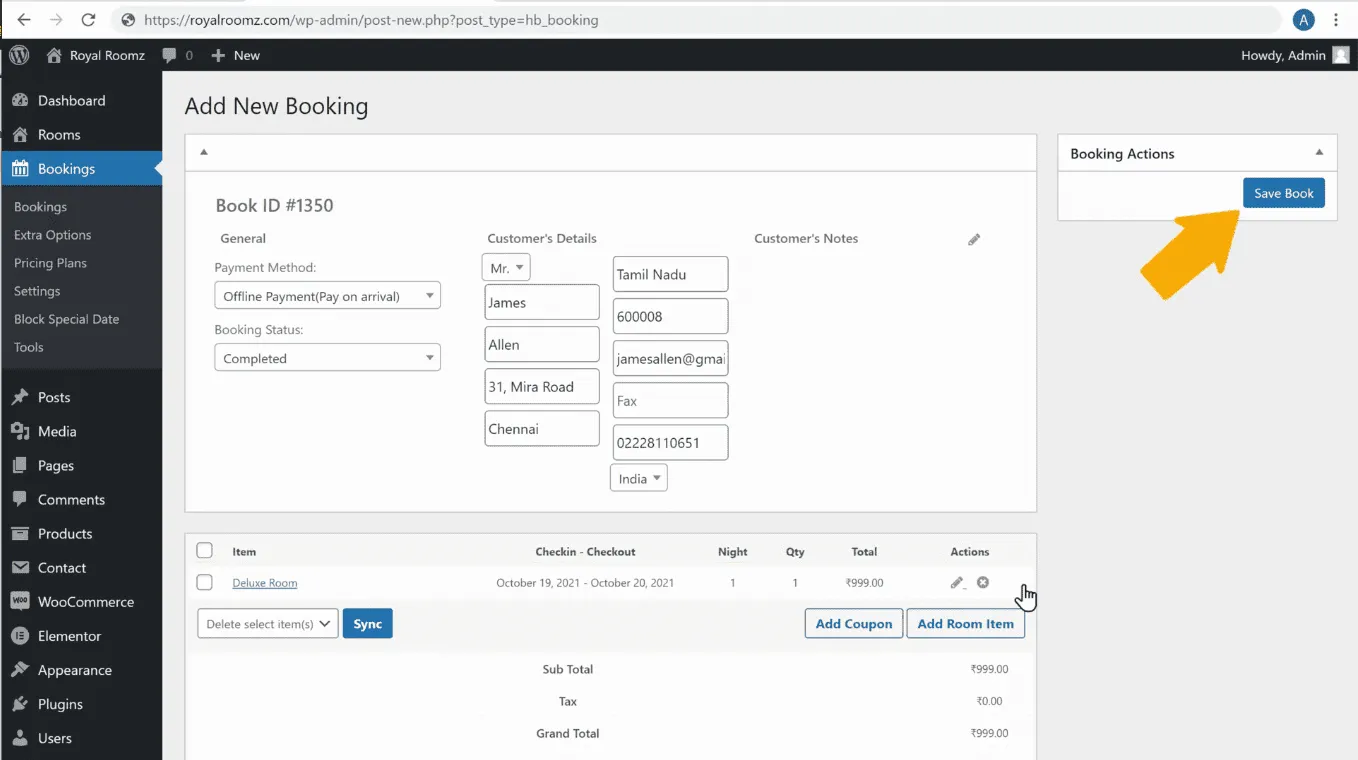
To add the booking you have received at your hotel, click ‘add new’, and you will get this page. Now click and select how your customer has made the payment. And then click to choose the booking status. Finally, just select ‘completed’ and enter the customer details if the booking is completed.
Once you are done, you need to add the room which your customer has selected. Click ‘Add room item’ if the booking is completed and a dialog box opens. Choose the room type, select the Check-in and Check-out date, and click ‘check available’.
Now you need to select the number of rooms they have chosen. Finally, click ‘ádd’ if the booking is completed. Once you have added the booking, click ‘save book’, and the room will be booked for your customer.
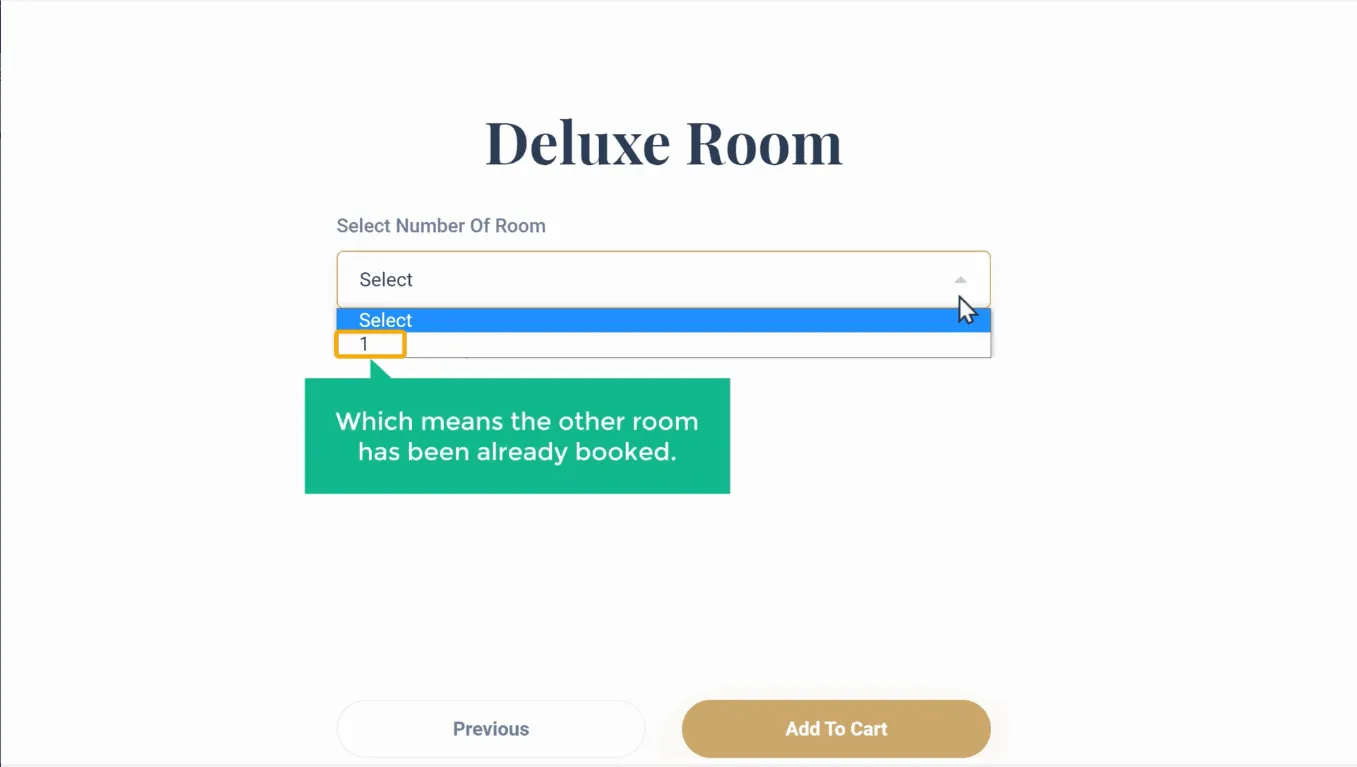
Now, let’s try to book the same room on the same date from your site. So just go to your site, and click refresh. Now click reservation and select the same Check-in and Check-out date. Finally, click check available, and you can see that only one room is available, which means the other room has been already booked.
So this is how you can add the booking to your site, which you have received at the hotel.
And this is how you can create a hotel booking website.
Now, if you’re ready to make your hotel booking website, you can click this link, and it will take you to MakeYourWP page, where you can launch your website and start building your hotel booking website.
Now that you know how to create a hotel booking website, the next thing you want is to drive more traffic to your hotel website, which is why you’re here, right?
Not everyone who visits your website will be interested in booking, or they might be interested but still browsing around for information. Remember that not all traffic has the potential for bookings, so your priority must be attracting the right traffic to your website – not just any traffic.
Right now, you want to know some strategies you can use to get more traffic to your hotel website! We will break it down into the following, so without further ado, here you go.
Once visitors are on your website, give them compelling reasons to book directly with you. Mention the kind of perks they are entitled to if they make bookings with you. For example – ‘Book with us & get 20% off on your food and beverage bill’, ‘Book with us directly to avail an easy room upgrade facility’ etc. Travellers do consider such offers and perks important before they make a booking.
If your hotel website is visually attractive, easy to navigate and above all, user-friendly, you are in for a ride. But, most importantly, your hotel website should be mobile responsive and load quickly because bookings that come from mobile devices are at an all-time high right now.
Having your hotel business on Google My Business service can get you featured on Google Search, Google Maps, and Google Plus giving you more visibility. Among its other benefits, having a listing on Google My Business lets you add videos, photos, phone numbers, prices, reviews and GPS coordinates along with a link to your website for free. In short, you can display any info you need, and you must keep the information updated, accurate as your business evolves for better visibility in Google and the local market.
With YouTube being the Internet’s second most popular search engine, create and upload some fun, informative videos of your hotel and facilities, your staff, and any nearby local attractions visitors might enjoy? Label your videos with clear, search-worthy titles that attract visitors and link them up on your website.
Connect your social media accounts with your website and keep them active with engaging content and special promotions. Before booking their holiday stay, people often explore social media, so make sure you have a presence there. Keep the social channels active with engaging content and special promotions.
Your goal is to convert digital visits to real ones, this is where offline promotions help you. Make sure to place your website address on customer invoices, receipts, and any other promotional material you hand out, such as web-redeemable coupons and other special offers. It gives your customers a chance to sign up for email alerts, and you can connect with them with any offers in the future.
When your visitors land on your website, grab their attention with an engaging page that captures their senses. The content you offer can be interesting, right from a guide to local tourist attractions to virtual tours, mesmerising photo galleries, videos and beyond, thus attracting many visitors and strengthening your performance on search engines—a win-win for all.
Most travellers read hotel reviews and consider them essential before making the final decision. Having good reviews can influence a traveller’s booking decision in a big way which is why you can go a step further than just collecting reviews. Follow up on reviews and respond to them, especially the bad ones, as you project the brand that cares for guests, thus fetching you brownie points.
Indulge in your imagination! Think out of the box, and you are more likely to find success with your hotel. An attractive, accessible and user-friendly website can give your hotel an edge over the competition and help convert visitors into paying customers by getting them to stay on your website and eventually book a room.
With its in-built themes, plugins and features that you need, MakeYourWP can be your preferred website template for building your dream website. Just select the template you want, purchase, customise, and you are ready to go.
If you have any questions about starting a hotel booking website with MakeYourWP or any other queries?
Feel free to discuss them in the comments section below!